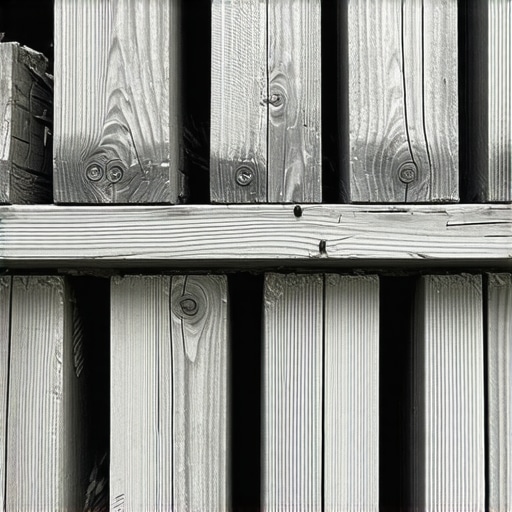
I remember the first time I stepped onto a deck that creaked ominously under my weight, and I quickly noticed the telltale sign—delaminated, rotted tops of the joists peeking out beneath the planks. That moment was a lightbulb for me: most deck joists rot at the tops first, often catching homeowners and even experienced DIYers off guard. It’s a sneaky problem that can compromise your entire outdoor space and turn a beautiful summer evening into a costly repair project.
The Hidden Culprit Behind Deck Joist Decay
After years of building and inspecting decks, I’ve realized that many folks don’t fully grasp why joists tend to rot at the top, right where they connect with the ledger board or are exposed to the elements. Simply put, it’s all about moisture management. When water lingers or seeps into vulnerable spots—especially at the deck’s overhangs or where flashing has failed—the tops of the joists become soaking wet, fostering the perfect environment for rot.
Early in my career, I made a mistake I often see others repeat: installing ledger boards without proper flashing or sealing. That mistake allowed water to seep behind the ledger, pooling at the top of the joists. The result? Decades-old decks with rotten tops, even when the rest seemed solid. According to industry research, improper flashing is a leading cause of deck failure, with rot often initiating at the joist tops where water accumulates and breaks down the wood’s integrity (source).
Is This Natural Process or Carelessness?
Many people believe that regular weather exposure is the main issue. But it’s more about how water interacts with your deck’s design and maintenance. If water can’t drain or dry quickly, it will damage the wood from the top down. Recognizing this has empowered me to design and maintain decks that stand the test of time with less rot and more enjoyment.
So, have you noticed your deck’s joists showing signs of rot at the top? Or maybe you’re worried about your deck’s longevity? If so, don’t worry—this is a common challenge, and there are practical steps to prevent it. In the upcoming sections, I’ll share proven strategies to protect your joists and extend your deck’s lifespan.
Seal and Flash Every Connection to Keep Water Out
In my first big deck project, I neglected proper flashing around the ledger board, which led to water seeping behind and rotting the joist tops. To prevent this, start by installing high-quality metal flashing, overlaying the ledger to direct water away from the wood. Use a continuous bead of waterproof sealant along the ledger’s top edge, then secure the flashing tightly. Pay special attention to corners and seams, ensuring no gaps remain. This creates a barrier that prevents water accumulation, similar to how your roof shingles work to shed water efficiently. For detailed guidance, check out this guide on designing safe stairs that highlights flashing techniques.
Elevate Your Joists with Proper Framing and Ventilation
Once I realized that air circulation is crucial, I elevated the joists off the deck ledger using spacers. This creates a small gap that allows moisture to evaporate, much like a sneaker allowing your feet to breathe. Installing a continuous rim joist, reinforced with galvanized brackets, adds stability and prevents water pooling. Using pressure-treated or rot-resistant lumber for joists further extends their lifespan. Remember, a well-ventilated frame reduces stagnation, significantly combating rot. To see how modern framing enhances durability, visit top-stairs design ideas for inspiration.
Manage Water with Smart Drainage and Slope
Sure, decks face weather, but a flat deck collects water like a bowl instead of draining it. When I built my latest deck, I intentionally sloped the decking at least 1/8 inch per foot away from the house using shims and adjustable post bases. This ensured water flowed to the edges, preventing pooling on joist tops, much like a driveway directing rain away. Adding gaps between boards (around 1/4 inch) allows water to escape freely. Additionally, installing under-deck drainage systems, such as a sloped surface with hidden gutters, keeps moisture away from the joists. Check out this guide on drainage systems for more details.
Choose the Right Materials to Fight Decay
I swapped pressure-treated lumber for rot-resistant options like cedar and composite materials when building new joists. For example, using capped composite boards with a mineral core significantly reduces moisture absorption, akin to how raincoats keep water out. When selecting lumber, look for grades labeled for rot resistance, and always seal cut ends with a waterproof sealant to slow absorption. Regularly inspect and reapply sealant annually, especially after winter storms. For insights into modern material choices, explore this guide on composite decking trends.
Implement Routine Maintenance and Inspection
Once my deck was built, I scheduled seasonal inspections to catch early signs of rot or water intrusion. I focused on areas around joist ends and where flashing met wood, applying sealant or replacing damaged parts promptly. Using a screwdriver or a moisture meter helps identify soft spots or dampness early—much like a dentist detects cavities before they worsen. Keeping the deck surface clean and free of debris reduces trapped moisture. This proactive approach extends the life of your joists and keeps your outdoor space safe. For practical maintenance tips, see this article on stair stringer maintenance.While many assume that installing a deck is straightforward, the nuances involved in outdoor living design often get overlooked by even seasoned DIYers. One prevalent misconception is that choosing the most visually appealing composite decking guarantees durability. However, not all composites are created equal—factors like mineral cores and manufacturing processes significantly influence their lifespan and resistance to fading or staining. For an informed choice, explore this comprehensive guide on modern composite trends.
Another common mistake involves neglecting proper ventilation beneath the deck. Many think that simply elevating the structure suffices, but without ensuring airflow, moisture accumulates, accelerating rot of joists and ledger boards. Incorporating intentional gaps and vented skirting can mitigate these issues, aligning with best practices discussed in latest outdoor living innovations.
What’s the pitfall of relying solely on conventional deck fasteners?
Using standard nails or hidden fasteners without considering material compatibility or seasonal temperature variations can lead to loosened or popped boards over time. Polymeric fasteners are more dimensionally stable, decreasing squeaks and maintenance. This oversight is a small detail with big consequences, emphasizing the importance of expert guidance during installation. Check out this article on long-lasting deck construction for more insights.
A further misconception relates to deck stairs. Many builders underestimate the significance of exact riser heights, which can cause safety hazards and comfort issues. Advanced builders understand that perfecting the stair rise is crucial—not just for aesthetics but for user safety and code compliance. For detailed design tips, see this guide to safe and stylish stairs.
Lastly, the idea that all outdoor lighting is purely decorative is a mistake. Thoughtfully integrated lighting enhances safety, extends usability, and adds ambiance—especially along stairs and pathways. LED options with adjustable brightness and color temperature ensure functionality without glare. To learn more about effective outdoor lighting, explore tips on stair lighting.
Maintaining a durable outdoor deck requires more than just good building practices; it hinges on the right tools and a consistent maintenance routine. Over the years, I’ve refined my toolkit to include some specialized equipment that makes inspection, maintenance, and scaling projects significantly more efficient.
Investing in Quality Inspection Tools
My go-to device is a digital moisture meter, specifically the
Using Proper Cleaning and Coating Tools
When it’s time for maintenance, I rely on a powered pressure washer with adjustable pressure settings to clean deck surfaces and exposed joists. I set the pressure below 1500 PSI and always use a wide spray tip to prevent surface damage. After cleaning, I apply high-quality sealants with a professional-grade brush or sprayer like the
Smart Planning for Future Scaling and Upgrades
As outdoor living spaces grow, scalability becomes critical. I recommend tools like the
How do I maintain my deck over time?
Regular inspections paired with moisture readings enable early intervention. Reapplying sealants every 2-3 years and replacing any compromised flashing or joists prevent extensive rot. Keep a maintenance schedule using a dedicated app or planner, noting areas that need attention after severe weather events or seasonal changes. For instance, revisiting critical points like flashed ledger boards ensures water isn’t seeping behind and causing unseen damage.
Looking ahead, trends like smart sensors embedded into wood or composite structures may revolutionize long-term monitoring, providing real-time alerts for moisture accumulation or temperature anomalies. Embracing these innovations could be the key to even better maintenance strategies in the future.
Try integrating a moisture meter check into your routine—it’s a game-changer for catching issues early. Want personalized guidance on your deck project? Contact me today to discuss tailored solutions that will keep your outdoor space performing flawlessly for years to come.
What the Toughest Lessons Taught Me About Deck Durability
One of the deepest insights I’ve gained is that skipping proper flashing and ventilation isn’t just a small mistake—it can lead to hidden rot that destroys your deck faster than you think. I learned the hard way that water management isn’t an optional detail; it’s the backbone of a lasting outdoor space. Taking the time to understand moisture pathways has saved me countless repairs and headaches.
Another revelation was the importance of choosing materials that fight decay—standard pressure-treated wood might be cheaper upfront but often costs more in the long run if not sealed and maintained regularly. From experience, investing in rot-resistant options and sealing cut ends thoroughly significantly extends the life of your deck joists, especially in humid climates.
Plus, routine inspections and early intervention are your best allies. Moisture meters and thermal cameras are game-changers—they reveal problems lurking beneath the surface before they turn into costly replacements. Building with awareness and proactive care transforms a simple structure into a resilient, beautiful outdoor extension of your home.