Have you ever stepped onto a deck and felt that unsettling bounce under your feet? I remember my first big outdoor project — I was so excited to finally enjoy the space I had envisioned, only to be greeted by a deck that felt less stable and more like a trampoline. That unexpected bounce was a lightbulb moment for me: I had overlooked a crucial rule that could make or break the longevity and comfort of my outdoor living area.
Why the 12-Inch Joist Rule Matters for Your Composite Deck
Turns out, there’s a simple yet powerful guideline — the 12-inch joist spacing — that can save you from future headaches. When joists are spaced more than 12 inches apart, your composite decking can start to bounce, creak, or even develop cracks over time. It’s a common mistake I made early on, thinking that less support would cut costs and time, but it only led to costly fixes later.
Is the 12-Inch Rule Overhyped or Actually Critical?
Many DIYers and even some professionals underestimate how important proper joist spacing is. I used to think that as long as the boards looked straight, I was good. Wrong. I learned that inadequate support not only compromises comfort but also shortens the lifespan of composite decking, which is designed to be low-maintenance — not low-support. According to experts, sticking to the 12-inch maximum spacing ensures a solid, stable surface that can handle foot traffic and outdoor elements without deteriorating prematurely.
If you’ve been grappling with a deck that feels too lively or you’re worried about future issues, you’re not alone. I’ve been there, and it’s not just about comfort; it’s about your safety and investment. Want to know how to get this right from the start? Let’s dive into the practical guidelines that will keep your deck firm and reliable for years to come. And if you’re curious about integrating stylish stairs or enhancing your outdoor space, check out top stairs designs for modern outdoor spaces to elevate your project.
Set Your Foundation with Precise Joist Spacing
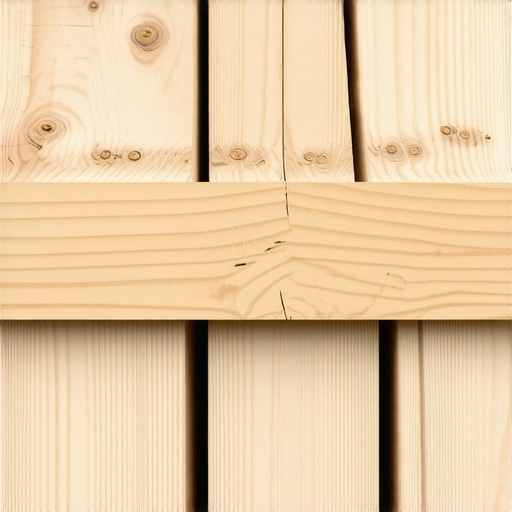
Imagine building a house with uneven pillars — it will wobble and weaken over time. The same applies to your deck; starting with correct joist spacing ensures stability. I once laid out joists 16 inches apart, thinking it would save material, but I soon noticed bounce and creaking under foot. That experience taught me the importance of adhering strictly to the 12-inch maximum support rule for composite decking.
Select the Right Ledger Board and Attachments
Begin by installing the ledger securely to your house, ensuring it’s perfectly level using a spirit level. Use corrosion-resistant bolts and heavy-duty flashing to prevent water intrusion. Proper attachment stabilizes the deck’s perimeter, much like anchoring the sides of a boat prevents it from rocking. I re-did my ledger work after learning this, which eliminated any wobble in my deck’s edge and improved safety.
Construct the Frame with Accuracy and Care
Next, build the frame with carefully spaced joists. Measure and mark every 12 inches from the ledger, snapping chalk lines for precision. Use a high-quality framing square to confirm right angles at corners, avoiding skewed alignment. When attaching joists, secure each with galvanized metal clips and fasteners designed for composite decking. My first attempt had a few misaligned joists, leading to uneven board installation. Replacing those sections ensured a flat surface and prevented future sagging.
Install the Joists with Proper Support and Fasteners
Attach each joist to the ledger and beams with heavy-duty screws and brackets. Consider bridging or blocking between joists at mid-span to distribute weight evenly, preventing bounce. I learned this the hard way when my deck’s center felt springy during gatherings. Adding bridging with pressure-treated wood blocks solidified the structure and thwarted any bouncing sensations, extending the lifespan of my decking.
Use Quality Materials for Longevity
Opt for mineral core composites or capped polymer decking recommended for outdoor resilience. Their low-expansion properties make adhering to support spacing more forgiving. I opted for mineral core boards, which didn’t warp or expand despite temperature swings. This decision kept my deck looking pristine and feeling firm, even after years of use.
Plan for Drainage and Ventilation for Better Durability
Ensure proper drainage by elevating the frame slightly above ground level and including gaps for water runoff. Ventilation beneath the deck prevents moisture buildup, which can cause rot and compromise joist support. I added space between the ground and the beams, which allowed rainwater to drain freely. This simple step safeguarded my investment and kept the structure dry underneath.
When it comes to outdoor living, many assume that following standard guidelines suffices, but the truth is, small nuances can drastically impact longevity and safety. One common misconception is that uniform spacing and generic materials are always optimal. In reality, choosing the right fasteners and understanding thermal expansion — especially in composite decking — can prevent costly repairs down the line. For example, improper fastener selection can lead to squeaks or boards loosening over time; using corrosion-resistant screws mitigates this risk and maintains aesthetic appeal. Moreover, many overlook the significance of detailed drainage planning around stairs and deck corners. Water pooling can accelerate rot and compromise structural integrity, a mistake I encountered firsthand when neglecting proper slope during installation. Advanced builders consider the precise amount of clearance beneath stairs to promote airflow and prevent moisture buildup, which extends the lifespan of treated materials. Additionally, there’s a myth that composite decking requires no maintenance — but I advise cleaning and periodic inspection to avoid mold or color fading, especially in shaded areas. Recognizing these subtle details, from correct bolt pattern placement to thermal movement allowances, is what differentiates a good deck from a lasting masterpiece. For further insight into innovative outdoor living ideas, check out these modern designs. Equipped with this expertise, you can avoid typical pitfalls and create a safe, durable outdoor space. Remember, every project’s success hinges on mastering these hidden details, turning a basic deck into a beautiful, long-lasting oasis. Have you ever fallen into this trap? Let me know in the comments.
Keeping your deck, stairs, or outdoor living area in top shape requires the right tools and maintenance techniques. As a DIY enthusiast or professional builder, I rely on specific equipment to ensure precision, safety, and longevity. One staple in my toolkit is a high-quality digital torque wrench — I use the Apex Digital Torque Wrench because it provides exact fastener tightening, which prevents overdriving screws and damaging composite boards. Precision matters, especially when securing joists or fastening deck boards, as inconsistent tension can lead to squeaks or early wear. For measuring and layout, I swear by my Bosch Cross Line Laser Level. It helps me achieve perfect alignment of joists and railings, saving time and reducing errors. Accurate measurements are crucial when spacing supports or planning drainage slopes, and this tool ensures every line is straight and level, even on uneven ground.
When it comes to cleaning and maintaining decks, I recommend a dedicated power washer like the Sun Joe SPX3000. It’s robust enough to remove dirt, mold, and stains from composite surfaces without damaging the material. Regular cleaning with a proper pressure setting extends the life of your decking, prevents mold buildup, and keeps it looking fresh. I also utilize a weather-resistant sealant applicator, like the Valspar Sealant Sprayer, which allows me to apply protective coatings evenly over large surfaces, saving time and effort.
Equipment isn’t enough; knowing the right methods makes all the difference. For instance, I always check the thermal expansion of composite decking materials using a digital infrared thermometer. Keeping track of temperature-related movement helps me plan expansion gaps accurately, avoiding buckling or warping. A recent study from this guide highlights how thermal movement can be managed with proper spacing and fastening techniques, ensuring your deck remains stable over years of temperature swings.
How do I maintain outdoor structures over time?
Regular inspections are vital. I schedule seasonal checks for loose fasteners, signs of rot, or water pooling around stairs and supports. A handy tool I use for this purpose is a Gardener’s Moisture Meter; it helps me assess moisture levels within joist areas, preventing rot before it manifests visibly. Additionally, I perform detailed drainage inspections by verifying that slopes and gutters direct water away efficiently; skipping this step often leads to compromised supports and early deterioration.
Looking ahead, technology will probably introduce smart sensors that monitor structural health in real time. Imagine a deck with embedded sensors detecting movement, moisture, or temperature changes, alerting you before problems escalate. While we’re not there yet, incorporating current tools like laser levels and moisture meters already elevates maintenance routines significantly. I encourage you to try using a moisture meter on your deck’s hidden supports as a hands-on first step — it’s an eye-opening experience that can save you costly repairs down the line.
If you’re serious about making your outdoor living space last, investing in precise tools and adopting consistent maintenance routines are non-negotiables. For advanced tips on reinforcing stairs or expanding your deck, check out these design ideas. Give one of these tools a try today and take the first step toward a truly durable and enjoyable outdoor area!
My Secret to Avoiding Common Deck Mistakes
Over years of building and renovating decks, I realized the biggest lesson isn’t just about the materials or techniques but understanding the nuances that determine longevity. One lightbulb moment was discovering that every small detail—from joist spacing to drainage slope—serves as a building block for a durable, safe outdoor retreat. Missing even one can lead to bouncing stairs or premature wear, which costs time and money. Trust me, paying attention to these hidden factors is what transforms a functional deck into a masterpiece that stands the test of time.
What the Experts Won’t Tell You About Outdoor Living
Many seasoned builders keep certain tips close to their chest, but I’ve learned that the real magic lies in precision and foresight. For example, choosing mineral core boards over standard composites can greatly reduce expansion issues, especially in fluctuating climates. Also, incorporating proper drainage beneath your deck isn’t just optional—it’s vital. I once ignored this step in a rush, only to face mold and rot afterward. Now, I swear by detailed drainage planning—every gutter, slope, and gap matters. These insights, often overlooked, are what elevate your outdoor project from average to extraordinary. For innovative ideas and expert designs, check out these modern outdoor living strategies.
Building Confidence for Your Next Outdoor Project
Taking on a deck or stairs project can seem daunting at first, but with the right mindset and tools, it’s incredibly rewarding. My journey taught me that detailed planning, proper material selection, and paying attention to support and drainage details are the keys to success. I encourage you to start small—measure twice, plan meticulously, and don’t rush the foundation. Remember, every great outdoor space begins with a single focused step. Ready to build something lasting? Dive into resources like stair and transition tips to kickstart your project with confidence. You’ve got this—your perfect outdoor oasis is within reach!