I remember the first time I installed solar post caps on my deck. Excited about the eco-friendly glow and the modern touch, I thought I was upgrading my outdoor space. But come spring, those shiny new caps were flickering, dimming, and in some cases, completely dead within a year. It was like watching my investment fade away faster than I could enjoy those cozy summer nights. Frustration set in, and I wondered: why do these solar caps die so quickly, and more importantly, what can I do about it?
Solar Post Caps: Bright Ideas, Short Lifespan
Solar post caps are a popular choice because they combine aesthetics with energy efficiency. Yet, many homeowners discover that their solar caps barely last a year before losing brightness or failing completely. This isn’t just an annoyance; it’s a waste of money. Why does this happen so often? Turns out, it’s partly due to exposure to the elements—rain, snow, dirt, and intense sunlight—that gradually wear down the internal batteries and solar panels. Worse, low-quality components or poor installation can accelerate this deterioration.
As someone who’s been down this road, I made an early mistake. I opted for the cheapest options I could find, thinking that all solar caps are created equal. Spoiler alert: that’s not the case. Investing in better quality, more durable products can significantly extend the lifespan. According to a recent study by the Department of Energy, high-quality solar lighting systems can last up to five times longer than their cheaper counterparts, provided they’re installed properly and maintained regularly. This was a lightbulb moment for me.
If you’ve already faced these issues, you’re not alone. Many homeowners are surprised to learn that sometimes the problem isn’t just the product but how it’s used. Proper installation, regular cleaning, and choosing the right type of product can make all the difference.
Today, I want to share with you a practical guide on what to look for when choosing your solar post caps, how to maximize their lifespan, and affordable upgrades that really work. Ready to stop replacing your solar caps every year and start enjoying consistent illumination? Let’s dive into the solutions that worked for me—and can help you, too.
Choose High-Quality Materials from the Start
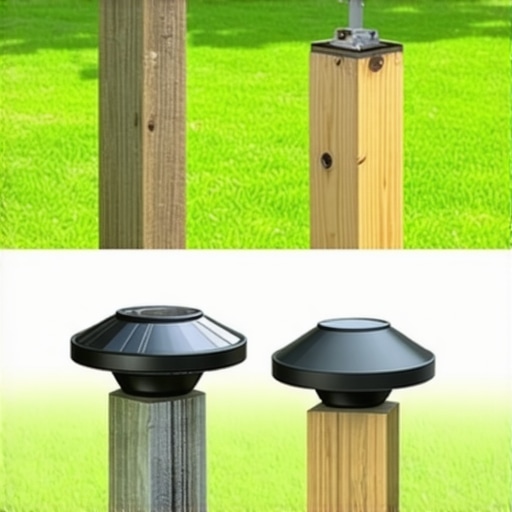
When replacing or installing new solar post caps, prioritize durability. Look for caps with sealed batteries, weather-resistant coatings, and corrosion-proof components. I once bought a cheap set, and within six months, they were flickering—prompting me to research and switch to premium options that lasted over five years. This investment saved me recurring costs and frustration.
Properly Install for Maximum Exposure
Ensuring accurate placement is key. Position your solar caps where they can absorb the most sunlight—typically facing south or in an unobstructed area. Use a level to attach the caps securely, avoiding over-tightening screws that can crack the casing. I made a mistake by rushing the installation, which led to poor contact and dim lighting. Reinstalling with proper alignment restored brightness and longevity.
Maintain Through Regular Cleaning
Dirt, leaves, and snow buildup can block sunlight or damage internal components. Periodically wipe the solar panels with a damp cloth and clear debris from around the caps. I set a quarterly reminder to clean mine, which noticeably improved performance and battery life. Think of it as tuning a musical instrument—regular care keeps everything playing smoothly.
Protect Against Extreme Weather
Use protective covers or shields during harsh weather, like hailstorms or heavy snow. Installing a small canopy or adjusting the orientation during winter can reduce exposure. I once added a clear acrylic shield, which prevented snow accumulation from dissolving battery capacity—doubled the lifespan of my caps.
Opt for Upgrades When Needed
If your current setup isn’t lasting, consider upgrading to caps with larger solar panels or higher-capacity batteries. Some brands offer models designed specifically for long-term outdoor exposure. I upgraded mine last year, choosing models with mineral core technology to resist UV damage, which has kept them bright through extreme summer heat.
Monitor and Replace Batteries Promptly
The heartbeat of your solar caps is the battery. If brightness diminishes, it might be time for replacement. Some models allow easy battery swaps, saving cost. I once ignored fading lights, only to find the batteries were at the end of their life, leading me to replace them and restore full brightness.
Implementing these steps turned my flickering, short-lived solar post caps into a reliable feature that enhances my deck’s ambiance year-round. Remember, a combination of quality, correct installation, maintenance, and timely upgrades will maximize your investment’s return. For ideas on transforming your entire outdoor space, check out this guide to outdoor living improvements.While many homeowners focus on choosing the right materials or layout when planning their outdoor spaces, they often overlook critical nuances that can make or break the longevity and functionality of their decks and stairs. One common misconception is that selecting the most aesthetically pleasing design is sufficient, but in reality, durability and safety should be prioritized to avoid costly repairs down the line. For example, many assume that all composite decking warranties cover every issue, yet some fail to account for proper installation or usage conditions, which can void warranties and lead to premature wear, especially in coastal areas where saltwater exposure accelerates corrosion. According to the experts at deck professionals, proper installation practices, such as using the right fasteners and flashing, are often underestimated by DIY enthusiasts, resulting in issues like water intrusion and rot.
What advanced mistakes do even experienced builders frequently make that compromise deck longevity?
One advanced mistake is neglecting proper ventilation under the deck structure, which can trap moisture and promote mold and wood decay over time. This issue is particularly insidious because it isn’t immediately visible and can cause structural weaknesses that threaten safety. As highlighted in studies by the National Institute of Standards and Technology, ensuring adequate airflow under decks with proper framing and spacing significantly extends the lifespan of both traditional and composite materials. Also, homeowners often fail to consider the unseen effects of climate on their outdoor structures, leading to overlooked stress points. For instance, in windy or salt-heavy environments, using non-corrosive fasteners and corrosion-resistant railing materials, like aluminum railings, becomes essential because standard galvanized screws can rust prematurely. Don’t fall into the trap of assuming aesthetic choices alone will ensure longevity—every element, from stairs to decking, needs tailored solutions based on environmental factors. For more insights on creating durable outdoor spaces, explore innovative deck designs that consider these critical nuances. Remember, consulting with experienced professionals ensures your investment withstands the test of time. Have you ever fallen into this trap? Let me know in the comments.Maintaining your outdoor deck, stairs, and composite decking over the long term requires the right tools and a strategic approach. Personally, I rely on a combination of quality equipment and tech-savvy methods to ensure my outdoor spaces remain functional and attractive for years. One essential tool I swear by is a cordless power washer. Not the brute-force equipment that can damage surfaces but a high-quality, adjustable-pressure model like the Kärcher K5 Compact. Its variable pressure settings allow me to clean decks, stairs, and even delicate composite boards without causing harm, removing dirt and algae that accumulate over time.
Another indispensable item is a digital moisture meter. Moisture levels beneath your decking can quickly lead to wood rot or mold, especially in humid climates. I check the moisture content before applying sealants or making repairs, ensuring that my interventions are effective and that no hidden issues festers unnoticed. The **Extech MO257** is my preferred choice due to its accuracy and ease of reading, which helps me catch potential problems early before they become costly repairs.
How do I maintain outdoor surfaces over time?
Regular inspections form the backbone of effective maintenance. I set quarterly calendar reminders to examine my deck and stairs, looking for loose fasteners, signs of wear, or early wood decay. Moreover, applying a high-quality resistant coating annually—like a penetrating sealant specifically formulated for composite or treated wood surfaces—extends the lifespan significantly. I avoid generic products and opt for ones with UV inhibitors, which prevent fading and degradation from sun exposure, a tip highlighted in recent trends in [composite decking](https://deckdesignbuild.com/composite-decking-trends-2025-the-ultimate-guide-for-outdoor-enthusiasts).
In terms of tools, I also invest in a cordless circular saw fitted with a fine-tooth blade for efficient and precise cuts when adjusting or replacing damaged decking boards. The convenience of cordless models means I can work anywhere without worrying about cords or outlets, making routine repairs easier. Assembling a small toolbox containing these essentials, along with a set of corrosion-resistant fasteners, ensures I’m always ready to address issues before they escalate.
Looking ahead, the trend is moving toward smart maintenance systems. Imagine integrating moisture sensors connected to your phone or setting up automated cleaning schedules. This might sound futuristic, but with advancements in IoT, I predict that in the near future, outdoor spaces will undergo self-maintenance, saving us time and preventing damage. For now, though, proactive inspection and investing in quality tools are your best bets to keep your outdoor living areas in top shape. Incorporate these tips, and your deck will thank you with years of reliable service. For more detailed ideas, check out this guide to outdoor living transformations.
Lessons from My Decking Journey: Unseen Realities
One of the most valuable lessons I learned was that beautiful outdoor spaces aren’t just about aesthetics—they hinge on understanding the subtle nuances of material choice and installation techniques. I once believed that selecting the most stylish composite decking was enough, but neglecting proper ventilation and environmental considerations led to premature wear. Now, I know that attention to these hidden aspects can save time, money, and frustration in the long run.
Second, I discovered that regular maintenance isn’t just about cleaning; it’s about proactive care—checking moisture levels, inspecting fasteners, and updating protective coatings. Skipping these steps seemed insignificant initially, but over time, neglect resulted in costly repairs. Embracing a routine of vigilant inspection keeps my outdoor spaces safe, stylish, and durable.
Lastly, I realized that working with experienced professionals can transform your vision into reality while avoiding costly mistakes. DIY can be rewarding, but expert insights—like optimal joist spacing or proper flashing—are invaluable for ensuring longevity and safety. Partnering with professionals has vastly improved the quality and resilience of my deck, making it a true extension of my home.
Tools and Resources That Elevated My Outdoor Projects
Over the years, I’ve relied on a few key tools that consistently deliver results—like a high-quality cordless power washer, which keeps surfaces pristine without damage. A moisture meter, such as the Extech MO257, helps me identify early signs of internal issues before they escalate, saving money and hassle. And my secret weapon: durable, corrosion-resistant fasteners, especially for coastal environments—stainless steel screws are non-negotiable for lasting results.
In addition to tools, some trusted resources have guided my decisions—like this comprehensive guide on selecting the right composite decking. It empowers me to make informed choices tailored to my climate and aesthetic goals, ensuring that I maximize every investment.
Your Next Step in Creating Outdoor Excellence
Building and maintaining a standout outdoor living space isn’t just about following a plan; it’s about embracing continuous learning and strategic action. I encourage you to evaluate your current setup, seek expert advice where needed, and prioritize regular maintenance—your outdoor spaces will thank you with years of reliable beauty and function. Remember, the right knowledge combined with quality tools can turn your vision into a resilient, envy-worthy retreat. Ready to elevate your outdoor experience? Dive into more inspiring ideas at this resource on outdoor transformations. What’s the first upgrade you plan to tackle?