I remember the first time I tried to cut composite decking, eager to tackle a small project around my backyard. I was excited but quickly ran into a frustrating problem—my cuts kept looking terrible, with edges melting, burn marks, and a dull, uneven finish. It was a lightbulb moment for me; I realized I was doing it all wrong. That day, I promised myself I wouldn’t settle for messy edges or damaged boards. Over time, I discovered some effective techniques that transformed my approach, and today, I want to share those insights with you.
The Key to Clean, Meltdown-Free Cuts in Composite Boards
Composite decking has become a popular choice for outdoor projects because of its low maintenance and durability. But cutting these materials can be tricky—if not done properly, you risk damaging the boards or creating unsightly edges that ruin the overall look. Many beginners and even seasoned DIYers fall into the trap of using the wrong tools or settings, leading to melted edges and burned streaks.
The challenge is understanding how to cut composite materials without causing heat buildup that melts or scorches the surface. It turns out that the technique and equipment you choose play a crucial role. Using a standard saw blade designed for wood often results in excessive friction and heat, which in turn causes the edges to melt. The solution lies in selecting the right blade, adjusting your saw’s settings, and employing proper cutting methods.
But before we get into the nuts and bolts, I want to ask—have you ever cut a composite board only to be disappointed by the damaged, melted edges? If so, you’re not alone. I’ve been there too, and I know how discouraging it can be. Fortunately, with a few simple adjustments, you can achieve clean, smooth cuts that look professional and last for years.
Recent studies have shown that using diamond-tipped or carbide-tipped blades can significantly reduce heat transfer during cutting, leading to cleaner edges and longer blade life (Source: Composite Decking Trends 2025). This is just one of the game-changing tips I’ll be sharing.
Now, let’s move from the problem to the practical solutions that will help you cut composite boards confidently and beautifully. Whether you’re working on a small DIY project or a larger outdoor space, mastering this skill will save you time, money, and headaches—plus, your project will look way better.
Choose the Right Blade for Clean Cuts
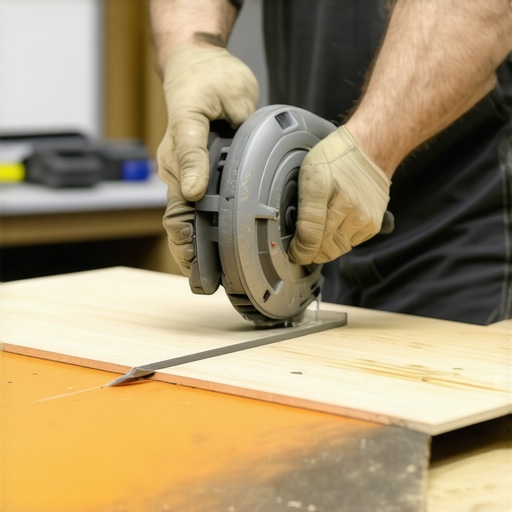
In my early projects, I used a standard woodworking blade, which resulted in melted edges and burnt spots. A turning point came when I switched to a diamond-tipped blade designed specifically for composite materials. This type of blade reduces heat buildup, allowing for smooth, clean cuts without charring the surface. When selecting a blade, look for those labeled for composite or plastic, and ensure it has carbide-tipped teeth for durability and precision.
Adjust Your Saw Properly
Using the right blade isn’t enough; you must also adjust your saw correctly. Set the blade depth just slightly deeper than the thickness of the board to prevent unnecessary friction. If you’re using a circular saw, lock the bevel to 0°, avoiding any tilt that could cause uneven cuts or binding. A mid-range rotary saw might be more controlled than a high-speed table saw for delicate composite cuts. I remember once cutting a long deck board with an improperly set blade—resulting in scorching and an unusable edge. After adjusting the blade depth and speed, my cuts became smooth and flawless.
Employ Proper Cutting Techniques
Slow, steady, and controlled passes are vital. Don’t rush through the cut; applying too much pressure generates heat, leading to melting. Think of it like slicing bread: gentle force ensures a clean cut without crushing the loaf. For longer cuts, stabilizing the board on sawhorses or a sturdy work surface keeps it from vibrating or splintering. I once tried to cut a curved section freehand, resulting in jagged edges. Securing your workpiece and moving your saw steadily makes the difference between a rough edge and a professional finish.
Use Guide Accessories for Precision
Guides and straightedges help maintain a consistent cut line. Clamp a straight, sturdy guide along your cut mark and run your saw along it. This minimizes wobble and ensures true edges, especially important for stair stringers or deck border trims. I learned this the hard way when trying to cut a series of identical boards; by using a clamped guide, all my pieces matched perfectly, giving a seamless look to the deck.

Investing in quality tools and mastering these techniques saves time and materials in the long run, resulting in a deck that’s not only sturdy but visually appealing. For more tips on professional deck projects, check out creating seamless stairs and outdoor transitions.
While many enthusiasts focus on selecting the right materials or design aesthetics for outdoor spaces, a less obvious yet critical aspect is understanding the nuanced pitfalls that can derail your project. Contrary to popular belief, just choosing high-quality composite decking or installing stylish stairs doesn’t guarantee longevity or safety. One common myth is that standard construction practices suffice for outdoor environments, but weather exposure demands specialized techniques.
A significant ‘oops’ many overlook is neglecting proper drainage and ventilation under decks, which can cause premature material degradation, even with premium composites. For example, improper slope grading or missed flashing details often lead to water pooling or rot, issues that are surprisingly costly to repair later. This is why consulting a professional deck builder can save you from these costly errors—see how they can transform your space through expert advice.
What advanced considerations should I think about when designing stairs for uneven terrain?
Deeply understanding terrain irregularities and their impact on stair design is essential. Advanced techniques involve precise ground measurement, modular framing adjustments, and incorporating adjustable supports to ensure safety and comfort. Incorporating features like wind-resistant balustrades or slip-proof treads further enhances durability and usability. Studies indicate that these nuanced design choices significantly extend the lifespan of your outdoor structures, especially in harsh climates (Source: Composite Decking Trends 2025).
Beware of the trap of over-relying on DIY solutions for complex integrations like curved stairs or multi-level platforms; these require precise calculations and professional finesse. Failing to recognize the importance of proper load distribution or load bearing capacity can result in structural failure over time. Therefore, partnering with experienced builders not only ensures safety but also optimizes aesthetics. You can explore more about the benefits of working with experts in this article.
Ultimately, mastering the intricacies of outdoor living design involves avoiding assumptions and understanding that small details—like junction points, material overlaps, and site-specific adjustments—hold the key to a durable, beautiful space. So, have you ever fallen into this trap? Let me know in the comments.
Keep Your Outdoor Spaces Functioning Smoothly with the Right Tools
Creating a durable and beautiful deck, stairs, or outdoor feature isn’t a one-and-done task; it requires consistent maintenance and using the proper tools. Over the years, I’ve refined my toolkit to ensure longevity and performance in every project. One of my most trusted tools is the Festool Kapex Slider Saw. Its precise cuts and integrated dust collection system help me execute clean, professional joins without the hassle of cleanup. I rely on this saw for framing stairs and cutting composite boards, especially because accuracy reduces the risk of future issues like warping or loosening.
Another indispensable item is a quality cordless impact driver, such as the DeWalt DCF887. Its power ensures that decking screws and fasteners are driven flush without over-torquing, which can damage composite materials. The portability allows me to work efficiently on elevated decks and stairs, where access is tricky.
Future Trends: Smarter, Safer, and More Automated Tools
Looking ahead, I predict the increased adoption of cordless battery tools with integrated smart features—like torque feedback and adaptive speed controls—to improve precision. Additionally, tools equipped with Bluetooth connectivity might offer real-time diagnostics, preventing damage during cutting or fastening. Investing in adaptable and tech-enabled tools ensures that your outdoor projects remain resilient and aesthetically appealing for decades.
How do I maintain my tools to keep them performing over time?
Regular maintenance is key. I clean my saw blades and impact drivers after each use, removing debris and checking for wear. Lubricating moving parts and replacing worn blades prevents heat buildup and mechanical failure. For power tools, proper storage in a dry, dust-free environment extends their lifespan. I also make it a habit to periodically recalibrate my saws, ensuring cuts stay precise, which is vital when measuring for seamless stairs or custom composite decking. This routine upkeep saves me time and money while guaranteeing consistent results.
If you’re serious about ensuring your outdoor structures stand the test of time, consider investing in quality tools like those I’ve mentioned. With proper maintenance, they become reliable partners in your projects, reducing errors and increasing safety. For expert advice tailored to your specific needs, reach out to a professional deck builder, or check out these tips for transforming your outdoor space.
What I Wish I Knew When Starting Out in Outdoor Construction
One of the most eye-opening lessons I learned was the importance of patience over rushing through projects. Rushing led to mistakes like uneven cuts or overlooked drainage, which can compromise your deck’s longevity. Embracing meticulous preparation and precision has saved me time and money, and it’s a mindset I recommend to anyone serious about outdoor living craftsmanship.
Secondly, the myth that expensive tools automatically guarantee perfect results almost held me back. I realized that choosing the right blade and adjusting my existing equipment was far more impactful than just buying premium tools. Modifying and maintaining tools, like calibrating saws and selecting blades designed for composite materials, transformed my work quality.
Lastly, I underestimated the value of detailed planning, especially for stairs on uneven terrain. Incorporating advanced measurement techniques and professional-grade supports gave my projects a professional look and lasting stability. These lessons, shaped by trial, error, and a hunger to improve, are invaluable for anyone aiming to elevate their outdoor living projects beyond basic DIY efforts.
Tools and Resources That Elevated My Deck Building Game
My go-to blade for composite cuts is the diamond-tipped blade. It reduces heat buildup, preventing melting and providing cleaner edges—essential for a professional finish. For measuring and alignment, I rely on a high-quality laser level that ensures perfect stair riser alignment, saving countless headaches during installation.
The adjustable support jacks I use allow me to adapt to uneven ground with confidence, ensuring stability and safety. Additionally, I trust the professional-grade fasteners that resist corrosion and maintain their grip over decades, critical for outdoor durability.
All these tools have been game-changers, especially when combined with ongoing maintenance—like cleaning blades and calibrating saws—making my projects more efficient and enduring. To dive deeper into expertly curated methods, check out these professional tips.
Your Next Step Toward Outdoor Excellence
Building a stunning, durable outdoor space isn’t just a task—it’s an ongoing journey of learning and improvement. Embrace the lessons learned, invest in the right tools, and never hesitate to seek expert advice. Your backyard or deck can become a sanctuary that stands the test of time, all with a bit of patience and a lot of passion. Remember, every great outdoor space starts with taking that first confident step. If you’re ready to elevate your outdoor living, explore the resources and tips available to you—your dream deck awaits.