I remember the day clearly—standing in my backyard, staring up at my deck, feeling a twinge of frustration. After a heavy rain, water pooled under my deck’s frame, my eyes scanning for leaks and soggy spots. I realized I’d overlooked one crucial aspect of outdoor living: waterproofing the space beneath my deck. That lightbulb moment hit me hard—water intrusion wasn’t just an annoyance; it threatened my home’s foundation and my peace of mind.
Why Proper Waterproofing Under Your Elevated Deck Is a Game-Changer
Many homeowners don’t think twice about the space underneath their decks—until problems start to emerge. Water seepage can lead to wood rot, mold, and even structural damage if left unchecked. It’s not just about keeping the area dry; it’s about safeguarding your investment and ensuring the longevity of your outdoor oasis. I soon learned that a well-executed waterproofing system can prevent these headaches and create a clean, usable space all year round.
But where to start? I’ll share my journey—from mistakes made early on to proven solutions that stand the test of time. If you’re tired of dealing with soggy crawl spaces or muddy surrounds after storms, this post is for you. We’ll explore practical, cost-effective ways to keep water at bay, making your outdoor living area comfortable and durable.
Is Waterproofing Really Worth the Extra Effort and Cost?
I confess, I was initially skeptical. The idea of additional materials and effort seemed unnecessary. But skipping waterproofing was a costly mistake—I ended up replacing rotted joists and battling moldy issues. According to a study by the Home Innovation Research Labs, waterproofing can extend the life of a deck’s structure by decades and save homeowners thousands in repairs.
Start with a Solid Base: Preparing the Surface
First, remove any debris, dirt, or loose wood from beneath your deck using a pressure washer or stiff broom. Inspect for rotting wood or damage; replace compromised joists or framing before proceeding. Think of this as preparing a foundation for a house—without a clean, sturdy base, waterproofing won’t hold. I once skipped this step and ended up applying waterproofing over uneven mud, which caused peeling and failure within months.
Seal Gaps and Joints: Blocking Water Entry Points
Next, apply a high-quality, flexible sealant to all cracks, gaps, and joints in the ledger board, post sleeves, and around ledger-to-wall connections. Use expandable foam or silicone caulk designed for outdoor use. I remember sealing gaps around post sleeves with marine-grade silicone—initially messy, but it ensured no water seeped through during the rainy season, preventing costly rot.
Install a Proper Drainage System: Creating a Waterway
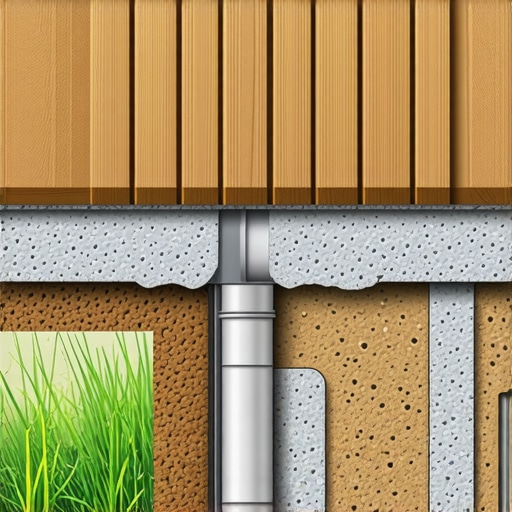
Imagine your deck’s underside as a boat hull—water needs an escape route. Install a waterproof membrane or under-deck drainage system, such as a sloped vapor barrier or gravel layer with a perforated pipe. When I added a slope with stacked sleepers under my deck, I directed water to a drain I installed at the low point, keeping the space dry and usable. Remember, without proper drainage, water pools, leading to long-term damage.
Apply Waterproof Membrane or Sealant: Creating a Protective Barrier
Choose a breathable, outdoor-rated waterproof membrane—like a liquid rubber coating or peel-and-stick membrane—and apply it over the prepared surface. Use a roller or brush for even coverage, focusing on seams and corners. I personally used a rubberized coating, carefully sealing all overlapping sections. This layer acts like a raincoat for your deck’s underside, blocking moisture ingress while allowing vapor to escape.
Add a Vapor Barrier: Preventing Moisture Build-Up
Attach a vapor barrier cloth or polyethylene sheeting beneath the joists, overlapping seams by several inches. Fasten everything securely with waterproof staples or clips. I taped seams with weatherproof tape, ensuring no gaps remain. Think of this as a raincoat lining—keeping internal moisture out, which prevents mold and wood decay.
Maintain and Inspect Regularly
After installation, schedule annual inspections to check for tears, cracks, or water intrusion signs. Reapply sealant or repair damaged areas immediately. I learned that a simple annual checkup saved me from expensive repairs later—much like a health checkup for your deck’s core. Regular maintenance prolongs the effectiveness of your waterproofing system.
Even seasoned DIYers often fall into common traps when upgrading their outdoor spaces. Contrary to popular belief, many assume that choosing the most affordable materials always leads to long-term savings, but in reality, opting for cheap composite decking or neglecting proper stair design can result in costly repairs and safety hazards later. For example, some forget that not all composite decking is created equal; inferior grades may warp or fade faster, undermining your investment. When planning your deck project, it’s vital to understand the nuances of material selection and installation techniques to avoid these pitfalls.
What sophisticated homeowners overlook about deck stair safety and design?
Advanced aficionados recognize that stair safety isn’t just about matching code; it’s about ergonomic comfort and seamless integration into your outdoor aesthetic. Small miscalculations in riser height or tread depth can cause trip hazards or feel uncomfortable during prolonged use. Moreover, improperly anchored stairs can wobble or settle unevenly over time, leading to structural concerns. Experts recommend paying attention to detailed specifications, such as consistent riser height—generally 7.75 to 8 inches—and sturdy anchoring methods, including proper ledger attachment. A study published in the Journal of Safety Research highlights that precise stair design significantly reduces fall risk and enhances accessibility. To ensure your stairs meet both safety standards and aesthetic goals, consider consulting a professional deck builder who understands these subtleties. Remember, the devil is in the details—skipping them can compromise your entire outdoor oasis. Curious how to incorporate these advanced techniques? Check out this guide on stylish and safe stairs. Have you ever fallen into this trap? Let me know in the comments.
Keeping It Working: Tools and Methods for Outdoor Excellence
When it comes to maintaining a durable and beautiful outdoor living area, having the right tools is half the battle won. I personally rely on a combination of high-quality equipment and proven methods that ensure my deck, stairs, and composite components remain in top shape for years to come. From cleaning to inspection and minor repairs, my toolkit is tailored to tackle each task efficiently.
One indispensable tool I keep handy is a cordless oscillating multi-tool. Its versatility allows me to sand, cut, and scrape in tight corners or delicate areas without damaging the surrounding material. I use this for detailed work when replacing loose fasteners or removing failed sealant, ensuring minimal disruption to the deck’s surface and structure.
.</p><h3>How do I maintain my outdoor living area long-term?</h3><p>The key lies in consistent, scheduled upkeep using the right tools and methods—such as annual inspections, targeted cleaning, and timely repairs. Embracing technology like moisture sensors and advanced sealants can elevate your maintenance game, ensuring your investment lasts as long as possible.</p><h2>How I Learned the Hard Way About Overlooking Details</h2><p>One of the biggest lessons I carry today is never to underestimate the importance of meticulous preparation—skipping steps like inspecting and repairing damaged wood can lead to costly failures down the line. I once thought a quick sealant application was enough, only to realize months later that moisture had seeped through unaddressed gaps, causing rot.</p><h2>Why Investing in Quality Materials Pays Off in Long-Term Durability</h2><p>Early on, I believed that cheaper sealants and membranes would do the job. Experience taught me otherwise. Choosing high-quality, breathable waterproofing membranes and sealants might seem more expensive initially, but they significantly extend your deck’s lifespan and save you from frequent repairs. Check out <a href=) this guide on choosing durable materials for insights.
this guide on choosing durable materials for insights.
The Power of a Pro-Level Drainage System
Installing a proper drainage system was a game-changer. Directing water away from your deck’s underside not only keeps the space clean and dry but also prevents hidden damage. My mistake was neglecting slope and drainage options, which led to standing water and mold. Consider integrating a weeping system or gravel layer—details for a long-lasting outdoor haven.
How Regular Maintenance Transformed My Outdoor Space
Scheduling annual inspections, reapplying sealants, and cleaning with the right tools like a pressure washer and moisture meter have been invaluable. These proactive steps caught issues early, saving me money and stress. For comprehensive techniques, explore this article on long-term deck care.
Sharing Lessons to Empower Your Outdoor Living Dreams
Building or renovating a deck isn’t just about aesthetics—it’s about resilience and safety. Every mistake I made taught me to pay attention to small details, choose quality over cost, and stay vigilant with maintenance. My hope is these insights help you craft outdoor spaces that last a lifetime, adding beauty and value to your home. Ready to take the next step? Consider consulting professionals at this contact page for expert guidance.
Comments are closed.