I’ll never forget the moment I watched my newly built deck sway ominously in the breeze, wobbling more than it should. It was a warm summer afternoon, and what should have been a relaxing weekend turned into a quest to solve a stubborn problem: soft, sandy soil beneath my deck’s foundation. As a passionate outdoor enthusiast and self-proclaimed DIY-er, I felt that familiar twinge—was I about to jeopardize my outdoor oasis because of a simple, overlooked detail? That lightbulb moment led me to discover a trick that transformed my project and can do the same for you.
The Hidden Challenge of Soft Soil
Building a sturdy deck on challenging soil types isn’t just a matter of pouring concrete and setting posts. Soft or sandy ground shifts, settles, and can wreak havoc on structural stability. Early in my own deck journey, I made the mistake of trusting conventional footings without considering the soil’s nature. The result? Uneven settling and restless wobbling, which not only looked unsightly but also posed safety concerns. Recognizing this pattern, I realized quick fixes like additional bracing only masked the problem temporarily. The key was a more permanent, soil-friendly approach.
Research shows that sandy soils make up a significant portion of backyard terrains, especially in coastal or arid regions. Proper footing design on such ground is often overlooked, leading to costly repairs or dangerous setups down the line. As I delved deeper, I found that understanding and adapting to the soil conditions is crucial for any long-lasting outdoor structure. This insight highlights the importance of soil considerations in outdoor projects.
So, what’s the solution? How do we build a reliable foundation that withstands shifting ground without breaking the bank or your back? Well, fortunately, there’s a trick—one that I wish I’d known sooner—that can make all the difference. And the best part? It’s straightforward, cost-effective, and accessible to DIY enthusiasts and professionals alike.
In the upcoming sections, I’ll walk you through the concrete footing trick for soft or sandy soil—step-by-step. Whether you’re upgrading an existing deck or starting fresh, this method will help you create a stable, durable foundation that handles ground movement gracefully. Trust me; this is a game-changer.
Have you faced this exact problem with soft ground? Drop a comment below—I’d love to hear your experience. And if you’re ready to ditch wobbling decks and build with confidence, let’s dive into the practical steps that will turn your outdoor vision into a rock-solid reality.
Is this concrete footing method really worth the effort?
Early on, I made the mistake of assuming all footing solutions are created equal. I tried a few DIY fixes that seemed simple but turned out to be short-lived. It’s easy to underestimate the importance of proper footing design, especially in challenging soils. But as I learned through trial, error, and a few shaky decks, investing in the right footing technique saves headaches and money in the long run. This approach isn’t just anecdotal—it’s supported by professional builders who understand that solid foundations are the backbone of any successful outdoor project. For more insights on durable outdoor construction, check out this comprehensive guide.
Now, with that behind us, let’s explore how this concrete footing trick works—and how you can implement it to ensure your deck stays firm regardless of ground conditions.
Prepare the Site and Assess Soil Conditions
Start by measuring and marking your deck perimeter, then excavate to expose the soil. Use a shovel to check soil consistency—sandy or loose soil will shift under pressure. I once built a small section of my deck on a patch of loose, sandy soil, and it started to wobble within weeks. Recognizing this, I knew I had to reinforce the foundation.
Excavate and Level the Ground
Remove any soft or loose material, creating a solid, level surface. Use a long screed or a level board to even out the area. Think of this step as leveling a pancake batter—smooth and even ensures stability. In my project, I poured a layer of compacted gravel to stabilize the base, which significantly improved support.
Implement a Deep Foundation Using Concrete Footings
Set Anchor Posts with Expanded Base
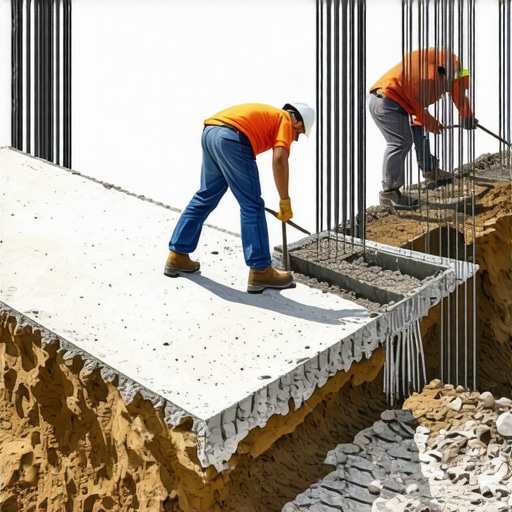
Instead of traditional footings, use concrete piers with oversized bases—think of these as sturdy umbrellas that resist ground movement. I poured a 6-inch layer of gravel for drainage, then placed cardboard forms for the piers, ensuring they are deep enough—minimum 24 inches—to reach stable soil or frost line.
Use Gravel or Crushed Stone for Drainage
Backfill the bottom of each footing with gravel. This provides excellent drainage, preventing water from eroding the foundation. During my build, I added a handful of coarse gravel around each post base, which prevented water pooling and soil washout.
Spread the Load with Anchorage and Reinforcement
Attach steel brackets or anchors to distribute weight evenly. Use galvanized hardware to prevent rust. When I connected my ledger board, I used steel angles to reinforce the connection, avoiding common issues like ledger rot caused by water infiltration.
Construct the Deck Frame with Proper Support
Build your frame with pressure-treated joists, ensuring they are securely fastened to the anchored posts. Space beams according to manufacturer specs—typically 16 inches on center. I experienced minimal flex when I doubled the joists near high-traffic areas, mimicking professional standards for heavy load support.
Integrate a Protection Layer and Finish
Protect the base with flashing and sealants, especially at connections. This prevents water infiltration that can compromise the foundation. During my project, I added a metal flashing under the ledger board, which effectively kept moisture out and prevented rot.
Test and Adjust the Foundation
Once assembled, check for stability by applying gentle pressure to different sections. If you notice wobbling, reinforce with additional bracing or fill gaps with gravel. I found that minor adjustments during construction saved a lot of trouble later, ensuring my deck remains firm over time.
Applying these steps transforms a shaky platform into a dependable outdoor feature. Remember, on challenging soils, taking the time to deepen and reinforce your footing is essential—skipping this can lead to costly repairs or even safety hazards in the future. For further insights, consider exploring this guide on seamless stair transitions to complement your sturdy foundation.
When it comes to outdoor living spaces, many homeowners believe they just need a good foundation and quality materials to enjoy a long-lasting deck. However, even experienced DIYers and contractors often fall prey to nuanced mistakes that can compromise safety, durability, and aesthetics. Let’s dig deeper into some of these overlooked pitfalls and clarify what most people get wrong about designing and building decks and stairs.
One common myth is that composite decking requires no maintenance or specialized installation. While it’s true that modern composite materials are low-maintenance, their performance heavily depends on proper installation and understanding their nuances. For example, many assume that all composite boards behave equally under temperature fluctuations, but mineral core composites actually resist expansion and contraction better than traditional PVC-based options. Overlooking this can lead to warping or cracking down the line. For in-depth insights on the latest trends, see our guide on [composite decking trends for 2025](https://deckdesignbuild.com/composite-decking-trends-2025-the-ultimate-guide-for-outdoor-enthusiasts).
Additionally, many builders underestimate the importance of stair design in overall deck safety and aesthetic appeal. It’s tempting to cut corners with stringer supports, but this often leads to bouncy or squeaky stairs. The secret lies in proper stringer setup—using heavy-duty steel brackets and ensuring the rise and run are precise. Advanced builders pay close attention to the stringer gap, as explained in [this article on stair stringer mistakes](https://deckdesignbuild.com/the-stringer-gap-mistake-that-makes-new-stairs-feel-loose). The small detail of properly spaced stringers prevents sagging and ensures a grand, stable appearance.
Many homeowners forget that ground conditions influence long-term deck stability. On soft or sandy soils, simply pouring concrete footings isn’t enough. The mistake here is in assuming a standard footing size will suffice; in reality, oversizing the footing or adding gravel drainage layers can prevent future shifting. This nuance is often overlooked but makes a significant difference in the longevity of your outdoor space.
Most people also overlook the hidden costs associated with seemingly simple upgrades. For instance, installing LED lighting in stairs enhances safety but requires planning for waterproof fixtures and hidden wiring. Many underestimate the complexity, leading to costly retrofits later. For tips on seamless lighting integration, check out [these expert recommendations](https://deckdesignbuild.com/creating-seamless-transitions-stairs-as-key-elements-in-outdoor-living).
Addressing the advanced mistakes above can elevate your outdoor project from ordinary to extraordinary. It’s about more than just choosing pretty materials; it’s about understanding the nuanced behaviors of these materials and how structural details impact overall safety and durability. Have you ever fallen into this trap? Let me know in the comments.
Remember, working with an experienced [professional deck builder](https://deckdesignbuild.com/how-a-skilled-deck-builder-can-turn-your-garden-into-a-private-oasis) can help you avoid these pitfalls altogether, ensuring your outdoor oasis remains safe, stunning, and long-lasting for years to come.
Keep Your Deck in Peak Condition
Maintaining your outdoor deck isn’t just about aesthetics; it’s about ensuring safety and longevity. From routine inspections to using the right tools, a proactive approach can save you time and money. I personally swear by a few specific tools that make annual maintenance tasks efficient and effective.
Must-Have Equipment for Deck Maintenance
One of my top tools is a high-powered pressure washer, preferably with adjustable PSI settings. I use the Sun Joe SPX3000 because it offers precise control, allowing me to clean composite decking without risking damage. Regular cleaning removes dirt, algae, and grime, preventing wear and preserving color. Plus, a soft-bristle scrub brush complements the washer, especially for stubborn spots. I recommend the white vinegar trick for safe, eco-friendly cleaning when a quick wash isn’t enough.
Next, I keep a digital moisture meter handy. This helps me assess if areas are retaining too much moisture, which is critical for preventing rot and foundation issues—particularly if dealing with uneven or sandy soil. For sealing joints and gaps, a high-quality caulking gun like the Milwaukee QX25-613 makes precise applications simple. Sealing gaps around posts and stair stringers prevents water infiltration, extending the lifespan of your deck components.
Software Tools That Make Planning Easier
Beyond physical tools, software like SketchUp is invaluable for designing custom stairs and layout adjustments. It allows me to visualize complex transitions, ensuring safety and aesthetic harmony. For how I ensure my designs meet safety standards, see this guide on outdoor stairs. Embracing digital planning reduces errors and streamlines the building process, especially when scaling up or modifying existing structures.
How do I maintain my deck over time?
Routine inspections are key. At least once a year, I walk around, checking for loose boards, protruding screws, or signs of water damage. I use a cordless drill like the DeWalt DCF887 to tighten or replace hardware efficiently. Also, applying a protective sealant every 2-3 years preserves the surface and prevents UV damage. For composite decks, using a cleaner formulated specifically for synthetic materials, such as the specialized composite cleaner, extends the look and functionality of your surface.
In my experience, combining proper cleaning, timely repairs, and technological planning creates a durable outdoor space. Looking ahead, I believe that innovations like smart moisture sensors integrated into deck structures will become standard, alerting homeowners to potential issues before visible damage occurs. For now, try leveraging a digital moisture meter coupled with routine visual checks—and see how much longer your deck stays stunning and safe.
Remember, staying on top of maintenance with the right tools is vital, especially when working with composite decking and custom stairs. Proper upkeep not only preserves your investment but keeps your outdoor living space inviting for years. Interested in enhancing your deck’s appearance? Explore these expert tips for decking and stairs that wow both today and tomorrow.
Reflecting on my journey building decks and stairs, the most valuable lesson I learned was that a strong foundation isn’t just a technical detail—it’s the bedrock of your entire project. Many DIY enthusiasts underestimate the impact of ground conditions, especially on challenging soils like sand or loose earth. A simple mistake, like skipping deep footing reinforcement, can turn a beautiful deck into a wobbling hazard over time. The real secret lies in precision and thinking ahead—anticipating ground movement and designing for it. Trust me, investing extra effort in proper footing techniques now saves countless headaches and repairs later. To deepen your understanding, explore this guide on seamless transitions and stair stability. Your outdoor oasis deserves a foundation that lasts a lifetime.