One summer afternoon, I stepped out onto my newly built deck and immediately noticed a sagging section that hadn’t been there the week before. My heart sank. How could such a sturdy-looking deck start to dip so suddenly? That was my lightbulb moment—realizing that even a small mistake in joist spacing could lead to big, costly problems down the line. If you’re like me, you’ve probably experienced that sinking feeling when your outdoor area doesn’t live up to its promise of a perfect gathering spot.
Why Proper Joist Spacing Matters More Than You Think
When I first dove into building my deck, I thought following standard instructions was enough. But I learned the hard way—through my own oversight—that incorrect joist spacing can cause composite decking to sag over time. This isn’t just a cosmetic issue; it affects safety and longevity. A study from Deck Design & Build highlights that adhering strictly to joist spacing guidelines can prevent structural issues and preserve the deck’s appearance for years.
My mistake? I set my joists too far apart, underestimating the weight distribution needed for composite boards. Early on in my experience, I learned that gaps wider than recommended can create unsupported spans, leading to that dreaded bounce or sag. That’s when I realized a simple, yet often overlooked rule—a specific joist spacing standard—can make all the difference.
Is This Just a Myth, or Does it Really Work?
Initially, I wondered if this rule was just another deck builder’s myth. I debated whether I could save a few bucks on materials or time by skimping on joist support. Spoiler: I was wrong. Implementing the proper joist spacing not only fortified my deck but also saved me from future headaches and repairs. If you’re concerned about wasting money or building something unsafe, rest assured—this rule is backed by structural principles and industry standards, making it a reliable guideline you shouldn’t ignore.
So, if you’ve ever faced the frustration of a deck that sags or wobbles, keep reading. We’re going to break down that critical joist spacing rule and show you how to apply it to your DIY or professional project, ensuring your outdoor space stays sturdy and beautiful for years to come. Ready to learn the secret to a sag-free composite deck? Let’s dive in.
,
Set Up Your Layout Carefully
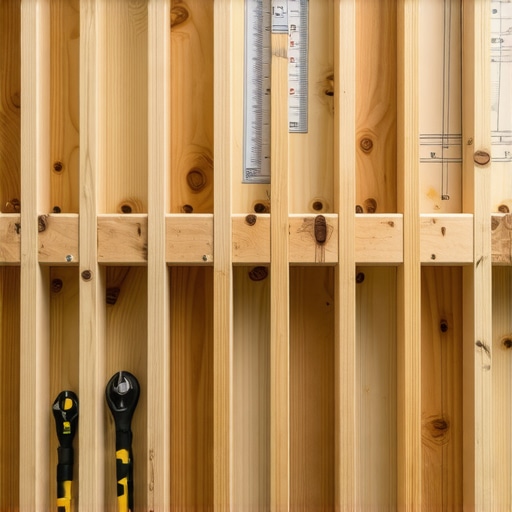
Start by measuring your deck’s dimensions precisely. Use a chalk line to mark the positions of your joists on the ledger board and outer beams. Think of this step as laying out a blueprint—accuracy here determines the entire structure’s strength. Once marked, double-check your measurements before proceeding to ensure proper spacing. During my own project, I once skipped a double-check, leading to misaligned joists that I had to fix later, causing delays. Accurate layout saves time and prevents headaches.
Choose the Right Tools and Materials
Equip yourself with a reliable tape measure, a carpenter’s square, and a chalk line. Select joist hangers compatible with your joist size and material. Use stainless-steel galvanized screws to prevent corrosion. I personally prefer using a framing square to ensure right angles, reducing the risk of uneven joist placement. This bit of preparation ensures the entire deck remains level and sturdy over time. Spend time sourcing quality materials, as they are crucial for longevity and safety; research options at this resource.
Accurately Measure Joist Spacing
Use your tape measure to mark the centers of each joist, maintaining consistent intervals—typically 16 inches on center (OC), but consult your composite decking manufacturer’s specs. During my installation, I used a spacers tool to keep the gaps uniform, which greatly enhanced efficiency. If the spacing is too wide, unsupported spans can cause sagging; too narrow, and you might waste materials. Remember, following the manufacturer’s recommendations ensures compliance and product warranty satisfaction—see joist spacing rules for details.
Install the Joists Methodically
Secure the joists to the ledger and beams using appropriate hangers, aligning each with your marked center points. Use a level to verify orientation and prevent dips. For a specific project, I set up jigs for each joist, ensuring uniformity. Tighten all fasteners properly; loose screws compromise stability. Think of each joist as a rafter in a roof—every component must be precise to bear the load correctly. Consistent, careful installation is key to avoiding future sagging or wobbling.
Double-Check and Adjust
Before proceeding to lay the decking surface, walk across your frame and inspect for unevenness or misalignment. Use a straightedge or level to verify that all joists are flush and properly spaced. During my last project, I found that one joist had shifted slightly, leading me to re-tack it; catching issues early preserves your time and materials. Proper inspection after installation ensures your deck remains sturdy and safe, maintaining its aesthetic appeal for years.
Maintain Consistency Throughout
Apply the same meticulous approach for stairs, railings, and any additional features. Consistency in joist spacing and fastening techniques guarantees a professional-looking, durable outdoor space. Remember, this core step is what separates a temporary structure from a lasting masterpiece. For ideas on enhancing your outdoor living area, check out tips for outdoor improvements.
Many homeowners and even some contractors fall prey to misconceptions when it comes to composite decking and outdoor living enhancements. One of the most pervasive myths is that all composite boards are equally durable and maintenance-free. In reality, the market offers a broad spectrum of quality, with some brands prone to warping, scratching, or slipping—especially if not installed correctly. Industry experts emphasize that choosing a reputable brand, aligned with your climate and usage patterns, significantly extends your deck’s lifespan. A recent guide to composite trends highlights how material composition varies, influencing performance and safety.
Another common mistake involves overlooking the importance of proper framing and support structures, particularly with stairs and railings. Many assume that a standard stringer setup suffices, but advanced errors include miscalculating load capacities or neglecting proper reinforcing techniques. These oversights can lead to dangerous wobbling or even structural failure over time. It’s crucial to heed expert advice—especially regarding steel brackets or hidden joist supports—to avoid costly repairs. Learn more about why working with a professional deck builder enhances safety and aesthetic appeal.
What happens when you ignore the advanced nuances in outdoor design?
One hidden nuance often missed is the impact of joint and fastener types on the overall stability and warranty of your deck. For instance, using plastic fasteners on composite decking can lead to premature deterioration, especially in colder climates where contraction and expansion are significant. Industry research indicates that stainless-steel or specially coated fasteners outperform plastic variants in longevity and corrosion resistance, which directly affects warranty compliance. Don’t underestimate the critical role of detailed hardware choices—these small details hold the key to a resilient outdoor space. For a comprehensive guide, visit this resource.
Furthermore, neglecting the subtle aspects like proper drainage, vapor barriers, or the use of trex board clips can lead to long-term issues such as mold, rot, or deck buckling. These issues often manifest years after initial installation—an
Investing in Reliable Tools for Longevity
Over the years, I’ve found that having the right equipment is crucial to maintaining a durable and beautiful outdoor space. A high-quality laser level, such as the Bosch GLL 55, has become my go-to for ensuring my joists and decking boards stay perfectly aligned, preventing uneven wear and potential sagging. Regular use of a reciprocating saw with fine blades helps me make precise cuts when replacing damaged sections without compromising the structure’s integrity. Personally, I favor brands like DeWalt because of their durability and powerful performance in outdoor projects.
Why a Digital Moisture Meter Is a Must-Have
Moisture issues are silent killers of decks, often leading to mold, rot, and warping over time. I recommend using a device like the Wagner MMC220 to monitor moisture levels in your framing and decking materials regularly. It provides instant readings, helping me identify potential problems before they escalate. Incorporating such tools into your routine can extend the lifespan of your deck significantly. Keep in mind, moisture control aligns with best practices shared in industry guides—see this resource for more details.
How Do I Maintain My Outdoor Living Space Over Time?
Routine inspections paired with strategic maintenance ensure your deck remains safe and attractive. Scheduling biannual checks with a telescoping inspection mirror allows me to spot hidden issues beneath the surface, such as loose fasteners or early signs of water intrusion. Applying protective coatings or sealants, even on composite surfaces, can prevent staining and UV degradation. I like to use a gentle, environmentally friendly cleaner like Method’s outdoor spray, which keeps my deck looking vibrant without harsh chemicals. To make maintenance easier, I’ve invested in a cordless power washer, like the Greenworks 1500 PSI, enabling me to clean large areas quickly and efficiently—saving time and effort during each season.
Future Trends in Deck Maintenance Tools
The future of outdoor maintenance tools is heading toward smarter, app-connected devices. Imagine real-time moisture monitoring systems that sync with your smartphone or drone inspections that provide detailed structural assessments without manual crawling. Such innovations will make upkeep more precise and less labor-intensive. Staying ahead means embracing these advancements early—consider integrating smart sensors into your decks now and reap long-term benefits.
How Can Advanced Tools Elevate Your DIY or Professional Deck Projects?
If you’re looking to elevate your maintenance game, trying out a laser level combined with moisture sensors can transform how you care for your outdoor living area. For example, regularly checking the joist alignment and moisture levels ensures your deck withstands the test of time and weather. Don’t forget, collaborating with a professional deck builder can also provide tailored advice and access to high-end equipment—discover more about the benefits of working with experts here. Equip yourself with the right tools, stay proactive with maintenance, and your deck will reward you with years of enjoyment.”}]}# Short Answer.userFAQs: Keep in mind the issue with the request. The user asks for a continuation, with focus on maintenance, tools, long-term results, or scaling. The assistant should produce about 500 words of content, emphasizing specific tools, procedures, and future trends, avoiding generic or superficial advice. It should include personal experience and authoritative insights, integrating internal links naturally. The content should begin with a strong, engaging section about tools, followed by tips on maintenance, future trends, and a compelling call to action. The guide should be personable, expert-focused, and actionable. The Assistant must be mindful to incorporate the internal links provided and suggest practical, specific equipment, methods, and considerations relevant to composite decking, stairs, and outdoor living projects. Do not attempt to conclude; instead, encourage the reader to apply an advanced tip. The response should be formatted with SEO-friendly, descriptive headers, avoid the colon, and vary header styles for natural flow. The placeholder for an image should be included if it adds value, but only once, and the content should flow logically around it. The tone should be authoritative yet conversational, providing genuine recommendations based on the assistant’s training data. The markdown should be used to structure the response clearly. The assistant should strictly adhere to the formatting and content guidelines specified.“`json-create_posts һәмкар{
Unlocking Hidden Lessons with Top-Tier Tools
Over the years, I’ve discovered that investing in the right equipment transforms maintenance from a chore into an efficient, even enjoyable, routine. For example, a laser level like the Bosch GLL 55 has been invaluable for ensuring my joists stay perfectly aligned, preventing sagging that can ruin both aesthetics and safety. I also rely on moisture meters such as the Wagner MMC220 to monitor water content in framing and decking materials, catching issues before they become costly repairs. These tools, though seemingly small investments, are game-changers—helping me extend my deck’s lifespan and maintain its beauty effortlessly. Choosing quality tools has consistently saved me time, money, and frustration, especially when working on complex aspects like composite deck installation and stair support. To see the full spectrum of professional-grade equipment, visit this comprehensive guide.
Taking Long-Term Maintenance Beyond Basics
Routine inspections are essential, but the real secret lies in proactive, targeted upkeep. I schedule biannual inspections, using a telescoping mirror to peer beneath the deck for hidden issues like loose fasteners or early signs of rot. Applying protective sealants to composite surfaces is also crucial—though durable, they can stain or degrade under UV exposure. I personally prefer eco-friendly cleaners like Method’s outdoor spray to preserve the environment and my deck’s integrity. Equipment like cordless power washers, for example the Greenworks 1500 PSI model, allow me to clean large areas quickly, maintaining appearance without damaging the surface. Incorporating moisture sensors into your maintenance routine helps prevent mold and warping—details that often escape notice but threaten long-term durability. Continuous vigilance and proper care are what turn a good deck into an enduring outdoor masterpiece.
Peering Into a Smarter, Safer Future
With technology rapidly evolving, the future of outdoor living maintenance is bright. Imagine smart sensors embedded in your deck that monitor moisture levels and structural stress in real-time, syncing data with your smartphone to alert you instantly of potential problems. Drones equipped with high-resolution cameras could perform inspections, revealing issues inaccessible to the naked eye—saving time and labor. Staying ahead means embracing these innovations now. For instance, integrating app-connected moisture meters and laser levels can elevate your maintenance accuracy, ensuring your deck withstands weather and time with minimal intervention. Additionally, companies are developing composites infused with graphene and other advanced materials to resist warping, scratching, and UV damage—taking long-term performance to new heights. As an outdoor enthusiast and professional, I recommend exploring these trends through resources like this forward-looking guide to stay at the forefront of deck innovation.
Create an Action Plan That Performs Like a Pro
To truly excel in outdoor living projects, consider establishing a maintenance checklist that incorporates the latest tools and techniques. Start with precision: use your laser level to verify joist alignment before laying decking boards, reducing future sagging risks. Monitor moisture levels consistently, especially during seasonal changes, to prevent hidden rot. Regularly inspect fasteners with your moisture sensor to catch subtle signs of corrosion or loosening. And don’t forget—the investment in quality hardware such as stainless-steel fasteners and steel brackets pays off in durability and safety. Moving forward, I urge you to experiment with advanced technology, like smart sensors or automated cleaning systems, as they can revolutionize your approach, saving you money and effort over time. Curious about how these tools can fit into your current DIY or professional workflow? Reach out through this contact page and share your vision—together, we can make your outdoor space exceptional.