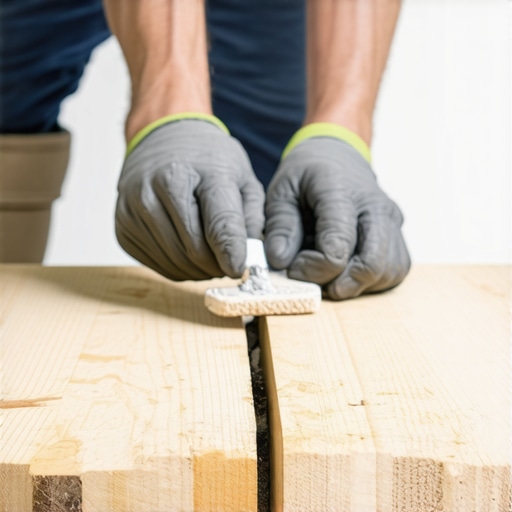
Ever spent hours staining or sealing your new deck, only to see it start stained or warped at the ends within months? I did. My first project with pressure-treated wood was a disaster—peeling ends, uneven finishes, and a sinking feeling I’d wasted money. That lightbulb moment hit me hard: I wasn’t sealing the end grains properly, and it was costing me in longevity and look.
Pressure-treated wood is fantastic for outdoor projects, but those end grains are like open doors to moisture invasion. When water gets into the unsealed ends, it accelerates decay, warping, and rot. I learned that the key isn’t just applying a good stain or sealant, but ensuring those vulnerable ends are sealed the *right* way. Today, I’ll share the proven method I’ve used in all my outdoor projects, saving me from costly repairs and giving my decks a much longer lifespan.
The Reason It Matters—Your Deck Deserves the Best Care
Your outdoor space is an extension of your home—a place where memories are made, parties are held, and quiet mornings are enjoyed. But without proper sealing at the end grains, those areas become weak points in your deck’s defense against the elements. Water seeps in, leading to swelling, splitting, or even structural failure over time.
I remember one project where I overlooked sealing the ends properly, and within a year, I noticed the ends starting to cup and crack. That mistake taught me the importance of paying attention to these tiny details that make a big difference.
Sealing the end grains isn’t just about aesthetics; it’s a practical step to extend your deck’s life. Doing it correctly now means less maintenance later—no one wants to be reapplying sealant every season or replacing rotten boards a few years down the line. According to experts, moisture intrusion is a leading cause of outdoor wood deterioration, and sealing the ends effectively can delay or prevent this process (source: [House Logic](https://www.houselogic.com/)).
If you’ve faced the frustration of deck damage that seems to come out of nowhere, or if you’re planning your next outdoor project, pay close attention. The method I’ll walk you through is straightforward but game-changing.
Ready to dive into the *right* way to seal those end grains once and for all? Keep reading—because it’s simpler than you think, and the results are worth every minute.
Prepare Your Materials and Workspace
Before starting, gather high-quality end grain sealant, a paintbrush or roller, protective gloves, and a clean cloth. Ensure your deck area is dry and free of debris. I once attempted to seal ends on a damp morning, which resulted in poor adhesion—lesson learned: choose a dry day for best results.
Cut and Inspect the End Grain
If you have new lumber, cut the ends square using a sharp saw. Inspect for splinters or rough edges, as these can hinder sealing. Remember, smooth, clean ends absorb sealant more effectively and provide better protection. During one project, I accidentally left rough edges, which led to uneven sealing and faster water intrusion—cutting carefully made a noticeable difference.
Apply the Sealant Generously
Use a quality end grain sealer designed for pressure-treated wood. Dip your brush or roller into the sealant and coat the end grains thoroughly, ensuring complete coverage. Think of it like applying a protective ‘armor’—the more uniform and thorough, the better. I once missed spots on one board, and a rainy season quickly revealed weak points where water seeped in, causing warping.
Seal All Sides and Ends
Don’t forget to coat the edges or cut faces on all sides of the lumber. This prevents moisture from entering from any angle. During a deck build, I sealed only the top ends, which over time led to cupping. Covering all surfaces pays off in the long run.
Let It Cure Properly
Allow the sealant to dry and cure as per manufacturer instructions, usually 24-48 hours. Avoid walking on or working with the wood during this time. I once hurried the process and applied stain too early, resulting in peeling—the cure time is crucial for maximum durability.
Regular Maintenance Checks
Periodically inspect the sealed ends, especially after harsh weather. Touch up any areas where the sealant has worn thin. This ongoing effort is key; I check my decks bi-annually and re-seal minor chips or worn spots, extending the lifespan significantly.
Additional Tips for Long-Lasting Results
For an extra layer of protection, consider applying a clear, penetrating sealer over the entire deck surface, including the ends. When I upgraded my sealing routine, I noticed a marked reduction in end grain decay, and my deck looked fresh longer. Remember, proper sealing at the outset saves you time and money later—it’s like setting a strong foundation for a house.
Understanding the importance of sealing end grains can be the difference between a deck that lasts decades and one that falls apart after a few years. Take your time with these steps; your future self will thank you for the extra effort. For more ideas on creating stunning outdoor spaces, check out these deck and stair ideas to elevate your backyard.
Many homeowners assume that selecting a premium composite decking or fancy stairs guarantees a long-lasting outdoor space, but in my experience, the real pitfalls lie in overlooked details and common misconceptions. One widespread myth is that all composite decking boards are created equal; however, a close look reveals significant differences in durability, heat retention, and how they handle expansion—especially in extreme climates. For example, some brands claim “maintenance-free” but fail in cold or humid environments, leading to warping or static buildup. It’s essential to choose products with proven heat-shield technology and high-quality cores, as outlined in the [2025 trends guide](https://deckdesignbuild.com/composite-decking-trends-2025-the-ultimate-guide-for-outdoor-enthusiasts), which discusses advances that address these issues.
Another mistake many builders make involves stair design—assuming that standard dimensions work universally. In reality, overlooking proper riser and tread proportions can compromise safety and aesthetics. Modern best practices recommend optimizing stair widths and gripability, especially when designing for elderly users or children; details that often get ignored during quick DIY projects. Also, installing stairs without considering seamless transitions can lead to tripping hazards, as highlighted in [creating seamless transitions](https://deckdesignbuild.com/creating-seamless-transitions-stairs-as-key-elements-in-outdoor-living). Keep in mind that a well-crafted staircase does more than look good—it enhances safety and usability.
Let’s address a common misconception about protective finishes—many believe that a high-quality stain or sealer is enough to ensure longevity. In truth, advanced sealing techniques involve multiple layers tailored to the specific wood type and environmental exposure. For instance, sealing the end grains with a specialized sealant prevents water intrusion, a mistake I see repeated frequently. Unexpected issues can arise if the sealant isn’t applied correctly or if the sealing process is rushed. An improper seal can lead to end grain rot, which undermines the entire deck’s integrity—a costly mistake avoidable through thorough craftsmanship and attention to detail.
The advanced homeowner or builder should also consider how junctions and hardware interact with outdoor elements. For example, using rust-resistant fasteners is critical in coastal areas, but many overlook proper flashing or sealing at ledger boards, risking water infiltration that can cause rim joist rot—the hidden threat that weakens the deck’s foundation. For in-depth insights on fastening and flashing techniques, see [deck framing secrets](https://deckdesignbuild.com/the-hidden-joist-support-that-prevents-deck-surface-sags). Recognizing these nuanced factors ensures your project withstands time and weather, rather than succumbing prematurely.
Have you ever fallen into these traps or overlooked a seemingly minor detail? Share your experiences in the comments or ask questions—I’m here to help you navigate the nuanced world of outdoor living. When you pay close attention to these details, your deck will not only look great but will also stand strong against the elements for years to come.Maintaining a durable and beautiful outdoor deck requires more than just initial building skills; it hinges on using the right tools and adopting proven methods for ongoing care. One indispensable tool I rely on is a high-quality laser level, such as the Bosch GLL 55, which ensures precise measurements during ongoing maintenance tasks like re-sealing or adjusting railings. Its accuracy helps prevent uneven joins or misaligned components, saving time and reducing frustration. For sealing end grains, I prefer a specialized end grain sealer like Sashco’s End Seal, which penetrates deeply and provides long-lasting waterproof protection—a critical step in extending your deck’s lifespan.
In my projects, I also leverage an oscillating multi-tool equipped with a scraper attachment to gently remove old sealant or stubborn debris without damaging the wood surface. This approach is especially helpful for refreshing sealing points or cleaning tight corners. Additionally, using a cordless power washer with adjustable pressure settings enables efficient cleaning without risking damage to composite boards or wood—crucial before resealing or applying protective finishes.
Looking ahead, I predict that automation and sensor-based tools will increasingly assist homeowners and contractors in routine maintenance over the next few years. Devices that monitor moisture levels or detect structural shifts could become standard, alerting us when re-sealing or repairs are needed. Investing in these advanced tools today prepares you for seamless long-term management.
### How can I keep my outdoor living space functioning smoothly over time?
A key step is establishing a regular maintenance routine that includes inspecting seals, fasteners, and structural components. Applying a penetrating sealant to end grains every couple of years, especially after harsh weather, can dramatically improve durability. Remember, tools like laser levels and powered cleaners aren’t just for initial construction—they’re critical allies in keeping your deck in prime condition. Regularly checking and maintaining hardware, sealing vulnerable areas, and using the right equipment ensure your outdoor space remains safe, beautiful, and functional for years.
For guidance on selecting the best composite materials that resist heat and warping, check out this comprehensive guide. Whether you’re a DIY enthusiast or working with a professional, embracing these tools and techniques will pay off in the long run. Don’t hesitate to try out one of the tips, like investing in a laser level for ongoing alignment checks—your future self will thank you for the extra effort.
What I Wish I Knew Before Laying My First Deck
One of the most valuable lessons I learned is that the smallest details, like sealing end grains properly, can dramatically extend the life of your outdoor structure. Failing to do so in my early projects led to premature warping and rot, teaching me to focus on these seemingly minor steps that pay off significantly over time.
Maintaining patience during sealing and curing processes is crucial. Rushing these steps, especially the application and drying phases, can compromise the entire protective layer, making your efforts less effective and shortening the lifespan of your deck or stairs.
Tools That Changed My Maintenance Routine
Investing in a laser level transformed how I measure and align during repairs or modifications, ensuring precision and saving time. A good quality sealant like Sashco’s End Seal has been my go-to for end grains, providing peace of mind against moisture intrusion. Additionally, an oscillating multi-tool with a scraper attachment helps refresh surfaces without damaging the wood—making routine upkeep more manageable.
The Power of Proper Detailing—More Than Just Looks
Adopting detailed techniques, such as sealing all sides of the end grain or ensuring seamless transitions between deck components, has prevented many issues like cupping, splinters, and water damage. Remember, investing time in the finer points of craftsmanship creates a safer, more durable outdoor living space that stands the test of time.
Creating a Realistic Maintenance Game Plan
By setting up regular inspection routines—checking for worn sealant, loose fasteners, or water ingress—you can catch problems early. Proper planning might include scheduling re-sealing every couple of years, especially after harsh weather, and using the right tools to make these tasks less daunting and more effective.
Prioritize the Details That Make a Difference
From selecting high-quality products like composite decking with heat-shield technology to ensuring your stair risers meet safety standards, focusing on these details results in a long-lasting, beautiful outdoor space. Avoid shortcuts, like neglecting sealing or hardware upgrades, which can cost you more in repairs down the line. Dive into resources such as the latest trends in composite decking to stay ahead of the game and keep your outdoor living areas resilient and thriving.