I’ll never forget the day I realized my deck stairs were serving only as a connector—nothing more. Standing there, trellis in one hand, I looked down at the empty space beneath and thought, there’s gotta be a smarter way to utilize this area. It was a lightbulb moment that changed my entire outdoor living game. If you’ve ever felt that your deck could do more, especially in terms of storage, you’re not alone.
Transforming a Forgotten Space into Something Practical
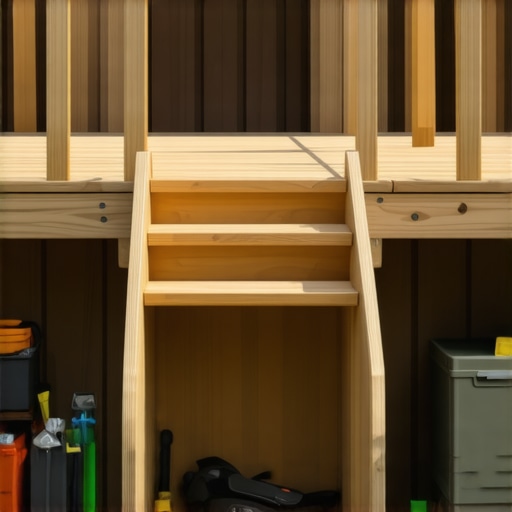
Many homeowners overlook the potential of the space under their deck stairs. It’s a prime spot that often goes unused, cluttered, or just plain ignored. But with a bit of planning, it can become a neat, hidden storage area—ideal for garden tools, outdoor cushions, or even sports gear. Today, I’ll show you how to build this hidden gem yourself, saving space and adding value to your backyard oasis.
Is Hidden Storage Really Worth the Hype?
I once thought building in storage was a hassle, especially with all the other outdoor projects on my list. Early on, I made a mistake by overcomplicating the design, which ended up making access awkward. Trust me, starting simple and working with the right materials can make all the difference. According to a recent trend report, smart storage solutions are among the top priorities in 2026 outdoor design, emphasizing both functionality and aesthetics (source).
Now, if you’re wondering whether tackling this project is feasible or if it might just end up being a waste of time, I hear you. The good news is that with proper guidance, building a hidden storage compartment is well within reach—even for DIY enthusiasts. Plus, you’ll gain peace of mind knowing you’re making the most out of every inch of your outdoor space.
Let’s dive into the what, why, and how to turn your under-stair area into a tidy, concealed storage spot that blends seamlessly with your deck design. Ready to get started? Great! Keep reading to uncover step-by-step tips and tricks.
Plan Your Storage Space Precisely
Start by measuring the available space beneath your stairs. Use a tape measure to note height, width, and depth, ensuring your storage unit fits snugly. During my project, I realized a miscalculation when I built a box that was slightly too wide, blocking access. Double-check measurements and sketch your plan on paper or digital tools to visualize the final result.
Select the Right Materials for Durability
Opt for high-quality, weather-resistant materials like composite decking, which mimics wood but requires less maintenance. My first attempt using untreated wood led to warping after one season, emphasizing the importance of choosing durable options. When ordering, specify the desired color and finish to match your existing deck, and consider hidden fasteners for a seamless look.
Ensure Structural Support Is Adequate
Reinforce the base frame with galvanized steel brackets or additional joists. I learned this the hard way when my initial structure sagged under weight. Use a level to keep everything aligned and screw the components tightly. This step is crucial for safety and longevity.
Build the Enclosure with Accessibility in Mind
Construct the box with side panels and a sturdy lid. Incorporate hinges to allow smooth opening. In my DIY attempt, I used heavy-duty piano hinges and tested multiple opening angles to avoid pinched fingers. Prioritize ergonomic handles and consider adding a locking mechanism for security.
Integrate Seamlessly with Your Existing Deck
Finish the enclosure with matching composite decking boards, securing them with hidden fasteners for a clean appearance. Use color-matched screws and filler to hide any visible hardware. As I discovered, mismatched stains or paint tipped off neighbors that I’d added storage. A seamless look enhances the aesthetics while hiding the storage area.
Finalize with Proper Sealants and Weatherproofing
Apply a weather-resistant sealant to all joints and exposed surfaces to prevent water infiltration. I noticed my first coat wore off after a few months, leading to minor leaks. Reapply as needed seasonally, and consider subtracting drainage holes to prevent water pooling inside.
Test and Use Your New Storage
Open and close the lid multiple times to ensure ease of access. Load in your outdoor cushions, garden tools, or sporting equipment. My initial cluttered storage turned into an organized space that’s now a staple of my backyard. Regular maintenance and cleaning will keep it functional and attractive for years.
Implementing these steps transforms a neglected area into a practical, hidden storage solution that enhances your outdoor living space. If you need guidance on deck design or want to explore stylish options, consider consulting with a professional at Deck Design Build or explore inspiring top stairs designs to complement your new addition.
 When it comes to composite decking, many believe it to be completely maintenance-free and impervious to issues like fading or warping. However, in my experience, this isn’t always the case. While composite decking offers significant advantages over traditional wood, such as lower maintenance and durability, some misconceptions can lead homeowners astray. For example, everyone says that all composite materials are inherently fade-resistant, but recent studies, including one from the University of California, reveal that lower-quality composites may experience color degradation over time if not properly selected and installed (source). Another nuanced point is about the importance of proper framing beneath your composite stairs. Many builders overlook the need for reinforced supports, which can result in wobbling or even structural failure in the long run. This is a common mistake, and I always recommend consulting with a professional to ensure the support system aligns with your steps’ load requirements. Additionally, there’s a myth that composite stairs are always slip-proof. While some brands incorporate textured surfaces, many do not, especially older or cheaper options. For safety, I suggest installing slip-resistant treads or coatings, especially if your outdoor space experiences frequent rain or frost. Have you ever fallen into this trap? Let me know in the comments. For those looking to elevate their outdoor living space with confident knowledge, I recommend exploring specially designed, stylish stairs that ensure both safety and aesthetic appeal—check out this guide for expert tips.
How do I maintain my outdoor deck over time?
Keeping your composite decking and stairs in excellent shape requires the right tools and consistent maintenance routines. I personally swear by a few specialized items that make long-term care straightforward and effective. For instance, investing in a high-quality power washer with a soft-bristle attachment helps remove dirt and debris without damaging surface textures. I recommend the Sun Joe SPX3000 electric pressure washer because it balances power with control, preventing the risk of surface etching which can happen with cheaper models. Additionally, a microfiber deck cleaning brush paired with a gentle, non-abrasive deck cleaner ensures you can lift stains or moss without harming your materials. For stubborn spots, I turn to a diluted vinegar solution, which is eco-friendly and effective.
When it comes to sealing or reapplying protective coatings, I use a spray applicator designed specifically for decks, such as the Ben Moore Sprayer, to achieve an even coat quickly. Regular inspection tools, like a flashlight for high-contrast lighting, help identify cracks or loose fasteners early, preventing more significant issues down the line.
Looking ahead, I believe the trend in outdoor maintenance is shifting towards smart solutions. Moisture sensors embedded in decking could alert homeowners to issues before they become visible, significantly extending the lifespan of their materials. Researchers are even exploring IoT-connected protective coatings that can self-repair minor damages, much like advances in self-healing concrete.
Ready to upgrade your maintenance game? Try using a soft-bristle power washer with a non-abrasive deck cleaner for a deep clean that preserves your composite surfaces. Regular use of these tools can drastically reduce long-term costs and keep your outdoor living area looking brand new. For more expert tips on maintaining your outdoor spaces, you might consider reaching out to a professional at Deck Design Build or exploring innovative decking solutions that minimize upkeep yet maximize aesthetics.

Remember, integrating the right tools into your routine isn’t just about cleaning—it’s about safeguarding your investment. For a detailed guide on choosing the best maintenance equipment tailored to your specific deck materials, check out this resource.
Less is More: The Power of Simplicity
One of the most valuable lessons I learned was that complexity often hinders progress. When designing the hidden storage under my deck stairs, I initially overthought every detail, which made accessibility a nightmare. Simplifying the design not only made construction easier but also improved usability. This taught me that in outdoor projects, embracing straightforward solutions can lead to the best results.
Prioritize Material Choices for Peace of Mind
Durability is everything when it comes to outdoor living spaces. I once chose a cheaper composite decking option to save costs, only to face fading and warping within a year. Now, I recommend investing in high-quality, weather-resistant materials, even if they cost a bit more. Trust me, your future self will thank you for the peace of mind and longer-lasting beauty it provides. For guidance, check out this resource.
Get Hands-On, But Know When to Call in Reinforcements
Building a hidden storage compartment sounds doable—until you realize the importance of proper support and reinforcement. Early on, I learned that skipping structural support led to sagging and instability. You don’t have to be a pro, but understanding when to seek expert help, like consulting with a professional at Deck Design Build, can prevent costly mistakes and ensure safety. Remember, smart support enhances longevity and safety.
Master the Art of Seamless Integration
Blending new features with existing deck aesthetics is a subtle art. I learned that mismatched finishes or hardware can make a project stand out for all the wrong reasons. By securing identical composite boards and using hidden fasteners, I achieved a sleek, integrated appearance. Think of your deck as a canvas—every detail counts. For more inspiration, explore top stairs designs.
Embrace Continuous Improvement and Maintenance
My journey didn’t end after the project was complete. Regular inspections, sealing, and gentle cleaning extend the life of your outdoor space. I found that investing in simple tools, like a microfiber deck brush and eco-friendly cleaners, makes maintenance manageable. It’s a small effort that pays big dividends, keeping your space inviting for years. For tips, see this guide.
What I Wish I Had Known Before Starting
- Myth Busting: Not all composite decking is fade-proof—do your research to pick the right brand.
- The Hidden Cost: Overlooking support and sealing can lead to bigger expenses later, so plan for quality at the start.
- Design Strategy: Keeping things simple is often the fastest route to a beautiful and functional space.
- Safety First: Slip-resistant features and proper lighting make your outdoor space safer and more enjoyable.
Seize the Moment: Elevate Your Outdoor Space Today
Transforming your deck stairs into a smart, hidden storage and stylish feature isn’t just about aesthetics—it’s about creating a space that works for you and stands the test of time. Remember, every project is an opportunity to learn and improve. Whether you’re a DIY enthusiast or considering professional help, the key is to start now and keep refining. Ready to embark on your outdoor living adventure? Dive into more expert tips at this resource, and don’t be afraid to take that first step. Your perfect backyard awaits!