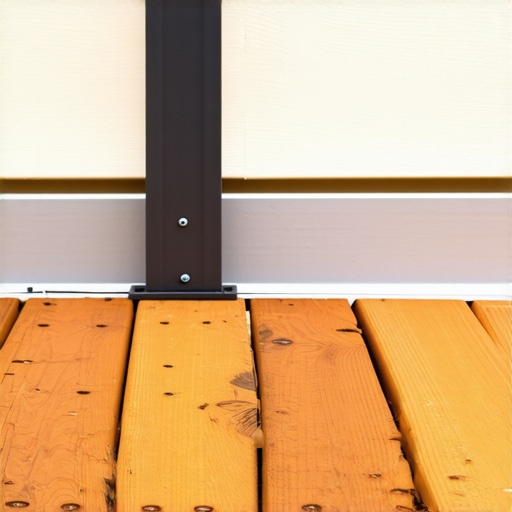
I’ll never forget the feeling of standing on my brand-new deck, coffee in hand, only to look down and see a jagged, uneven black void where the boards met my house siding. It was like wearing a tuxedo with flip-flops. That little gap wasn’t just an eyesore; it was a magnet for fallen leaves, rogue sunflower seeds, and—as I eventually learned—an open invitation for a family of field mice to set up shop. I actually tried to fix it once by just jamming some scrap trim in there without a plan. Spoiler alert: the first time the temperature dropped, the house settled, and the gap swallowed my ‘fix’ whole. We spend thousands on custom composite decking ideas, but it’s these tiny details that determine if the project looks like a pro did it or if it’s a DIY disaster waiting to happen. If you’ve ever wondered how to fix a deck that has started to pull away from the siding, or if you’re just finishing a build and want that seamless transition, you’re in the right place. Today, I’m going to show you how to close that gap for good without compromising your home’s structural integrity.
Stop Letting Your Deck Look Like an Unfinished Puzzle
The gap between your deck and the house exists for a reason, usually to allow for drainage and the natural expansion of materials. However, leaving it wide open is a rookie move. I used to think I could just ignore it, but then I noticed how much dirt was accumulating against my rim joist. When you are choosing a deck color that complements your siding, the last thing you want is a dark, shadowy line breaking up that beautiful aesthetic. Whether you are working with a professional deck builder or tackling it yourself, finishing this transition is about more than just looks. According to the National Fire Protection Association (NFPA), debris trapped in deck gaps can actually become a significant fuel source for embers during wildfire seasons, making that ‘little gap’ a genuine safety hazard for your entire home. By using the right flashing and trim techniques, we can make the deck feel like a literal extension of your living room. Have you ever looked at your deck and wondered if that dark space against the wall was actually a mistake?
Will Trapping Moisture Under the Siding Ruin Your House?
This is the biggest fear I hear from neighbors and readers alike. They worry that if they hide the gap, they’ll trap water against the ledger board and cause rot. I made the mistake of tight-fitting my first trim piece without leaving a drainage path, and within two seasons, I had green moss growing behind my siding. The trick is to use a combination of Z-flashing and specialized trim that allows air to flow while keeping the visual gap closed. You have to account for how composite boards expand into your vinyl siding during the peak of summer. If you don’t leave room for the material to breathe, it will buckle your trim and look worse than the gap ever did. In the next section, we’ll dive into the specific materials that bridge this divide safely and beautifully.
[image_placeholder]
To bridge this divide properly, we have to start with the skeleton—the flashing. Think of flashing like the umbrella for your deck’s ledger board. Without it, water doesn’t just sit; it migrates. I once spent a whole Saturday trying to ‘caulk’ a gap that was an inch wide on a rental property. It looked like toothpaste on a dinosaur, and within six months, the caulk had cracked and peeled away, leaving the wood exposed to a rainy autumn. That failure taught me that you can’t fight physics with a tube of sealant. You need a mechanical barrier. When choosing the right composite decking for durable low-maintenance outdoor areas, the flashing is your insurance policy that the house stays dry while the deck stays pretty.
Install the Hidden Shield Every Deck Needs
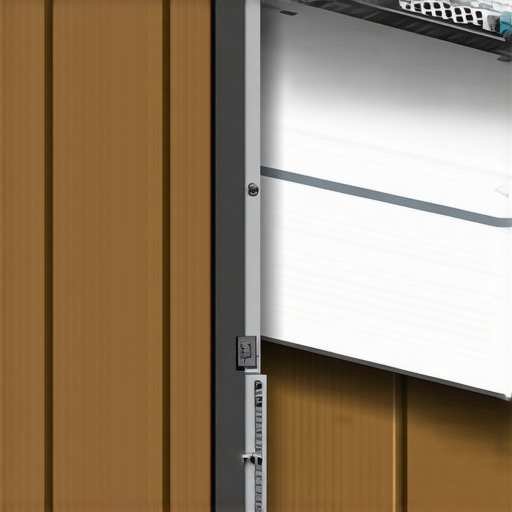
The very first step is ensuring your Z-flashing is tucked behind the house wrap or siding and laps over the ledger board. This creates a continuous path for water to shed away from the structure. If you are already dealing with an existing gap, you might need to carefully pry up the bottom course of siding to slip the metal flashing underneath. It’s a tedious ten minutes that saves you a decade of structural headaches. I always tell people that how to keep your deck joists from rotting under the boards starts here, at the house connection, not out in the middle of the yard.
Get Your Flashing Tight Against the House
Once the flashing is in place, you’ll notice a small horizontal lip. This is where the magic happens. You want to install a filler piece—often a ripped-down piece of composite or a specialized PVC trim board—that sits just below this lip. This board acts as a bridge. However, you cannot just jam it in there. You need to leave about a 1/8-inch gap between the end of your deck boards and this trim piece. Why? Because materials move. If you’ve ever wondered why your composite boards are expanding more than expected, it’s usually because they were installed tight during a cool morning and had nowhere to go when the afternoon sun hit. Giving them that tiny bit of breathing room prevents the boards from ‘growing’ into your siding and popping the trim off.
Choose Trim That Survives the Seasons
For the aesthetic finish, I prefer using a color-matched fascia board or a dedicated ‘rim’ joist cover. This is essentially a thin piece of composite that hides the raw cuts of your decking. This is particularly important if you didn’t plan for a border, though why picture framing your deck is more than just a style choice becomes obvious here—it provides a factory-finished edge that sits flush against the house. When you install this trim, use stainless steel screws and always pre-drill. I learned the hard way that composite trim is prone to splitting at the ends if you try to force a screw through it without a pilot hole. Also, don’t forget the best way to seal the cut ends of composite boards involves using a specialized paint or sealer to prevent the core from absorbing moisture, especially in that tight, humid space against the house wall.
Leave Room for the Boards to Breathe
The final nuance is the vertical clearance. Your siding should never actually touch the deck boards. You want at least a two-inch gap between the bottom of the siding and the top of the deck. This prevents ‘wicking,’ where the siding sucks up moisture sitting on the deck surface. If your siding is currently touching the boards, you’ll need to trim it back. It feels wrong to cut your house siding, but it’s the only way to ensure air can circulate. It’s these small, technical adjustments that separate a long-lasting professional deck builder project from a weekend job that rots out in five years.
Why an Airtight Seal Is Your Deck’s Worst Enemy
I’ve seen dozens of DIYers and even some ‘pros’ make the mistake of thinking an airtight seal is the gold standard for innovative outdoor living ideas. It’s actually a recipe for disaster. Most people assume that if water can’t get in, the wood is safe. But they forget about condensation and the humidity that naturally builds up behind your siding. If you use high-end composite decking but then seal the expansion gap with heavy-duty silicone, you’re essentially trapping moisture in a dark, warm space. In my years as a professional deck builder, I’ve found that managing moisture is about directed flow, not total blockage. According to research published by the Journal of Light Construction, moisture behind the house wrap needs an exit path via gravity. If you seal the gap perfectly, you create a terrarium for mold.
Does Your Stair Connection Mimic Your Siding Gap?
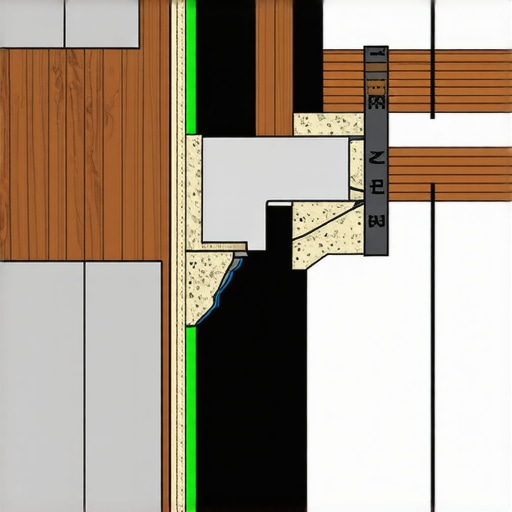
This logic of airflow carries over when you are designing safe and stylish stairs for outdoor decks in 2025. I often see stringers bolted directly against the rim joist without any spacing. Just like the siding gap, a tight connection here traps debris and moisture against the framing. I always recommend using a 1/2-inch spacer or stack of washers to allow water to run behind the stringer. If you don’t, you’ll eventually wonder why your deck stair stringers are cracking at the throat or rotting from the inside out. Even with modern stairs designs for modern outdoor spaces, the physics of water remains the same.
Stop Falling for the Maintenance-Free Myth
Many homeowners buy into the truth about maintenance-free decking claims, thinking that because the boards are plastic-capped, the connection to the house is ‘set and forget.’ The reality is that the house-to-deck transition is the highest-maintenance area of the entire structure. If your builder didn’t use structural screws instead of old-fashioned lag bolts, the ledger can pull away over time, widening that gap and compromising your flashing seal. The most common ‘trap’ I see is failing to account for thermal expansion when installing trim. If you’ve ever noticed why your composite boards are expanding more than expected, imagine what that force does to a tiny piece of finish trim pinned between the deck and the house. It will buckle or rip the siding off its tracks. Always size your trim for peak summer heat. Have you ever fallen into this trap? Let me know in the comments.
If you really want to graduate from ‘amateur’ to ‘expert,’ you need to stop thinking about your deck as a flat platform and start seeing it as a complex water management system. My favorite piece of gear for this isn’t a fancy laser level; it’s my impact driver loaded with specific fasteners. I’ve realized over the years that why I use structural screws instead of lag bolts for ledgers comes down to the shear strength and the fact that they don’t split the wood, which is vital when you are working in that tight space right against the house. When I’m transforming a space with expert deck builder tips, I always keep a bottle of end-cut sealer in my pocket. Every time I trim a board to fit against the siding, I dab that sealer on the raw edge. It’s a five-second habit that prevents the board from soaking up water like a sponge.
The Gear That Separates Pros from Weekend Warriors
Beyond the basics, I swear by using a digital approach before I even pick up a hammer. Personally, why a digital designer is the best move for planning a complex backyard deck is because it allows you to visualize how the stairs and the siding gap will interact in 3D. You can see the flashing details before they are hidden by boards. When it comes to the physical build, I recommend the American Wood Council’s DCA 6 – Prescriptive Residential Wood Deck Construction Guide as your bible. It’s the industry standard that technical pros use to ensure every connection is over-engineered for safety. I also never tackle a project without a set of specialized spacers; the spacing secret for installing composite decking in winter is to use wider gaps to account for the massive expansion that happens once July hits. If you don’t have these in your bag, you’re just guessing.

How do I keep this gap and deck looking new for decades?
Maintenance is where most people drop the ball. You need to perform a ‘gap audit’ every spring. Grab a shop vac or a stiff brush and look for the best way to clean pine needles out of deck gaps, especially that one against the house. Debris there acts like a wet rag against your siding, eventually rotting the very structure you’re trying to protect. If you notice the gap widening, it might be a sign that your deck ledger needs a tension tie to stay secure. I also suggest a quick wash with a non-abrasive cleaner once a year. Learning how to clean grease stains off composite without ruining the finish will save you from a permanent eyesore after your first summer barbecue. It’s not just about the boards; it’s about the integrity of the house-to-deck connection. According to the North American Deck and Railing Association (NADRA), over 40 million decks in the US are over 20 years old and need professional inspection to ensure these transitions haven’t failed.
Where Outdoor Living is Heading in 2026 and Beyond
Looking forward, I predict we are going to see a massive shift toward ‘smart’ drainage. We are already seeing innovative outdoor living ideas with composite decking in 2025 that include built-in sensors to detect moisture levels under the boards. The trend is moving away from just ‘hiding’ the gap and moving toward active ventilation systems integrated into the trim. As we see more composite decking trends in 2025, the focus will be on seamless, indoor-outdoor transitions where the floor level of the house and the deck are perfectly flush, requiring even more advanced flashing tech. If you’re ready to take your project to the next level, I highly encourage you to try installing the bracket that makes your deck stairs feel rock solid. It’s a small hardware upgrade that makes a massive difference in how the deck feels underfoot. Don’t just build a deck; build a structure that outlasts the house itself.
The Hard Truth About My First Deck Gap Disaster
I used to think that a tight seal meant a job well done. But after watching a perfectly good cedar ledger rot because I didn’t leave room for airflow, I realized my mistake. Here are the lightbulb moments that changed everything for me:
- Air is your best friend: Never, ever try to seal the gap between your deck and siding with just caulk; you need airflow to prevent mold and rot.
- Flashing is non-negotiable: If the Z-flashing isn’t tucked behind the house wrap, you’re basically funneling water into your walls.
- Expect the ‘Growth’: Composite boards are alive in the sun. If you don’t account for why your composite boards are expanding more than expected, they will win the fight against your trim every time.
The Gear I Trust to Get the Job Done Right
Over the years, my tool bag has evolved. I no longer guess at my layouts or ‘eye-ball’ the flashing. I firmly believe why a digital designer is the best move for planning a complex backyard deck—it catches these siding transition issues before you even buy a single board. For the physical build, I’ve completely moved away from hardware store lag bolts. The reason we use structural screws instead of old-fashioned lag bolts is because they provide a tighter, more reliable connection to the house frame without the risk of splitting the wood during installation. Finally, I always keep a copy of the American Wood Council’s DCA 6 guide in my truck; it’s the literal bible for residential deck construction safety.
Build a Deck That Your Grandkids Will Enjoy
It’s tempting to rush through the transition details to get to the ‘fun’ part of innovative outdoor living ideas with composite decking in 2025. But taking that extra hour to properly flash, trim, and space your deck against the house is what ensures your home stays safe and dry for decades. You have the knowledge now to avoid the DIY pitfalls and create a space that looks like it was handled by a seasoned professional deck builder. Go out there and make that transition look seamless!
Have you ever dealt with a deck gap that seemed to swallow everything you dropped? Let me know your biggest struggle with siding transitions in the comments below!