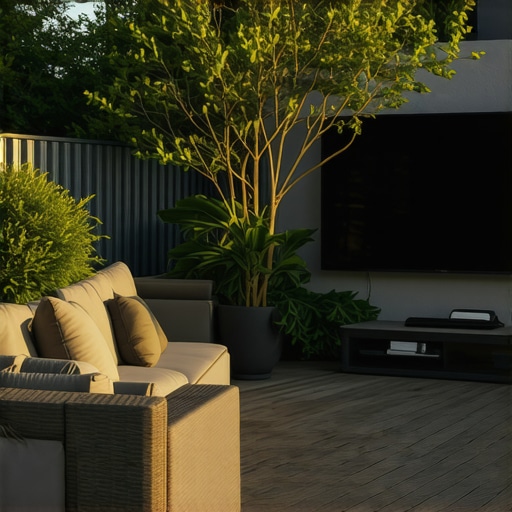
I remember the moment clearly—standing on my outdoor deck, trying to get my new weatherproof TV mounted so I could enjoy those summer evenings with friends. But panic set in when I realized I had no idea how to secure it properly outdoors. The mounting process, which seemed straightforward at first, quickly became a frustrating puzzle of rust-prone hardware, unstable viewing angles, and visions of expensive tech crashing to the ground after the next storm. That was my “lightbulb moment”—I knew I wasn’t alone in this struggle.
The Challenge of Outdoor TV Mounting
Transforming a deck into an outdoor entertainment haven is now more popular than ever. With everyone craving easier ways to enjoy summer nights and sports on the big screen, mounting a TV outside sounds like a perfect solution. But as many homeowners discover, the one-size-fits-all approach just doesn’t cut it. Poorly mounted TVs can be a safety hazard, susceptible to weather damage, or simply become an eyesore.
The key is understanding the unique challenges that outdoor environments pose—like exposure to moisture, temperature fluctuations, and wind—and how they demand specialized mounting solutions. I learned this the hard way early on, installing a bracket meant for indoor use that quickly rusted and failed.
Today, I’ll walk you through proven methods to securely and safely mount your outdoor TV, based on my own experiences and lessons learned from a professional deck builder. Whether you’re upgrading your deck to host movie nights or just want a sturdy setup for game day, this guide will ensure your setup stands up to the elements.
Is Hidden Hardware Worth the Hassle?
One of my biggest mistakes was choosing a mount that looked sleek but used exposed hardware vulnerable to corrosion. Over time, I faced loose bolts and uneven alignment, which could’ve been dangerous. Trust me, investing in concealed mounting solutions not only enhances aesthetics but also shields components from moisture and debris. If you want to see how thoughtful design can elevate your outdoor space, check out some inspiring ideas on maximizing outdoor space.
As we dive into the specific steps to mount your TV securely, remember: proper installation isn’t just about convenience—it’s about ensuring safety and longevity in your outdoor living area.
Choose the Right Mounting Hardware
Begin by selecting a mount specifically designed for outdoor use, preferably one with sealed joints and rust-resistant materials like aluminum or stainless steel. I once tried a generic indoor mount on my deck, and within a year, corrosion had loosened the hardware, risking the TV’s safety. Always opt for mounts rated for the weather conditions in your area, ensuring longevity and safety.
Assess the Wall or Mounting Surface
Next, evaluate the surface where you’ll attach the mount. For a wood deck post or wall, use a stud finder to locate sturdy framing behind the siding or paneling. If mounting onto concrete or masonry, you’ll need appropriate anchors and bits. In my experience, drilling into a solid concrete pillar required a hammer drill and corrosion-proof anchors, which prevented the mount from wobbling or pulling loose over time.
Drill and Prepare the Holes
Mark your drilling points precisely, matching the mount’s bracket holes with the studs or anchors. Use a level to ensure perfect alignment. When I installed a bracket on my brick pillar, I pre-drilled holes with a masonry bit, inserted heavy-duty anchors, and used high-quality bolts with exterior-grade washers. This prevented any wobbling and maintained perfect alignment—crucial for a safe, stable setup.
Attach Mounting Bracket Firmly
Secure the bracket with corrosion-resistant hardware, tightening bolts gradually in a crisscross pattern to evenly distribute the load. During my project, I used a torque wrench to ensure consistent tightness, avoiding over-tightening which could crack the material. Proper fastening prevents future loosening caused by wind or vibrations.
Secure the TV to the Mount
Follow the manufacturer’s instructions to attach the TV bracket, ensuring all screws are tight and properly aligned. Use locking screws or safety screws to prevent theft or accidental detachment. I remember securing my TV with lockable screws; it gave me peace of mind during storms and high winds.
Protect the Wiring
Run the cable through weatherproof conduit or enclosures to shield against moisture and UV damage. Conceal wiring as much as possible for aesthetics and safety. I installed a waterproof conduit along the wall, which not only protected the cables but also maintained a clean appearance.
Test Stability and Safety
Finally, gently shake the mounted TV to check for wobbling or looseness. Confirm all bolts are tight and that the mount is securely anchored. Proper testing saved me from potential damage when a strong gust tried to sway the setup during a storm—preventing costly accidents.
 When it comes to outdoor living, many believe it’s simply about choosing the right materials or designing a stylish deck. However, professionals know there’s a multitude of subtle factors that can make or break your project—and these are often misunderstood or overlooked. For instance, a common myth is that all composite decking boards behave the same; in reality, differences in formulations and installation methods can significantly impact durability and maintenance. Selecting the wrong type or neglecting proper ventilation can lead to warping, mold, or premature wear. Similarly, many assume that installing stairs is just about aesthetics—think safety is secondary. But improper stringer calculations or inadequate railing height can result in dangerous trip hazards or code violations. For example, the misconception that thicker posts always mean better support ignores the importance of proper spacing and anchoring techniques, which are critical for safety and longevity. Moreover, the role of a skilled deck builder extends beyond just construction; they understand how environmental nuances—like soil stability and wind exposure—affect long-term performance. This expertise helps avoid costly mistakes, such as undersized footings or inappropriate material choices for your climate. Don’t forget, even seemingly minor details like correct slope grading or weatherproofing joints are vital in preventing deterioration over time. As studies highlight, neglecting these advanced considerations can reduce the lifespan of your outdoor space considerably. So, when planning your project, aim to go beyond the basics and focus on these hidden nuances. A professional’s insight can save you from future frustrations and expenses. Have you ever fallen into this trap? Let me know in the comments and share your experiences.Maintaining your outdoor deck, stairs, and mounting hardware is essential to ensure they stay safe, functional, and visually appealing for years to come. One of my go-to tools for ongoing maintenance is an electric heat gun combined with a high-quality scrubbing brush. I use the heat gun to gently soften and remove stubborn debris and old sealants from surface joints, especially around stair stringers where dirt tends to accumulate. Followed by a thorough scrub with a stiff-bristled brush, this combo keeps surfaces clean without damaging the material. For proper waterproofing and long-term protection, I swear by a professional-grade penetrating sealant. Applying it with a foam brush ensures even coverage in tricky corners and joints, particularly where moisture tends to collect. Regular inspections are also crucial—every season, I check hardware like mounting brackets, fasteners, and railings, tightening or replacing components as needed. Using a torque wrench ensures bolts are secured to manufacturer specifications, preventing loosening over time caused by wind or temperature fluctuations, which newer outdoor environments will see more of—see the latest guidance from structural engineering experts to stay ahead of weather-induced wear. Adopting a preventative mindset means catching issues early—like rust or corrosion on hardware—and addressing them before they escalate into safety hazards. I also recommend maintaining your composite decking with a gentle cleaner suitable for your material, avoiding power washing, which can cause surface damage. Instead, soft brushes and eco-friendly cleaners, applied with a spray bottle, do the job effectively. As we look to the future, advancements in smart maintenance sensors might soon notify us of structural shifts or moisture build-up, further simplifying long-term care. But for now, establishing a routine using these precise tools and methods truly extends the lifespan of your investment. How do I keep my stairs and outdoor mounts working over time? The secret is in detailed inspections, timely repairs, and the right tools for cleaning and sealing. To get started, try using a foam brush to apply a high-quality sealant into those hard-to-reach joints—this step alone can dramatically increase your deck’s durability and safety for seasons to come. Remember, a well-maintained outdoor space isn’t just about appearance; it’s about creating a safe, reliable haven for years of enjoyment.
Lessons That Changed My Outdoor Living Perspective
One of the biggest revelations was realizing that weatherproofing isn’t just about picking the right materials; it’s about understanding how different environments affect hardware longevity. I once thought stainless steel was enough, but I learned that specific coatings and proper installation techniques are crucial for lasting protection.
Another lesson was the importance of planning wiring routes before installing the mount. Rushing this step led me to redo work twice, proving that early measurements and weatherproof conduit planning save time and prevent future headaches. It emphasized that patience and precision are key in outdoor projects.
I also discovered that professional-grade anchors and fasteners aren’t a luxury—they’re a necessity for safety. Using hardware that’s rated for your climate and exposure ensures your outdoor TV stays secure through storms and strong winds, giving peace of mind during weather surprises.
Finally, I realized that integrating aesthetics with functionality—like concealed hardware and clean cable management—elevates the entire outdoor space. It’s not just about mounting a TV; it’s about creating a seamless, inviting entertainment zone that endures the tests of time and weather.
Tools and Resources That Made All the Difference
- Wiha Precision Screwdriver Set: Reliable for tightening small screws on mounts and brackets, especially in tight outdoor spots. Trusted for its durability and grip.
- Milwaukee M12 Cordless Hammer Drill: Essential for drilling into masonry or concrete. Its power and portability streamline the installation process.
- Weatherproof Conduit and Connectors by Legrand: Provides a foolproof way to protect wiring. I rely on these for every outdoor AV setup because they last and prevent corrosion.
- DeckMax Sealant: A professional-grade sealant that I frequently use for sealing around mounting points and conduit entry points to keep out moisture and dirt. It’s a game-changer for long-term protection.
Your Outdoor Entertainment Journey Awaits
Equipping your outdoor space with a securely mounted, weather-resistant TV transforms summer evenings and game days into unforgettable moments. Remember, the key to success lies in meticulous planning, using the right tools, and paying attention to the small details that safeguard your investment. Every project I’ve undertaken has taught me that patience and quality craftsmanship don’t just lead to a safer setup—they create an outdoor sanctuary where memories are made. Now, it’s your turn to elevate your outdoor entertainment—start planning, invest in good hardware, and enjoy the views for years to come.