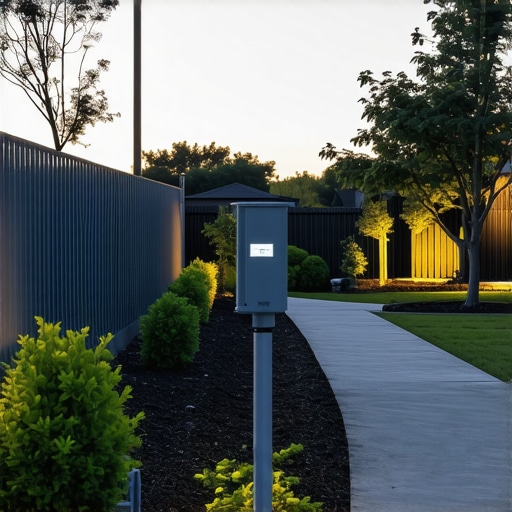
One evening, I was standing on my deck, admiring the subtle glow of my outdoor lighting, when suddenly, half the lights flickered out. Frustration bubbled up—I’d invested so much into creating a cozy backyard oasis, only to have my lighting setup betray me just when I needed it most. That lightbulb moment made me realize something: choosing the right low-voltage transformer isn’t just a minor detail; it’s the heartbeat of your outdoor lighting system.
Why Picking the Right Transformer Can Make or Break Your Lighting Experience
Outdoor lighting transforms dusk into a magical scene, inviting family and friends to enjoy your backyard long after sunset. But without the proper low-voltage transformer, your beautifully illuminated space can become a flickering frustration. The enormity of the task—lighting a large backyard—demands a transformer that can handle the load reliably, ensuring every bulb glows evenly and safely. Early on, I learned the hard way that a cheap or under-spec transformer can lead to dimming lights, frequent failures, and even potential safety hazards.
In fact, according to the National Electrical Code (NEC), the correct transformer size is crucial for safe and effective outdoor lighting. Choosing the right transformer isn’t just about wattage—it’s about ensuring longevity, safety, and a truly enjoyable ambiance. My mistake was selecting a transformer based solely on price, neglecting my backyard’s specific needs. That oversight resulted in flickering lights and a lot of frustration.
Don’t worry—I’ll walk you through what to look for and how to select a transformer that will keep your outdoor space glowing beautifully for years to come. Whether you’re planning a small pathway or a sprawling backyard lighting display, understanding the ins and outs of low-voltage transformers will save you time, money, and headaches.
Ready to ditch those flickering lights? Let’s dive into how to pick the perfect low-voltage transformer for your large backyard setup—and avoid making the same costly mistakes.
Calculate Your Power Needs Precisely
Begin by listing all the fixtures you plan to install, noting each bulb’s wattage. For example, if you have 20 pathway lights at 3 watts each, that totals 60 watts. Add all fixtures to determine the total load. Use a portable power meter during a test run if possible, to ensure accuracy. I once miscalculated my backyard landscape lighting, leading to flickering because the transformer was underpowered. To avoid this, always add a buffer—choose a transformer with at least 20% higher wattage capacity than your total load for expansion and safety margins.
Choose a Transformer with Adequate Capacity
Match or slightly exceed your calculated wattage, never underload. For expansive backyard lighting, opt for a transformer designed for large systems—generally between 300 to 600 watts. A good rule of thumb is to pace yourself: a transformer that’s too small strains under the load, resulting in dimming or flickering. When I upgraded from a 200-watt to a 400-watt transformer, I immediately noticed more consistent brightness across my lighting zones—no more flickering during late evenings.
Select a Transformer with Safety and Durability Features
Look for models with overload protection, weatherproof enclosures, and corrosion-resistant components. Outdoor conditions demand ruggedness; metals like stainless steel or anodized aluminum resist corrosion effectively. I installed a transformer with a built-in fuse and waterproof casing, which withstood a heavy rainstorm without any issues. Such features prolong the lifespan of your system and reduce maintenance costs.
Ensure Compatibility with Your Wiring and Fixtures
Use 12 or 14-gauge low-voltage wiring compatible with your transformer’s output. For large systems, thicker wiring reduces voltage drop, ensuring all fixtures receive adequate power. When connecting, double-check that the transformer supports the number of circuits you plan: some models offer multiple outputs, simplifying wiring complexity. A mistake I once made was using thin wiring for my high-wattage landscape lights, which caused dimming—upgraded to thicker cable, and the lights became perfectly uniform.
Plan Your Installation for Future Expansion
Choose a transformer with extra capacity for potential future additions. Installing a slightly larger transformer now can save you from expensive rewiring later. For my large backyard, I installed a 600-watt transformer, which accommodated additional ambient lights and decorative features three years down the line, without needing a new transformer. Also consider future-proofing by selecting models with programmable timers or Dusk-to-Dawn sensors for convenience.
Finally, always comply with local electrical codes, and if unsure, consult with a professional for complex or large-scale systems. Proper planning upfront ensures your outdoor lighting stays reliable, safe, and beautiful for years to come.
Many homeowners believe that choosing the most affordable composite decking or the simplest stair design is always the best way to save money and time. However, this misconception often leads to costly mistakes and compromised safety. In my experience, one common myth is that all composite decking is created equal; in reality, the material’s quality, core composition, and finish significantly impact its durability and ease of maintenance. For example, mineral core boards offer superior weather resistance, which is essential for longevity in outdoor environments.
Are We Overlooking the Fine Details That Make a Difference?
Another nuance many overlook is the importance of proper framing and support for stairs and decks. Inadequate support or incorrect joist spacing can cause sagging or dangerous instability over time, even if the decking surface appears perfect. Beyond structural concerns, the aesthetic harmony between stairs and decks requires specialized planning. Quick, generic solutions often result in uneven riser heights or awkward transitions, which diminish safety and visual appeal. According to a study published in the Journal of Construction Engineering, precision in framing and support significantly prolongs lifespan and reduces maintenance costs.
One frequent mistake is neglecting the need for proper drainage and moisture control, which can lead to rot and deterioration despite using high-quality materials. Installing flashing tape and sealing joints correctly are critical steps that many DIYers overlook, leading to early failure of structural components. As I’ve learned from professional guides, such as those on composite decking trends, integrating these small details enhances overall durability.
When designing outdoor spaces, it’s tempting to focus solely on surface aesthetics or quick fixes. Nonetheless, taking the time to understand the nuanced differences—in material choice, support systems, and detailed installation techniques—can dramatically improve both safety and lifespan. Don’t fall into the trap of oversimplification; your outdoor living area deserves thoughtful planning rooted in expert insights. Have you ever fallen into this trap? Let me know in the comments and share your experiences!
Maintaining your deck, stairs, and composite outdoor features is crucial to ensuring longevity and safety. I personally rely on a set of dedicated tools and methods to keep everything in top shape, starting with a high-quality digital moisture meter like the Protimeter Surveymaster. This device helps me detect hidden moisture issues beneath composite decking and supports proactive maintenance, preventing rot and deterioration. For cleaning, I swear by a power washer with adjustable pressure settings—aiming for around 1500 psi—to remove dirt and algae without damaging the surface. Regular inspections with a flashlight and mirror allow me to identify early signs of decay or loose fasteners, especially on stair stringers and support beams.
How Do I Maintain Outdoor Living Elements Over Time?
Incorporating a routine schedule—quarterly checks for loose fittings, annual deep cleaning, and timely sealing—ensures that your outdoor spaces stay inviting and safe. I also recommend investing in weather-resistant fasteners like stainless steel screws and rustproof brackets, which significantly reduces maintenance requirements. Using protective coatings designed for composite materials, such as those from SealOnce, can extend the life of your decking and stairs by preventing moisture infiltration. Remember, superior tools make the process more efficient and accurate, saving you money and effort in the long run. Looking ahead, I predict that IoT-connected sensors will become more integrated into outdoor projects, providing real-time monitoring of moisture and structural integrity—making smart maintenance a standard. For now, I encourage you to try out a moisture meter during your next inspection session; it’s an advanced tip that truly pays off in early problem detection.
What I Wish I Knew Before Wiring My Backyard Oasis
One of the most eye-opening lessons I learned was that not all transformers are created equal—skimping on quality or capacity can turn a beautiful backyard into a flickering nightmare. The secret is understanding that your transformer is the backbone of your outdoor lighting; it needs to match your specific needs and withstand weather challenges. Choosing a transformer that exceeds your current load might seem like overkill, but it actually offers peace of mind and flexibility for future additions.
How Small Details Make a Big Difference in Outdoor Spaces
From support support systems to moisture barriers, I discovered that overlooking tiny elements can cause big problems down the line. For example, proper drainage and sealing are often neglected. These small steps significantly extend the life of your deck and stairs, saving you from costly repairs. Investing in quality fasteners and considering future-proof features like smart timers transformed my backyard from a temporary project into a durable retreat. The key is recognizing that every detail counts—what may seem minor now could prevent major headaches later.
Turning Experience into Confidence: My Top Tips for Outdoor Living
Building a stunning, safe outdoor space takes more than just good intentions; it requires intentional planning and reliable tools. Regular maintenance, like using a moisture meter or pressure washer, can catch issues early before they escalate. I’ve found that understanding the nuances—like correct joist spacing, proper flashing, and wiring techniques—makes all the difference. For those looking to upgrade or start anew, I highly recommend exploring cutting-edge composite decking trends and considering professional insights to make your outdoor dreams last for years to come.