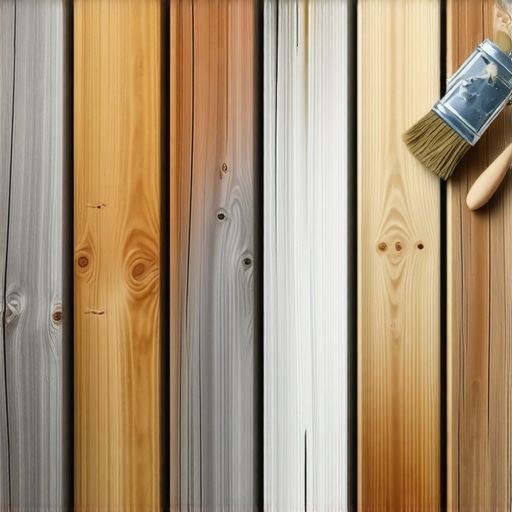
I remember the first warm weekend after a long winter, stepping onto my deck only to be greeted by a dull, weathered gray surface where vibrant wood once shined. That sinking feeling hit me—I had neglected my outdoor space for too long. It was frustrating to see my beautiful deck fade into an uninviting eyesore, losing its character and charm. Have you ever felt that sting when your backyard retreat just doesn’t look the same anymore? If so, you’re not alone. Many homeowners wrestle with faded, gray decks that seem to have lost their luster despite their best efforts to maintain them.
Why a Faded Deck Can Ruin Your Outdoor Oasis
Over time, exposure to sun, rain, and countless outdoor adventures can strip your deck of its original color and vibrancy. This isn’t just about aesthetics—faded decks can also be more susceptible to further damage, like cracking or splintering, which can lead to costly repairs if ignored. Restoring your deck’s color isn’t just about freshening up the look; it’s about protecting your investment and reclaiming your outdoor sanctuary. I’ve learned from my own mistakes that tackling this problem early makes a huge difference. Early on, I tried to ignore the dullness, thinking a good cleaning would suffice. Turns out, that was a rookie mistake that many make—cleaning alone isn’t enough to bring back that beautiful hue. Instead, understanding the right restoration methods can transform your weathered surface back into a stunning centerpiece of your outdoor living space.
Is Restoring a Gray Deck Actually Worth the Effort?
Initially, I wondered if all the fuss was overblown or if my efforts would really pay off. I also worried about wasting time and money on something that might not give me the results I desired. Believe it or not, the secret lies in applying the right techniques and products—like specialized restorers and sealers—that can breathe new life into worn-out wood. Early in my journey, I made the mistake of using just a garden hose and generic cleaner, which did little to improve the color. It was only when I consulted experts and invested in proven restoration products that I finally saw a real difference. For anyone doubting whether it’s worth it, remember—your deck frames your entire outdoor experience, and a fresh, vibrant surface can dramatically enhance your backyard’s appeal. For insights into current decking trends and the best materials to consider, I recommend checking out this comprehensive guide on composite decking trends in 2025.
Now that I’ve set the stage, let’s dive into the practical steps to bring back that beautiful gray—step by step, neighbor to neighbor. Whether you’re determined to restore your existing deck or just want to learn what works best, I’ll share everything I’ve discovered along the way, so you can enjoy your outdoor space once more with confidence.
Strip the Old Finish and Clean Thoroughly
Start by removing any existing stain, paint, or sealant using a deck stripper. Use a stiff-bristled brush or a power washer set to a gentle pressure—think of it as giving your deck a gentle scrub to lift the stubborn layers of grime and old coatings. When I did this for my own deck, I wore goggles and long sleeves to protect against splashes, and I was surprised at how much that old, gray weathered layer peeled off, revealing fresh-looking wood beneath. Be cautious with pressure washers; too high pressure can gouge the wood. After stripping, rinse thoroughly and allow the surface to dry completely—this can take 24-48 hours, depending on humidity.
Sand and Smooth the Surface
Once dry, lightly sand the deck to smooth out rough patches and even out surface inconsistencies. Use a medium-grit (around 120-grit) orbital sander, working along the grain of the wood for a uniform finish. If you notice splinters or raised grain, sand them down gently to prevent future splinters and ensure a smooth application of finishing products. This step acts like giving your deck a manicure—it prepares the surface for optimal absorption of stain or sealer. During my project, I used a handheld pad sander for tight corners, which made a noticeable difference in the final look.
Apply a Restorative Deck Cleaner or Brightener
Next, apply a deck brightener or restorative cleaner to neutralize any remaining stain and restore the wood’s natural color. This step enhances the wood’s appearance and prepares it for sealing. Follow the manufacturer’s instructions carefully—most require mixing with water and application with a brush or sprayer. When I did this, I noticed the wood’s usual dull gray turn into a warm, inviting hue, creating a perfect base for the stain or sealer. This process also helps remove mold, mildew, and algae, which can contribute to color fading over time, ensuring your deck remains vibrant longer.
Seal and Protect with the Right Finish
Choose a high-quality sealant or stain suitable for your climate and the type of decking material. For composite decks, opt for a product designed specifically for synthetic surfaces, which will protect against UV damage and wear. For wooden decks, consider a semi-transparent stain that enhances grain and offers UV protection. During my experience, sealing immediately after cleaning prevented new dirt from settling, and I applied two coats for better durability. Proper sealing is like putting on a raincoat for your deck—it locks in the fresh look and shields it from future weathering.
Maintain with Routine Upkeep
After restoration, regular maintenance will prolong your deck’s life and keep it looking great. Sweep away debris weekly and wash with a gentle soap and water every few months. For composite decks, periodic cleaning with a soft-bristle brush prevents dirt buildup that can dull appearance. For wooden decks, reapply sealant every two to three years or as recommended to maintain protection. In my case, setting a calendar reminder for annual inspections helped me catch early signs of wear, avoiding costly repairs down the line.
Additional Tips for Enhancing Your Outdoor Space
Consider upgrading your stairs, railings, or lighting to complement your restored deck. For example, modern outdoor living ideas can turn your simple space into a backyard retreat. When redoing stairs, think about designing seamless transitions that invite relaxation. Small visual upgrades like new lighting or furniture can dramatically boost your deck’s appeal without major renovation.
While many DIYers and even seasoned professionals focus on choosing the right composite decking material or designing appealing stairs, there’s a lesser-known nuance that can make or break your outdoor project. A common misconception is that all composite decks are virtually maintenance-free and impervious to issues like fading, warping, or mold. However, this oversimplification often leads homeowners into costly pitfalls. For example, believing that premium brands guarantee perfect performance without proper installation or maintenance is a trap many fall into. The truth is, even the best materials require correct installation—such as precise joist spacing and adequate drainage—to perform optimally over time.
Another myth revolves around the assumption that surface cleaning alone restores a degraded composite deck. In reality, neglecting to apply appropriate sealants or protective coatings after cleaning can leave your surface vulnerable to UV damage and staining. Moreover, many overlook the importance of choosing the right fastening systems. Using cheap or incompatible screws can lead to squeaking, loosening, and unsightly gaps, which compromise the integrity and aesthetics of your outdoor space.
Advanced builders understand that the seemingly small details—like proper edging, seamless transitions, and correct stair riser height—are crucial for safety and visual coherence. Improperly installed stairs, for instance, not only pose safety risks but also diminish the overall appeal of your deck. To avoid these errors, it’s beneficial to engage a professional deck builder who understands the intricacies of outdoor materials and design. They can help you select the best composite decking trends in 2025 and ensure proper installation, saving you from costly repairs down the line.
In addition, outdoor living isn’t just about aesthetics; it’s about creating a durable, functional space. Overlooking climate-specific design considerations—such as ventilation, shading, and drainage—can lead to premature degradation or discomfort. A sophisticated understanding of these nuances elevates your project from good to excellent.
Remember, the devil is in the details. By recognizing and avoiding these common misconceptions and advanced mistakes, you ensure your outdoor living area remains beautiful, safe, and low-maintenance for years to come. Have you ever fallen into this trap? Let me know in the comments.
Keep Things Running Smoothly: Tools and Tips for Deck Maintenance
Ensuring your outdoor living space remains beautiful and functional requires more than just DIY enthusiasm; it demands the right tools and a strategic approach. I personally rely on a combination of specialized equipment and software to streamline my deck maintenance process and achieve lasting results.
One indispensable tool I use is a digital moisture meter. This device provides precise readings of wood and composite moisture content, which is critical before sealing or staining. Too much moisture can lead to warping or mold, but with a reliable moisture meter, I can determine exactly when my deck is ready for the next treatment, avoiding costly mistakes and prolonging its lifespan. I recommend models like the Tramex Moisture Meter, which balances accuracy with ease of use.
For cleaning, a pressure washer equipped with adjustable settings is essential. I prefer models with variable pressure control, like the Simpson MegaShot, as they give me the ability to remove dirt and old finishes without damaging the surface—especially important for composite decking, which can be susceptible to high-pressure damage. Additionally, a good orbital sander with variable speed helps smooth out rough patches after stripping and before applying sealant, ensuring an even finish.
On the software side, I utilize deck design programs such as SketchUp or specialized CAD tools. These allow me to plan upgrades, visualize the space, and determine the best placement for stairs or railings. For instance, I recently used a 3D modeling app to simulate the lighting effects on my deck at night, which helped me choose the optimal placement of low-profile LED lights, ensuring both safety and ambiance. These digital tools save time and reduce errors, especially when coordinating complex projects, and they’re becoming increasingly essential for serious outdoor builders.
How do I maintain my deck over time?
Consistent inspection is key. I set seasonal reminders to check for loose fasteners, damaged boards, or signs of mold and mildew. I also make it a habit to clean the surface with a gentle soap solution and a soft-bristle brush to prevent dirt buildup. Applying sealants or stains with a quality brush or roller—preferably with a long handle to reach all areas—ensures even coverage and longevity. Remember, choosing a high-quality product specifically formulated for your decking material, like those discussed in this guide, can drastically improve durability.
Looking ahead, the trend of integrating smart technology into outdoor maintenance, such as IoT-enabled moisture sensors and automated cleaning systems, is set to grow. Staying updated with these innovations will help you keep your deck in top shape with less effort.
If you’re ready to elevate your maintenance game, I highly recommend trying out a digital moisture meter combined with a reliable pressure washer. These tools have transformed how I approach outdoor upkeep, making the process more efficient and effective—ensuring many more seasons of beautiful outdoor living.

What I Didn’t Expect to Face When Reviving My Deck
One of the most unexpected lessons was realizing that even with the right tools, patience and timing can make or break your project. I once rushed the drying process after stripping, only to see the old gray hue return quicker than I anticipated—proof that taking your time isn’t just advice; it’s essential for longevity. Another revelation was how critical proper lighting and drainage were—small details that can turn a beautifully restored deck into a perpetual maintenance headache if overlooked. The biggest lightbulb moment, however, was understanding that restoration isn’t a one-time fix but a commitment to ongoing care. Investing in quality sealants and establishing a regular upkeep routine has transformed my outdoor space into a true retreat, reducing my repair bills and boosting curb appeal in the process.
Tools and Resources That Changed My Approach
If I had to pick three essentials that elevated my deck restoration journey, they would be: first, a reliable moisture meter like the Tramex, which provided real data guiding my sealing schedule; second, a pressure washer with adjustable settings, such as the Simpson MegaShot, vital for gentle but effective cleaning; and third, digital design tools like SketchUp, which helped me visualize upgrades and plan seamless transitions. Additionally, I found the comprehensive guide on composite decking trends in 2025 invaluable for choosing modern materials that stand up to wear and weather. These resources didn’t just improve my results—they cost me less time, money, and frustration.
Seizing the Moment for Your Outdoor Sanctuary
Your outdoor space is an extension of your home, a place where memories are made and relaxation begins. The effort you put into restoring and maintaining your deck fuels confidence and pride in your living area. Don’t wait for the next season or weather setback—embrace the process today. With the right knowledge, tools, and a willingness to act, you can turn a weathered surface into a vibrant focal point that invites family and friends alike. Remember, every step you take towards caring for your deck now sets the stage for countless enjoyable moments ahead. So, are you ready to elevate your outdoor living space and enjoy the satisfaction of a job well done? Share your stories or questions in the comments below and let’s grow together in this journey toward beautiful, durable decks.