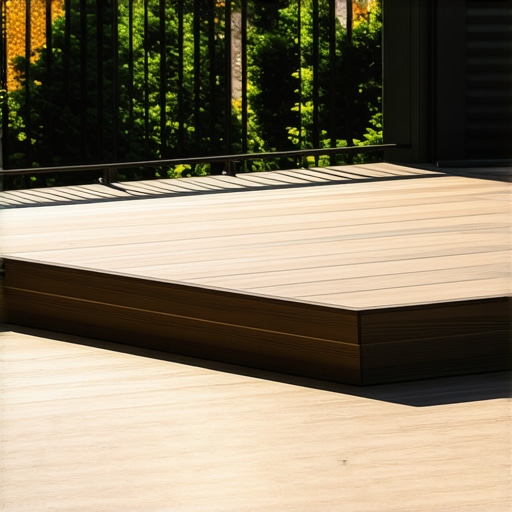
Ever stepped outside, only to stumble over a jumble of exposed wires lurking beneath your deck? I remember the first time I did—my bare foot landing right on an awkwardly snaked-up extension cord. It wasn’t just painful, it was a wake-up call. That messy situation not only marred the beauty of my outdoor space but also raised safety concerns I’d never considered. If you’ve ever felt frustrated by unsightly and tripping hazards lurking just out of sight, know that you’re not alone.
In this article, we’ll tackle the age-old dilemma of hiding ugly, and sometimes dangerous, wires under your deck railing. I’ll share tips from my personal experience, proven techniques, and common pitfalls to avoid. By the end, you’ll know how to transform that cluttered under-deck nightmare into a sleek, safe, and tidy extension of your outdoor living area.
Why Wires Turn into a Serious Problem—and How to Tame Them
Unkempt wires aren’t just an eyesore; they pose real safety risks. Tripping over exposed cords is one thing, but potential electrical hazards can be downright dangerous. Early on, I made the mistake of tucking wires haphazardly along the deck skirt, thinking I’d hide them visually. Instead, I just created a tangled mess that worsened over time, especially after weather exposure. Trust me, a little foresight and proper planning go a long way.
The key is to conceal these wires effectively without compromising accessibility or safety. There are clever methods I’ve discovered through trial and error—methods that will keep your outdoor space looking pristine and ensure peace of mind. Whether you’re installing string lights, outdoor speakers, or security cameras, knowing the right tricks will make all the difference.
Have you ever faced this exact problem—wires that seem to multiply with each project? If so, you’re in good company. Let’s explore how to conquer this common issue and turn your deck into a safe, clutter-free oasis.
Is Concealing Wires Actually Worth the Effort?
Some skeptics argue that hiding wires is overkill or unnecessary. I admit, I initially thought so too. But after witnessing the deterioration of exposed cords due to weather and the near-miss trips, I changed my tune. Proper concealment not only boosts your deck’s aesthetics but extends the lifespan of your electrical accessories. Remember, a short circuit caused by water and exposure can lead to costly repairs—something no homeowner wants.
Early in my DIY journey, I also underestimated the importance of using weatherproof conduits and proper fasteners. These small, critical details significantly upgraded my wiring setup, ensuring durability and safety. For in-depth insights, I recommend checking out the current trends in composite decking [here](https://deckdesignbuild.com/composite-decking-trends-2025-the-ultimate-guide-for-outdoor-enthusiasts), which emphasize not just style but resilience.
In the next sections, I’ll walk you through proven methods to hide those wires discreetly, securely, and professionally, so you can enjoy your outdoor haven without worry or clutter. Ready to dive into those solutions? Let’s get started!
Measure and Plan Before You Begin
Start by assessing the length of wires you need to hide and the best routes from power sources to their outlets or fixtures. Use a tape measure to determine exact distances, and sketch a simple diagram to visualize the wiring path. This clarity helps prevent under- or over-estimating materials and ensures a clean finish. I once misjudged a wire length, ending up with a loose loop that caught on a passing chair, so double-check your measurements for a seamless look.
Choose Weatherproof Conduits and Fasteners
Select outdoor-rated, weatherproof conduit tubing made from PVC or flexible flex conduit designed for exposure. These protect your wiring from moisture, UV damage, and pests. Secure the conduit with stainless steel band clamps or zip ties, making sure they’re tight but not crimping the conduit. Using corrosion-resistant fasteners is critical; I learned this the hard way when rusted clamps caused a wire sag after just one rainy season. Proper fasteners maintain a neat, secure installation that withstands the elements.
Install Conduits Along the Railing or Deck Skirt
Run the conduit along the underside of your deck railing or skirt, anchoring it at intervals with clips or anchors that screw into the framing. Keep the conduit close to the structure to minimize movement and visual distraction. When I installed mine, I used exterior-grade clamps placed every 16 inches, which kept the conduit firmly in place and prevented sway. Ensure that the conduit follows natural curves and contours, avoiding sharp bends that could damage the wires inside. You can also paint or stain the conduit to match your deck’s color scheme for added aesthetic integration.
Hide the Conduit Path with Trim or Decorative Coverings
For a polished look, consider covering the conduit with decorative trim, lattice, or custom-built enclosures that blend with your deck design. This approach disguises wiring while maintaining accessibility for future upgrades or repairs. I once built a wooden trim box that doubled as a planter, cleverly hiding the conduit and adding beauty. Just remember, access panels or removable covers are essential for maintenance without needing to dismantle your entire setup.
Secure and Test Your Wiring System
Before finalizing, turn on your wires to check for proper connection and ensure no snags or shorts. Test all fixtures—lights, outlets, or speakers—to confirm functionality. Once satisfied, tighten all fasteners, and perform a weather check, perhaps during rain, to see if any water infiltration occurs. Making these checks saved me from later troubleshooting electrical issues caused by overlooked leaks or loose fittings. Proper securing ensures your wiring remains safe and functional over the years.
Maintain Regular Inspection and Upkeep
Periodically inspect your wiring for signs of wear, corrosion, or damage. Keep conduit clear of debris and verify fasteners remain tight. If you notice any issues, address them immediately to prevent hazards. Routine maintenance prolongs the lifespan of your wiring system and preserves your outdoor space’s safety. My experience teaches that a quick annual check can save a lot of trouble, ensuring your deck remains both beautiful and secure.
When it comes to composite decking, many homeowners and even some professionals fall into misconceptions that can lead to costly mistakes and subpar results. Let’s dig deeper into what most people overlook, challenge some common beliefs, and reveal nuances that can elevate your outdoor project from average to outstanding.
One widespread myth is that all composite decking is maintenance-free. While it’s true that composite materials generally require less upkeep than wood, they aren’t entirely carefree. Neglecting periodic cleaning or avoiding inspections can lead to mold, mildew, and staining issues. According to a recent study by the American Society of Homeowners, regular maintenance extends the lifespan and aesthetic appeal of composite decks significantly.
A common trap during deck installation is underestimating the importance of proper framing and support. Many assume that choosing good materials alone guarantees durability, but improper joist spacing or inadequate ventilation can cause warping or sagging over time. For example, gaps and insufficient support can allow moisture to collect, accelerating material deterioration, which is often overlooked by DIYers eager to cut costs.
Thinking that composite stairs don’t need special consideration? Think again. Stairs are a high-traffic area prone to wear and accident risk. Proper riser and tread design, with attention to slip resistance and safety codes, can prevent future hazards. An advanced error I see frequently is overlooking the importance of consistent stair stringer spacing and secure fastening systems—details that create a safe, long-lasting staircase.
But perhaps the most overlooked aspect in outdoor living is seamless transitions between deck levels or adjoining spaces. Failing to plan for proper drainage and level transitions can result in water pooling or even structural compromise. For instance, building stairs without accounting for local grade variation may cause uneven steps or water runoff issues. My experience suggests that consulting comprehensive guides, like those on creating seamless transitions, helps avoid these pitfalls.
Here’s a question that advanced DIYers and pros alike should ask: How do material choices and installation techniques influence the long-term behavior of composite structures under fluctuating environmental conditions?
Research from the National Association of Home Builders indicates that using high-quality fasteners, ensuring proper ventilation, and selecting weather-resistant materials are critical for longevity, especially in harsher climates. For example, mineral core composite decking offers enhanced resistance to moisture and temperature swings, a nuance that isn’t widely appreciated.
Have you ever fallen into this trap? Let me know in the comments or reach out through our contact page. Remember, understanding these hidden nuances equips you to build safer, more durable, and visually appealing outdoor living spaces that stand the test of time.
Tools That Make Maintenance Easier Than Ever
Maintaining a beautiful and durable outdoor space requires the right tools. I personally rely on a high-quality cordless oscillating tool for delicate sanding and cutting tasks, especially when installing or repairing composite decking. Its versatility saves time and minimizes damage to surrounding materials. For cleaning, I swear by a pressure washer equipped with adjustable nozzles; it effectively removes dirt, mold, and stains from surfaces without risking damage when used at the correct pressure settings—generally around 1500 to 2000 PSI for composite surfaces. Regular cleaning extends the lifespan of your decking and keeps it looking fresh.
Software That Keeps Projects on Track
If you’re planning a larger project—such as adding new stairs or expanding your deck—using 3D design software like SketchUp or specialized deck-design apps helps visualize the final outcome. These tools allow you to experiment with layout, check measurements, and identify potential issues before starting construction. I use these extensively to plan custom features, ensuring that everything fits perfectly and meets safety standards. This proactive approach minimizes costly mistakes and keeps the project moving smoothly.
Adopting Smart Maintenance Strategies
Long-term results hinge on consistent upkeep. I recommend scheduling seasonal inspections to identify possible issues early, such as loose fasteners or signs of wear. Applying a high-quality, UV-resistant stain or sealant annually protects the surface from sun damage and moisture infiltration. For composite decks, avoid harsh chemical cleaners; instead, opt for gentle, non-toxic solutions like vinegar and water for routine cleaning—especially since most composite surfaces, according to professional deck builders, recommend low-impact maintenance to preserve durability.
Preparing for Future Expansion and Scale
If you’re considering scaling your outdoor living area, investing in modular, easily adjustable support systems can save headaches later. For instance, using adjustable post bases and supports allows for seamless expansion as your needs evolve. I also suggest keeping extra materials on hand, like additional composite boards and fasteners, to facilitate future upgrades or repairs. Staying organized with detailed measurements and project documentation streamlines the process and prevents delays.
How do I keep my composite decking and stairs looking pristine over time?
Regular cleaning combined with protective treatments is key. Use a gentle cleaning method monthly, and annually reseal or recoat to maintain appearance and resistance to weathering. Avoid abrasive tools or harsh chemicals, which can damage surfaces. Additionally, inspecting hardware and structural components at least twice a year ensures everything remains secure and safe, preventing costly repairs later. For complex setups, consulting detailed guides like those on creating seamless transitions and stairs can provide valuable insights into maintaining long-term performance. Pro tip: consider using rust-resistant stainless steel screws and fasteners wherever possible—this small upgrade significantly prolongs your deck’s lifespan. Try implementing one of these maintenance tips this season, and enjoy a safer, more attractive outdoor space for years to come.
Lessons That Changed My Decking Approach
One eye-opening lesson was realizing that hiding wires isn’t just about aesthetics—it’s fundamentally about safety and longevity. I once underestimated the importance of weatherproof conduits, which led to early deterioration and hazards. The second was understanding that a decorative cover isn’t just for looks; it can simplify future maintenance and upgrades. Lastly, I learned that every project teaches patience—rushing to hide wires can cause overlooked details, resulting in costly fixes later. These insights transformed my outdoor space from a tangled mess into a sanctuary of style and safety.
My Top Tools and Resources for Outdoor Wiring and Deck Perfection
For wiring, I trust high-quality outdoor-rated conduit, like PVC flexible tubing, because it withstands the elements and is easy to install. My staple tool is a cordless drill with corrosion-resistant bits, streamlining fastener installation. When it comes to planning, 3D design software has been invaluable, allowing me to visualize the wiring pathways before drilling into the structure. For maintenance, a pressure washer with adjustable nozzles is essential—cleaning decks and conduits without damage keeps everything looking fresh. Lastly, consulting professional insights provides practical tips that I implement with confidence.
The Spark That Ignited My Passion for Perfect Outdoor Spaces
Taking on the wiring challenge taught me that attention to detail elevates a project from good to extraordinary. I feel deeply satisfied when I see a clean, safe, and functional deck—proof that proper planning and care make a real difference. Don’t let the fear of complexity hold you back; starting small with well-chosen tools and resources can lead to big results. Remember, every successful outdoor project begins with a single step—and that step is understanding that quality craftsmanship transforms your space into your personal oasis. So, go ahead—pick up those tools, plan carefully, and watch your outdoor space flourish with safety and style.