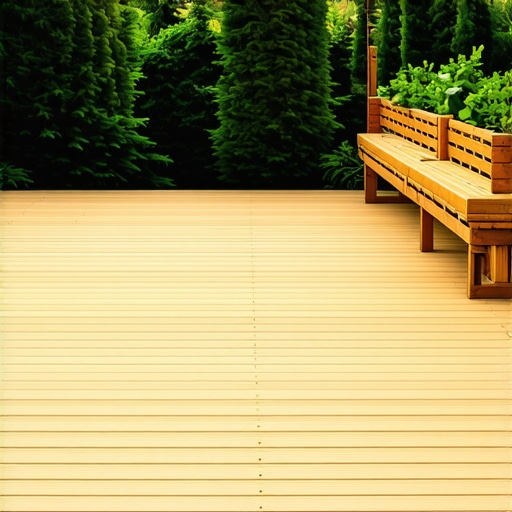
I remember the first time I tried to design a deck for a tight backyard. I was so eager to maximize every inch that I overlooked one simple detail—how the direction of the deck boards could make a world of difference in how spacious the area felt. Suddenly, what was supposed to be a cozy nook looked cramped and uneven, robbing the space of its potential. That lightbulb moment made me realize how crucial deck board orientation is, especially when you’re working with limited space.
Why Deck Board Direction Can Make or Break Your Small Outdoor Area
If you’ve ever felt disappointed after finishing a deck project, thinking it didn’t look as open or inviting as you’d hoped, you’re not alone. The direction in which you lay your deck boards influences visual flow, perceived size, and even safety. A well-chosen orientation can visually expand your space, making it feel twice as large, while a poorly planned layout can emphasize its limitations.
Based on my experience, paying attention to how your deck boards are arranged isn’t just about aesthetics—it can be a game-changer. For example, laying boards parallel to the longest wall of your yard can draw the eye outward, creating an illusion of depth. Conversely, a perpendicular layout might break up the space, making it feel smaller than it really is.
For even more innovative ideas, I recommend checking out creating seamless transitions in outdoor living design. Understanding how the orientation of stairs and transitions can complement your deck layout is essential for a harmonious look.
Is Your Deck Layout Undermining Your Vision of a Spacious Backyard?
Early on, I made the mistake of choosing a layout that seemed practical but ended up making the space feel even more confined. It’s a common error—thinking that a straightforward pattern is always best. But sometimes, intentional asymmetry or diagonal placement can open things up visually.
If you’ve faced similar frustrations, know that the right deck board direction isn’t just a minor detail—it’s a fundamental element of outdoor design that can enhance or hinder your small space’s potential. Now, let’s explore how you can choose the optimal orientation for your deck boards and bring that sense of openness you desire.
,
Lay Out a Strategic Foundation
Start by assessing your space. Visualize the yard’s longest dimension; laying your deck boards parallel to this length can create an illusion of depth, making your backyard appear larger. I once faced a tight corner and decided to lay the boards along the longest wall—initially a mess, but it visually expanded the area. Use chalk lines to outline your preferred direction before cutting or fastening, ensuring precision from the start.
Choose the Right Pattern for Your Space
Parallel to the Longest Wall
This straightforward approach aligns boards along the yard’s main axis, guiding the eye outward and extending perceived space. When I built a deck in a narrow yard, I laid the boards parallel to the house, which immediately made the area feel broader.
Diagonal Placement
Cutting boards at a 45-degree angle introduces dynamic movement, breaking the confines of typical grid patterns. Diagonal layouts can create focal points or direct attention to specific features. I experimented with this method on a client’s narrow patio—initially confusing, but the resulting sense of spaciousness was worth the effort.
Perpendicular to Longest Dimension
Placing boards perpendicular to the primary length can segment the space, creating visual interest. However, avoid overusing this in small yards, as it may emphasize narrowness. I learned this the hard way when I initially chose this pattern, only to see the yard feel even tighter.
Leverage the Power of Asymmetry and Diagonals
In tight spaces, asymmetrical layouts or diagonal cuts can trick the eye into perceiving more area. For example, I incorporated diagonal cuts around a curved edge—this intentional distraction made the boundary less noticeable. This approach requires careful measurement but yields impressive results when executed properly.
Combine Patterns with Transition Elements
Blending different orientations—like switching from parallel to diagonal at a transition—adds complexity and helps define zones. I once designed a small balcony with a diagonal central area, surrounded by linear borders, creating a multi-dimensional feeling despite limited space. Check out creating seamless transitions to understand how to use stairs and borders to complement board orientation.
Mind the Direction of Traffic
Ensure that lay-outs consider how people will move across the deck. Laying boards in the same direction as main walkways reduces tripping hazards and creates visual coherence. I added a flexible pattern that guided traffic flow, which also made the deck’s purpose clear.
Test and Adjust Before Finalizing
Lay out the boards temporarily with clamps or chalk marks to visualize the effect. Check from different angles to assess how the pattern influences perceived space. My early experiments often involved repositioning boards multiple times—each adjustment significantly improved the overall feel.
Use Proper Tools and Materials for Precision
Accurate cuts and secure fastening are vital. Use a high-quality miter saw for diagonal cuts and ensure consistent spacing with spacers. When I dealt with a tricky corner cut, I relied on a combination of a speed square and a template to get perfect angles—saving time and avoiding waste. For durable fastening, consider stainless-steel screws compatible with your decking material, especially if working with composite decking.
Maintain Consistency While Applying Variations
If switching between patterns, keep a consistent spacing and joint style to avoid a disjointed look. Using standardized spacing helps maintain harmony, even with complex layouts. I once created a hybrid layout—linear with diagonal accents—that required meticulous planning to ensure smooth transitions.
Evaluate Lighting and Shadows
Pattern placement influences how shadows fall, affecting perception of space. Laying boards along the natural light source can enhance openness during the day and create appealing shadows at night. During my last project, I aligned the boards to maximize light reflection, making the deck feel more inviting after sunset.
Experiment and Refine Your Strategy
Try different pattern combinations during the planning stage. Using sample layouts or digital visualizations can help you see the impact without physical labor. My initial prototypes often involved sketching ideas or laying out temporary boards—this iterative process led to the most satisfying design.
When it comes to outdoor living, many homeowners and even seasoned DIYers believe they understand the basics well enough. However, lurking beneath surface-level knowledge are subtle nuances and misconceptions that can lead to expensive mistakes or compromised safety. Let’s dig deeper into what most people get wrong, especially about stairs, composite decking, and working with professional deck builders.
One pervasive myth is that all composite decking is created equal. Many assume that choosing the most popular brand guarantees durability and low maintenance. But as I’ve seen in my experience, **not all composite boards are suited for every environment**. For instance, some cheaper options tend to fade unevenly or develop mold if not properly ventilated. An advanced mistake is relying solely on color and price without considering mineral core technology, which significantly enhances resistance to moisture and UV damage. For a comprehensive look at future trends, be sure to check out the ultimate guide on composite trends 2025.
When building stairs, a common oversight is neglecting the importance of precise stringer calculations and proper nosing for safety and aesthetic harmony. Many projects falter because homeowners overlook the subtle effect that stair riser height variations can have on perceived quality. An advanced trap involves underestimating the importance of anti-slip measures integrated seamlessly into the step design. For example, a small design detail like textured stair nosings can prevent accidents, especially in rainy climates.
From an expert standpoint, the most overlooked element among enthusiasts is the **hidden complexity of professional deck installation**. There’s a misconception that DIY can match the quality of a seasoned deck builder, but in reality, skilled professionals utilize precise tools and seasoned judgment that often go unnoticed. For example, seamless transitions between stairs and decks aren’t just aesthetic—they ensure safety and longevity. A sophisticated detail involves recognizing optimal joist spacing and proper flashing techniques to avoid rot and structural failure.
Have you ever fallen into this trap? Let me know in the comments. Remember, investing in understanding these nuances can save you time, money, and frustration down the line. Whether you’re enhancing your outdoor space with composite decking or designing stairs that blend safety and style, appreciating the hidden complexities empowers you to make smarter choices and achieve results that truly stand out.
Invest in Quality Tools for Long-Lasting Results
Successful deck maintenance starts with having the right equipment. I personally swear by a cordless oscillating tool for cleaning tight spaces and detailed areas. Its versatility allows me to remove mold and debris from deck corners without damaging the surface. For larger areas, a power washer with adjustable pressure settings is indispensable. I prefer models with a variable spray wand because they give me control over delicate composite surfaces, preventing erosion of the material. When working on stairs or railings, a precision level and a laser distance finder ensure that all components are aligned perfectly, which prolongs the lifespan of the structure.
Use Software to Plan and Track Maintenance
Keeping track of your deck’s condition is often overlooked but vital. I rely on design software like SketchUp to visualize upcoming projects or repairs. Additionally, dedicated maintenance apps help me record when I last sealed or cleaned certain areas, ensuring I stay on schedule. This proactive approach minimizes costly repairs and keeps the deck looking pristine over the years. Prediction: As technology evolves, augmented reality tools will likely become standard for homeowners to conduct virtual inspections and maintenance planning directly from their smartphones.
Slow and Steady Wins the Race in Maintenance
When maintaining outdoor living spaces, patience is key. Regular inspections—at least twice a year—allow you to identify issues early. Use a simple screwdriver or a deck inspection mirror to examine hidden spots like beneath joists or around fasteners. Early detection of loose fasteners, mold buildup, or water intrusion can save you significant money and effort later. Remember, routine maintenance is about consistency, not perfection. I aim to reseal or stain my deck every 2-3 years, depending on exposure and usage, especially for composite decks that are designed to withstand the elements but still benefit from periodic care.
Can You Extend Your Deck’s Life with Proper Maintenance?
Absolutely. Proper upkeep not only preserves aesthetics but also ensures safety and structural integrity for years. Using high-quality sealants and protective coatings is vital, especially for composite decking, which is more resistant than wood but not entirely maintenance-free. I recommend applying a UV-protective sealant every few years, particularly in sunny climates. It’s also wise to periodically clean your deck with eco-friendly solutions—avoiding harsh chemicals that can degrade the surface. For tailored advice, the ultimate guide on composite decking maintenance offers in-depth tips to help you get the most from your investment.
How do I keep my stairs safe and durable over time?
Stairs are often overlooked in maintenance, yet they’re critical for safety. Regularly check for loose or wobbly components, especially around stringers and handrails. Installing anti-slip strips or textured nosings can significantly reduce accidents, a detail emphasized in professional outdoor projects. I personally use a handheld impact driver for tightening fasteners on stairs quickly and securely, reducing the risk of loosening over time. For optimal longevity, employing corrosion-resistant fasteners—like stainless-steel—is a must, especially in humid or rainy environments. Remember: periodic sanding of wooden components and applying non-slip coatings extend the lifespan and safety of your stairs significantly.
Embrace these tools and routines, and you’ll find maintenance becomes less daunting and more rewarding. For a comprehensive maintenance schedule tailored to your deck type, visiting our expert contact page can connect you with specialists ready to assist. Try implementing a once-a-year deep clean combined with biannual inspections, and watch your outdoor living space thrive for decades to come.
What I Wish I Had Known Before Laying My First Deck
One of the biggest lessons I learned through trial and error was the importance of planning for the natural movement of materials, especially with composite decking. I once ignored expansion gaps, only to find boards warping and buckling in hot weather—something that could have been prevented with a simple understanding of material behavior. This lightbulb moment taught me to always leave appropriate spacing and to choose materials suited for my local climate, which is crucial for longevity and safety.
Another unexpected revelation was how a seemingly minor detail like deck board orientation can transform the sense of space. For small outdoor areas, laying boards parallel to the longest wall creates an illusion of depth, making even tight yards feel more open. My experience confirms that this strategic choice can be the difference between a cramped-looking deck and an inviting retreat.
I’ve also discovered that seamless transitions with stairs are critical—not just aesthetically but for safety and durability. Incorporating properly calculated stringer spacing and anti-slip measures can prevent accidents and ensure your stairs remain solid year after year. Professional insights, like those found in creating seamless transitions, are invaluable in mastering these details.
Gear Up with the Right Tools and Resources
Having the proper equipment can make or break your project. I rely on a durable high-quality miter saw for accurate cuts, ensuring clean edges and tight joints, especially when working diagonally. A precision level helps maintain uniformity across the deck surface, preventing wobbliness over time. Investing in the right tools reduces frustration and leads to a professional finish that lasts.
For planning and maintenance, I turn to design software like SketchUp, which allows me to visualize patterns and transitions before laying a single board. Additionally, dedicated apps for tracking sealing schedules, like DeckPlan, help me stay ahead of maintenance, ensuring that my outdoor space stays beautiful and safe for years to come. Technology is evolving rapidly, and embracing these tools can elevate your DIY game significantly.
Create Your Own Outdoor Sanctuary and Take Action
Designing or refining your deck and stairs isn’t just about aesthetics—it’s about crafting a space that welcomes, safe, and lasts. Each decision, from board orientation to transition elements, impacts how you experience your outdoor living. With the right knowledge and tools, you can transform a limited backyard into a breathtaking retreat. Remember, every great project begins with a small step—so get started today, experiment, and enjoy the process of creating your dream outdoor space.
Thinking about your next step? What’s one detail you’re eager to implement or improve on your deck or stairs? Share your thoughts below and let’s build something amazing together!
,