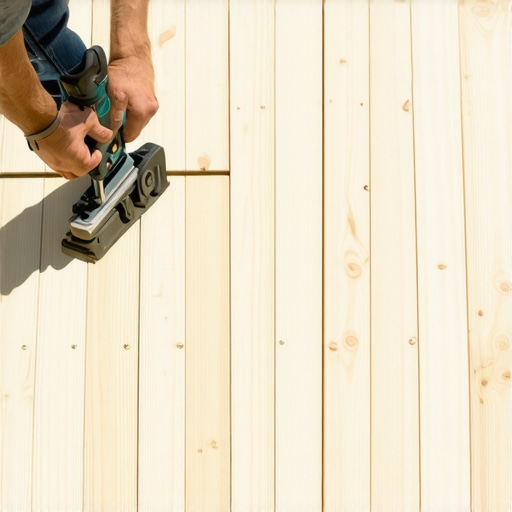
It was a sunny Saturday morning when I finally decided to build that deck I’d been dreaming about for years. As I stood there, measuring one more time, I realized I was already running behind schedule. The drill bit in my toolbox seemed straightforward—yet somehow, my spacing was off, uneven, and I kept having to go back and fix it. Frustration was bubbling up faster than I could work. Have you ever faced that sinking feeling when your deck boards just don’t line up right, no matter how carefully you measure? Those small misalignments can turn a beautiful outdoor space into an eyesore, and correcting them later can be a real headache.
Why Perfect Spacing Matters More Than You Think
The truth is, consistent spacing isn’t just about aesthetics—it affects the longevity and safety of your deck. Uneven gaps can trap moisture, leading to faster warping or rotting of the boards. I learned this the hard way early in my projects, when I skipped a simple technique that could have saved me hours of redoing work. It’s a sneaky problem that sneaks up, especially if you’re new to deck building or trying to keep things budget-friendly.
What really changed the game for me was discovering a smart trick involving your drill bit. This isn’t just about measuring—it’s about setting your tools up for success from the start. Once I started using this method, my boards lined up perfectly every single time, giving my deck a professional look without the added cost of professional labor. And the best part? It’s easy to master.
If you’re tired of uneven decks that make your outdoor space look sloppy, stick around. We’re about to dive into a simple, effective drill bit trick that will transform your DIY game and ensure every plank is perfectly spaced. Say goodbye to guesswork and hello to a deck that looks as good as it functions.
Is This Drill Bit Trick Really Worth the Hype?
Early on, I doubted that a single tip could solve all my spacing issues. I’d made my share of mistakes, like using the wrong fasteners or rushing through measurements. But I quickly realized that the real issue was timing and setup—and that a small change with the drill bit could make a significant difference. Trust me, I’ve been there, and I know how tempting it is to ignore these small details. But ignoring them can lead to costly corrections later.
So, if you’ve ever experienced the frustration of crooked boards or uneven gaps, you’re not alone. This little trick will help you avoid those pitfalls and build a deck that’s not just sturdy but also stunning. Ready to see how it works? Let’s get into the steps that took my project from so-so to striking.
Set Up Your Tools for Success
Start by selecting a drill bit slightly thinner than your desired gap between deck boards—this will be your spacing guide. I remember the first time I tried this method; I scoffed at the idea but quickly saw how precise it was. Gather your measuring tape, drill, and the chosen bit to streamline the process. This setup acts like a stencil, ensuring uniform gaps every time.
Mark Your Spacer on the Drill Bit
Next, hold the drill bit against a piece of painter’s tape and mark the point that corresponds to your chosen gap measurement. For example, if you want a 1/4-inch space, mark that point clearly with a permanent marker. This creates a visual cue directly on your tool. When drilling, you’ll stop once the bit reaches that mark, guaranteeing consistent spacing. I once applied this during my backyard deck build, and my boards lined up with near-perfect precision, surprising even myself.
Practice with a Scrap Piece
Before working on your actual deck, test the technique on a scrap piece of wood. Drill a few holes, stopping at your marked point each time. This helps you get comfortable with how much pressure to apply and how the bit feels. I recommend doing this if you’re new to the method, as it prevents costly mistakes once you’re on the actual deck boards. Watching your gaps become more uniform with each try is satisfying and boosts confidence.
Apply the Technique During Installation
When nailing or screwing down your deck boards, use your marked drill bit as a spacer. Place the bit against the edge of the board and drill until the mark is flush with the surface. This method works best when the boards are laid out on a flat, level surface. For added accuracy, consider installing temporary spacers or clamps, but the drill bit marker is your primary guide. This approach drastically reduces uneven gaps caused by manual measurement errors.
Tip: Maintain Consistency Throughout Your Project
Ensure that the bit remains unaltered and that your marks are visible and accurate. If your project involves many boards, double-check your markings periodically. During my last build, I kept a small notebook recording the measurements, ensuring each board matched the pattern perfectly from start to finish. This technique isn’t just quick—it’s a game-changer for achieving a professional look without hiring a pro.
Why This Method Works Better Than Measuring Each Gap
While traditional measuring and marking might seem straightforward, they leave room for human error—misreading tapes, inconsistent markings, or shifting boards. Using a drill bit with a pre-made mark ensures uniform gaps, saving time and reducing waste. Think of it as having a custom-made stencil that guarantees each cut or placement is identical, much like a customized template for a complex woodworking project. Transitioning to this method can elevate your outdoor living space with seamless, evenly spaced decking.
For more tips on creating stunning outdoor spaces, consider exploring ideas on maximizing outdoor spaces or integrating stairs smoothly into your deck’s design. These resources can help turn your simple deck into a functional, beautiful extension of your home. Remember, small details like spacing can make the difference between a backyard that looks homemade and one that feels professionally crafted.When it comes to outdoor living, many enthusiasts fall into misconceptions that can cost time, money, or safety. One prevalent myth is that all composite decking is equally durable; in reality, choosing inferior materials or ignoring recent trends can lead to premature wear. For example, some believe that low-cost composites don’t require maintenance, but they often stain or fade faster without proper care, as highlighted in recent trend reports.
**Misunderstanding the Right Support for Stairs** is another trap. Many assume a single stringer suffices, yet advanced builders know that multi-stringer systems ensure stability, especially on multi-level decks. Neglecting proper support can cause bouncy or unsafe stairs over time. It’s essential to consult professional insights to avoid these pitfalls.
**Common Misconception About Framing Materials** suggests that pressure-treated wood is the only option for support beams. However, emerging alternatives like aluminum or composite supports offer longer-lasting solutions, especially in moist climates. Relying solely on treated wood might lead to rot prematurely, a mistake that expert deck builders often warn about.
### Why Do People Still Believe in DIY Myths? Let’s Meet the Challenges
One myth that persists is the idea that DIYers can master all nuances of outdoor construction without professional guidance. This overlooks critical details such as proper flashing, drainage, and material selection, which experts emphasize in their detailed analyses. For instance, improper flashing can lead to house rot, a problem discussed extensively here.
**Advanced Tip for Seeking Long-Term Durability** involves understanding the nuances of climate-resilient materials. A recent study from industry leaders points out that mineral core composite decking offers superior resistance against UV and moisture, far outperforming traditional options. Skipping such details can result in a deck that fades or degrades within a few years.
Have you ever fallen into this trap? Let me know in the comments. Remember, elevating your outdoor space isn’t just about aesthetics—it’s about understanding the nuances that make the difference between ordinary and outstanding.Maintaining your outdoor deck is crucial to preserve its beauty, safety, and functionality over the years. While choosing the right materials is important, the tools you use for maintenance can make a significant difference in efficiency and result. Personally, I rely heavily on a few specific equipment pieces that have proven their worth in my DIY projects.
First and foremost, a high-quality power washer is indispensable. I prefer models with adjustable pressure settings, allowing me to thoroughly clean surfaces without causing damage. Regular power washing prevents the buildup of mold, algae, and dirt, which can degrade composite decking and support structures over time. For softer woods or delicate finishes, I switch to a lower pressure to avoid etching or splintering.
Next, investing in a cordless detail sander has been a game-changer. This tool is perfect for sanding down rough edges, smoothing out minor splinters, and prepping surfaces before sealing or staining. Its portability allows me to reach tight corners and uneven spots without hassle. Remember to use fine-grit sandpaper to prevent creating new scratches that could harbor moisture.
A versatile multi-tool with a variety of attachment heads is also essential. I use it for trimming away damaged caulk, cleaning out cracks, or removing old paint. Its precision ensures that maintenance tasks are completed efficiently, and it reduces the need for multiple specialized tools.
When it comes to sealing and protecting your deck, a quality sprayer—preferably a pump-up or backpack model—helps apply sealants evenly across large surfaces. I’ve found that using a spray method results in fewer streaks and better penetration, especially on composite decking, which benefits from regular sealing to maintain color and resist staining. Be sure to choose compatible sealants and follow the manufacturer’s instructions for best results.
In terms of software and planning, I recommend using project management apps like Trello or specific deck designing software to organize maintenance schedules and plan repairs. Staying proactive with scheduled inspections—checking for loose fasteners, warped boards, or signs of rot—extends your deck’s lifespan and can save you money in the long run.
prediction points toward smarter, more eco-friendly maintenance solutions, such as biodegradable sealants and solar-powered lighting integrated into regular upkeep routines. These innovations aim to reduce environmental impact while enhancing your outdoor space.
How do I keep my deck in top shape over the years?
Consistent maintenance is key. Regularly inspect all fasteners and connections, clean surfaces with a power washer, and reapply sealants when needed. Additionally, consider installing durable, corrosion-resistant screws and fittings, like stainless steel or composite fasteners, which resist rust and wear. Upgrading your tools and following a regular maintenance routine ensures your deck remains safe, beautiful, and functional for decades.
If you’re interested in exploring materials that require even less maintenance, check out the latest trends in composite decking, such as mineral core options, which are designed to withstand the elements with minimal upkeep. To discover how to integrate these into your outdoor projects, visit this guide on composite decking trends.
Meanwhile, adopting a proactive approach by scheduling seasonal inspections and cleaning can greatly enhance your deck’s longevity. Don’t wait until problems escalate—regular care is your best strategy for enjoying a gorgeous outdoor living area year-round. Remember, the right tools, combined with a disciplined maintenance plan, will keep your deck looking new and functioning perfectly for many years to come.
Lessons that Changed My Outdoor Projects Forever
One of the biggest surprises I discovered was how small adjustments, like marking a precise point on my drill bit, could completely transform my decking results. It’s funny how I used to think meticulous measurements alone would guarantee perfection, but I learned that integrating simple tools and techniques makes all the difference. Realizing that my habits could obscure the quality of my work, I started focusing on creating consistent spacing, which not only improved aesthetics but also prolonged the lifespan of my decks. The value of investing time in preparation and understanding my tools became clear when my decks started looking professional, even without professional help.
Another lightbulb moment was acknowledging that overlooking minor details—like using the wrong fasteners or neglecting proper support in stairs—could lead to costly repairs down the line. It made me realize that mastery in outdoor living projects often resides in the fine points, which most people tend to ignore. For example, I found that multi-stringer stairs, although more complex initially, provided safer, more durable access than single-stringer setups. These insights pushed me to seek out expert advice and trusted resources, ultimately making my outdoor spaces safer, more beautiful, and easier to maintain.
Lastly, I learned that continuous learning and sharing experiences are vital. Whether it’s exploring new composite decking options that resist fading or understanding how to properly flash a deck to prevent rot, staying curious kept my projects fresh and satisfying. Building confidence in my skills came from trial, error, and the willingness to learn from seasoned professionals and authentic resources dedicated to outdoor living excellence.
Tools and Resources That Elevated My Decking Game
My first must-have is the detailed composite decking trends guide. It helped me select materials that are both durable and low-maintenance, saving me time and money. The deck and stair ideas resource inspired creative layouts, ensuring my outdoor spaces reflect personal style. I rely on high-quality power washers and multi-tools, which I trust because they stand up to the demands of outdoor cleaning and detailed work, respectively.
Books on deck-building fundamentals have also been game changers; they provide step-by-step procedures I can revisit whenever I face a challenge, ensuring I build safely and efficiently. Consulting with professional deck builders has given me confidence that I’m on the right track, especially for complex projects. These resources have collectively transformed my outdoor DIY journey from guesswork into craftsmanship.
Take Action and Bring Your Dream Deck to Life
The key to creating stunning, long-lasting outdoor spaces lies in embracing continuous learning and meticulous attention to detail. Whether you’re fixing uneven stairs or choosing the right composite decking, every small decision counts. Remember, perfection doesn’t come overnight—it’s built through patience, practice, and the right resources. Your outdoor oasis awaits, and with the right mindset and tools, you can make it a reality that enhances your home’s beauty and your well-being. So, what’s stopping you from taking that first step toward your dream deck or outdoor project today?
And I’d love to hear from you: Have you ever struggled with a specific step in decking or stair building? Let me know below and share your experiences or questions!