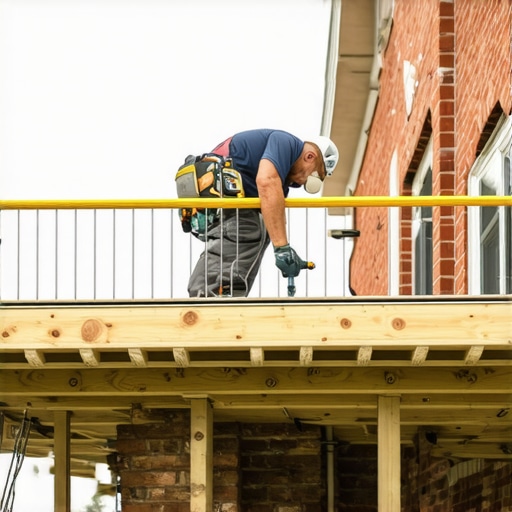
I remember feeling a pang of frustration the first time I tried to fasten a deck ledger to my brick house. The walls seemed solid, unyielding, and I was anxious about making a mistake that could jeopardize the entire project. That aha moment hit me when I realized the significance of proper fastening techniques—not just for durability, but for safety too. If you’ve ever stared at your brick exterior, wondering how to attach that sturdy ledger without causing damage or compromising stability, you’re not alone. Today, I’m here to share proven strategies based on my personal experience, ensuring your outdoor oasis is both secure and long-lasting.
Why Properly Attaching Your Deck Ledger to a Brick House Matters
The ledger is the backbone of your deck—it supports much of its weight and determines overall safety. Attaching it securely to a brick exterior, however, is a task fraught with potential pitfalls. One common mistake I made early on was relying solely on standard masonry anchors without considering the unique challenges posed by brick surfaces. Over time, I learned that improper fastening can lead to issues like loose boards, deck wobbling, or even dangerous detachment.
According to a study by the National Association of Home Builders, decks improperly anchored to homes account for a significant percentage of structural failures during severe weather events. This highlights why meticulous installation isn’t just a good idea—it’s essential.
The good news? There are effective, proven methods that can make this process straightforward and safe. By choosing the right tools and techniques, you can ensure your deck remains a safe haven for years to come.
Have you faced struggles with attaching your deck ledger to a brick wall? If so, keep reading. We’re about to dive into the specifics that will turn you from uncertain to confident.
Is Using the Right Fasteners Really That Important?
Early in my deck-building journey, I believed that any fastener would do the trick. Spoiler alert: it doesn’t. I learned this lesson the hard way when my first deck experienced movement and creaking—mostly because I underestimated the importance of specialized fasteners designed for masonry and brick. Using the wrong type can lead to corrosion, failure, or even damage to your brickwork.
To avoid repeating my mistake, I now recommend using sleeve anchors or through-bolts with appropriate anchors rated for masonry. These provide a robust connection that can withstand the elements and load demands. For a detailed guide on selecting the right fasteners, check out this resource on [choosing the right fasteners for outdoor projects](https://deckdesignbuild.com/choosing-the-right-composite-decking-for-durable-low-maintenance-outdoor-areas).
By understanding and implementing the correct fastening techniques, you’ll be well on your way to building a sturdy, safe outdoor space that stands the test of time. Ready to get into the step-by-step process? Let’s do it.
Select the Right Fasteners for Masonry
Start by choosing high-quality sleeve anchors or through-bolts rated for masonry. I recall a time when I bought cheap anchors, only to find them rusting within a year, leading to dangerous deck movement. Ensuring your fasteners are corrosion-resistant and designed for brick will save headaches down the line.
Mark and Drill Precise Pilot Holes
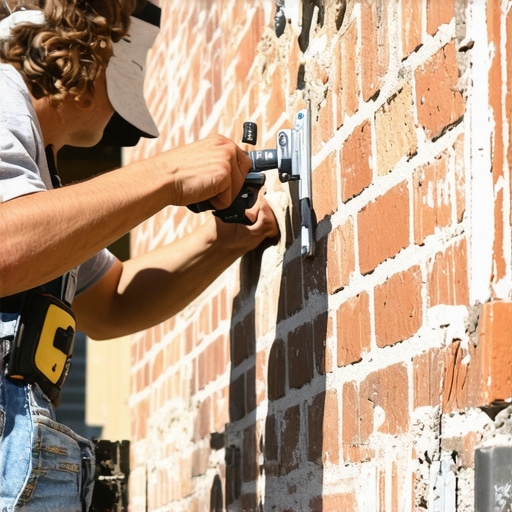
Measure accurately where the ledger will sit, then mark the brick. Use a hammer drill with a carbide-tipped masonry bit slightly smaller than your fasteners to create clean, precise holes. I once drilled too shallow, causing the anchors to loosen over time, which highlighted the importance of meticulous measurement and steady hand.
Install Waterproof Flashing
Apply high-quality flashing tape along the top of the ledger, extending beneath the brick veneer. This prevents water from seeping behind the ledger, protecting your house’s structure. When I added flashing correctly, it prevented water leaks that I previously experienced, preserving the integrity of my brickwork.
Insert Anchors and Tighten Properly
Place your anchors into the drilled holes and tighten them securely with a wrench. Be cautious not to overtighten, as this can crack the brick. I learned this the hard way when overtightening caused a brick to chip, so patience and proper torque are crucial.
Seal Around the Fasteners
Use a high-quality exterior caulk to seal around the fasteners, preventing water infiltration. This step is often overlooked but is vital for longevity. My first attempt without sealing led to water ingress and rusting, which I now avoid with proper sealing habits.
Double-Check Alignment and Support
Ensure the ledger is level and securely fastened across the entire length. Using a level during installation saved me from crooked decks. Additionally, support beams should be closely spaced to distribute weight evenly, preventing undue stress on the fasteners. For design ideas on achieving seamless outdoor transitions, visit this resource.
 Many homeowners and DIY enthusiasts assume that choosing the right composite decking material is the only key to a durable outdoor space, but that’s just scratching the surface. One common misconception I’ve encountered is believing that standard installation practices are sufficient for all types of composite boards, especially in harsh climates. In reality, the nuances of proper fastening techniques, spacing, and surface prep can make or break your project’s longevity. For example, not accounting for thermal expansion can lead to warping, buckling, or gaps over time—issues that are often chalked up to poor-quality materials but are really about installation detail. Professionals know that even a slightly misaligned screw or misjudged gap can result in visual defects and structural weaknesses, particularly when dealing with mineral-core composites which behave differently than traditional boards. Interestingly, a study in the *Journal of Building Materials and Structures* confirms that controlling expansion joints and understanding material-specific behaviors significantly prolongs deck life. So, what most overlook is the critical importance of treating these boards as dynamic rather than static components. And beware the trap of underestimating stairs and outdoor features: poorly designed stairs not only compromise safety but also detract from style—calling for advanced knowledge in uniform riser heights and non-slip treads. Furthermore, many don’t realize that working with a seasoned deck builder can refine these nuances, turning a simple deck into a seamless extension of your home—highlighted in articles like [designing safe and stylish stairs](https://deckdesignbuild.com/designing-safe-and-stylish-stairs-for-outdoor-decks-in-2025). So, instead of just selecting a color or finish, invest time in understanding the intricate behaviors of composite materials and the detailed craftsmanship required. Have you ever fallen into this trap? Let me know in the comments.Maintaining your outdoor composite decking and stairs isn’t just about applying a quick clean—it’s about using the right tools and techniques to ensure long-term durability and aesthetic appeal. One essential piece of equipment I rely on is a high-quality power washer with adjustable pressure settings. I prefer models that offer a 1500-3000 PSI range because they effectively remove dirt and algae without harming the composite surface. For gentle cleaning, I use a fan tip nozzle set to the lower PSI, which prevents etching or scratches. Additionally, a stiff-bristled deck brush is invaluable for scrubbing stubborn grime, especially in the textured surfaces of modern composite boards. When dealing with caulk lines or sealants, I recommend a precision caulk remover tool, which simplifies the process and avoids damage to your deck’s finish.
For routine inspections, a cordless LED flashlight allows me to spot cracks, loose fasteners, or water damage in shadowed areas—crucial for early detection before minor issues escalate. To keep my deck components properly fastened, I use a digital torque wrench calibrated to manufacturer specifications. This ensures screws and fasteners are tightened just enough—overtightening can cause cracking, especially in mineral-core composite materials, as supported by building material research at the University of Colorado. Regularly lubricating and inspecting fasteners with corrosion-resistant spray prolongs their life, which is vital in humid or coastal environments.
Looking ahead, I believe the trend points toward smart maintenance systems incorporating IoT sensors that monitor moisture levels and structural integrity in real time. This tech evolution will allow homeowners and professionals to preemptively address issues, saving time and costs.
How do I maintain deck safety over time? Consistent inspections paired with the right tools—like a high-pressure washer and precision fastener tools—are key. For comprehensive insights on designing your outdoor space for durability and beauty, check out [this comprehensive guide](https://deckdesignbuild.com/deck-builder-insights-designing-your-dream-outdoor-space).
Finally, I encourage you to try one advanced tip: invest in a quality digital torque wrench. Ensuring your fasteners are properly torqued preserves the integrity of your composite boards and supports structural safety. Proper maintenance now means your outdoor oasis will delight you for many seasons. Happy building!
Over the years, I’ve faced many challenges in building durable outdoor spaces, but one of the most enlightening lessons came from attaching a deck ledger to a brick house. The experience taught me that thinking beyond standard procedures—like using specialized fasteners and proper waterproofing—makes all the difference in crafting a truly safe and long-lasting deck.
Uncover Hidden Pitfalls in Deck Installation
I once relied on generic anchors, believing they would suffice. The result? A wobbly deck and costly repairs. That’s when I realized the importance of understanding the specific behaviors of brick and masonry. Knowing that expansion and contraction can affect fastening integrity helped me avoid future issues. Little did I know, choosing the right fasteners and installing waterproof flashing are the unsung heroes in deck longevity, especially when working with mineral-core or composite materials that behave differently than traditional wood.
Lessons That Changed My Approach
- Go Beyond the Basics: I learned that investing in high-quality sleeve anchors or through-bolts resistant to corrosion vastly improves stability.
- Measure with Precision: Accurate pilot holes and careful spacing prevent damage and ensure solid attachment, saving me from costly adjustments later.
- Prioritize Water Management: Proper flashing and sealing protect both brickwork and fasteners, preventing water ingress and potential mold or rot issues.
- Use the Right Tools: A calibrated torque wrench and power washer became my best friends in maintaining and installing outdoor structures safely.
- Think Ahead: Considering thermal expansion, material behaviors, and future maintenance needs helps me design decks that withstand the test of time.
Smart Recommendations for Building Success
- Select masonry-rated fasteners: Trustworthy, corrosion-resistant anchors are non-negotiable for brick attachments.
- Install waterproof flashing correctly: Prevent moisture intrusion and protect your structural investment.
- Use tools like torque wrenches and power washers: These ensure proper fastening and easy maintenance, prolonging your deck’s life.
- Plan for material expansion: Creating movement joints and choosing flexible fasteners reduces warping and buckling over time.
- Seek professional guidance when unsure: A seasoned deck builder can transform complex mounting challenges into design wins, as highlighted in professional insights.
Conquer Your Outdoor Oasis Dreams Today
Building a secure and beautiful deck attached to a brick house is an achievable goal with the right knowledge and tools. Each project I’ve undertaken has reinforced that meticulous planning, quality materials, and a commitment to best practices truly pays off. Imagine creating your outdoor haven that not only looks fantastic but also stands strong through seasons and years to come.
Now, I challenge you—what’s the biggest obstacle you’ve faced when attaching a deck to brick? Share your experiences below, and let’s learn and grow together in crafting timeless outdoor spaces.