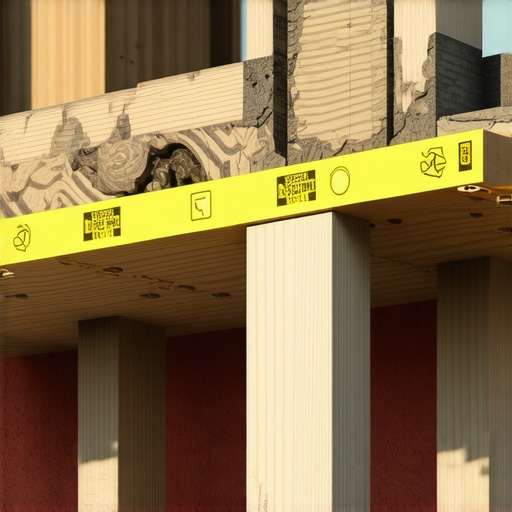
I vividly recall the moment I realized my outdoor deck was slowly deteriorating, not because of the wood or the weather, but due to a seemingly small mistake with flashing tape that I overlooked early on. It was a sunny Saturday, and I was inspecting my newly built deck when I noticed water pooling near the joist ends. The truth hit me: I had sealed the wrong way, and water was sneaking into places it shouldn’t have.
That lightbulb moment changed everything. I learned that the flashing tape, if applied improperly, can be a silent killer—leading to rot, structural failures, and costly repairs. Whether you’re a seasoned builder or a DIY enthusiast, understanding this small yet critical detail can save you from heartbreak down the line.
Why the Flashing Tape Error Is Deadly for Deck Joists
In my early projects, I made the mistake of assuming that flashing tape is just a protective layer. But I found out the hard way that the way you install it matters immensely. When flashing tape isn’t applied correctly—especially with regard to overlap, sealant, and direction—water finds its way past the barrier. Over time, this moisture causes the wood to rot from the inside out, weakening the entire structure.
Proper flashing techniques can dramatically prolong the life of your deck. It’s not just about water-resistant materials; it’s about how each piece is installed, ensuring water is directed away from vulnerable joints and joists. I’ve seen decks fail prematurely because of this simple but crucial mistake.
Research shows that improper flashing is a leading cause of deck failure, sometimes even more than heavy loads or storms (source: [The Flashing Error That Causes House Rot And How To Avoid It](https://deckdesignbuild.com/the-flashing-error-that-causes-house-rot-and-how-to-avoid-it)). This indicates just how vital correct flashing installation truly is.
Thinking about your outdoor project? Have you faced water intrusion issues that seemed inexplicable or persistent? If yes, you’re not alone—and the good news is, by mastering proper flashing techniques, you can prevent these problems before they start.
In the sections ahead, I’ll walk you through the common pitfalls and show you the best practices I’ve adopted over the years. Whether it’s understanding the right tape, angles, or overlaps, these tips will help safeguard your deck’s longevity and keep your outdoor space safe and beautiful for years to come.
Start with a Clean, Dry Surface
Ensure your joist ends and framing areas are free from dust, debris, and moisture before applying flashing tape. I once skipped this step during a weekend project, which led to the tape peeling off in the rain, causing water infiltration. To avoid this, use a wire brush or a damp cloth to clean surfaces thoroughly and let them dry completely.
Choose the Correct Flashing Tape and Material
Select high-quality, self-adhering flashing tape designed for outdoor use and compatible with deck materials. I recommend a flexible, but durable tape that conforms well to irregular surfaces. When I used a cheap, rigid tape on my second deck, it cracked and lifted after exposure to sunlight. Invest in reliable tape as it offers better adhesion and longevity.
Apply Overlapping Layers with Precision
Unroll the tape and start from the bottom of the joist end, pressing firmly as you move upward to create a slight downward slope that directs water away. I once made the mistake of applying the tape flat without overlap, which allowed water to seep beneath. Overlap each subsequent layer by at least 2 inches, ensuring complete coverage. This layered approach acts like shingles on a roof, directing water away from vulnerable joints.
Follow the Correct Direction for Water Flow
Always install the flashing tape so that water flows over and away from the joist ends. Think of it as installing rain gutters on your house—water should never be allowed to pool or seep into joints. During my own deck build, I double-checked flow directions and used a level to ensure the tape sloped correctly, which prevented any leaks.
Seal Edges and Penetrations
Use a compatible sealant at all tape edges and around fasteners to prevent water from finding gaps. I once neglected this step and noticed water creeping in along the fastener holes after heavy rains. Applying a bead of sealant at these points creates an extra barrier. Keep an eye out for any corners or edges where water might bypass the tape, and seal accordingly.
Secure and Inspect the Installation
Press down the tape firmly to ensure full adhesion, especially around edges and overlaps. Use a roller or a blunt tool to eliminate air bubbles. For example, during my last project, I used a PVC pipe to roll over the tape, which improved its adherence. After installation, regularly inspect for signs of lifting or cracking, especially after storms, and repairs should be made immediately to prevent water damage.
Integrate with Overall Deck Water Management
Remember, flashing tape is one component of a comprehensive water management system. Combine it with proper slope grading, guttering, and drainage planning. When I redesigned my deck, I incorporated a slight slope away from the house and added gutters to ensure water was directed safely away. Proper integration prevents water from compromising your entire deck structure.
When designing outdoor spaces, especially decks and stairs, many enthusiasts and even professionals focus on aesthetics and initial installation, but overlook nuanced details that can make or break long-term durability. A recurring misconception is the belief that standard techniques suffice for complex outdoor environments. For example, many assume that assembling stairs with generic stringer layouts is adequate, but neglecting precise measurements can lead to uneven steps and safety hazards. This is where specialized solutions, such as innovative stringer layouts, prove invaluable; learn more about [innovative stairs solutions for safe outdoor access](https://deckdesignbuild.com/innovative-stairs-solutions-for-safe-outdoor-deck-access).Achieving a durable, beautiful outdoor living area requires more than just good design; it hinges on the right tools and maintenance routines that keep your deck and stairs in top shape over the years. As an experienced deck builder, I rely heavily on specialized equipment to ensure precision and longevity in every project. One game-changer for me has been the use of a high-quality cordless oscillating multi-tool. Its versatility allows me to make clean, precise cuts in composite decking and work around awkward joints without damaging surrounding material. This tool’s variable speed feature ensures I can adapt to different materials, reducing the risk of melting or chipping, especially when working with delicate coatings or finishes. For sealing and caulking, I prefer a professional-grade, heat-accelerated gun. It consistently provides smooth, controlled flow, making it easier to apply sealants evenly and avoid gaps that could trap moisture. Regular maintenance is critical, so I recommend investing in a durable, high-powered blower with adjustable settings. It helps remove debris, leaves, and dust that can cause staining or mold growth. Keeping your outdoor space free from organic matter not only preserves its appearance but also prevents moisture retention that accelerates wood rot. Software tools have also become invaluable for long-term planning. I use 3D design programs to visualize modifications and upgrades, allowing for meticulous planning before any physical work begins. These tools help identify potential problem areas—like improper slope or inadequate drainage—that could compromise your setup over time. Predictive maintenance is another area where technology is advancing. Sensors embedded in critical joints can monitor moisture levels and structural movements, alerting you before minor issues become major repairs. Although still emerging in public projects, this trend is likely to become mainstream as sensor affordability improves.
How do I maintain my outdoor spaces over time?Creating a routine inspection schedule is vital. Check for loose fasteners, signs of water infiltration, or surface damage every few months, especially after storms or harsh weather. Reapplying sealants every two to three years maintains water resistance, and replacing worn fasteners with stainless steel screws stops corrosion. I also recommend periodically removing organic debris with a leaf blower and cleaning surfaces with a gentle, composite-appropriate cleaner to prevent stains and mold. Looking ahead, the future of outdoor living will likely see even smarter tools. Integration of IoT devices in decks and stairs could offer real-time monitoring, extending the life of your space with minimal effort. So, challenge yourself today: try upgrading your maintenance routine by incorporating one of these advanced tools or techniques. For detailed insights on optimizing your deck’s durability, visit our comprehensive guide on [composite decking trends for 2025](https://deckdesignbuild.com/composite-decking-trends-2025-the-ultimate-guide-for-outdoor-enthusiasts). Regular attention and the right equipment ensure your outdoor oasis remains safe, functional, and stunning for years to come. Small improvements today lead to long-term satisfaction.
Building or maintaining an outdoor deck isn’t just about selecting the right materials; it’s about understanding the subtle nuances that determine long-term durability. My personal experience with flashing tape taught me that even the smallest oversight can have profound consequences, transforming a beautiful deck into a rotting liability. Over the years, I’ve discovered that the secrets to outdoor longevity lie in attention to detail—techniques that many overlook but are pivotal in protecting your investment.
Lessons Learned from Overlooking the Fine Details
- Water flow isn’t intuitive: I once installed flashing tape without considering the natural water runoff patterns, which led to pooling and eventual rot. Now, I always think like water—if it’s not directed away, it’s working against you.
- Quality matters more than quantity: Choosing premium flashing tape with better elasticity and adhesion might seem costlier initially, but the peace of mind and durability it offers are priceless.
- Overlapping is a game-changer: A simple 2-inch overlap in layers has saved me from countless leaks post-storm. It’s a small detail that pays enormous dividends over time.
- Seal edges meticulously: I learned to never skip sealing vulnerable edges and fastener holes, as water finds even the tiniest gaps. A dab of high-quality sealant can be your best friend.
- Ongoing vigilance outweighs perfection at installation: Regular inspections, especially after storms, catch issues early, saving headaches later. Pay attention, and don’t assume your work is forever done once the deck is built.
These lessons underscore the importance of continual learning and precision. As I integrate these insights into my projects, I see fewer call-backs and longer-lasting decks. It’s a reminder that craftsmanship isn’t just about the initial build but about foresight and ongoing care. For deeper insights into outdoor living improvements, exploring [custom composite decking ideas for 2025](https://deckdesignbuild.com/innovative-outdoor-living-ideas-with-composite-decking-in-2025) can spark fresh inspiration.
Equip Yourself with Trusted Tools and Resources
- High-quality flashing tape: My pick is a flexible, durable brand that conforms to irregular surfaces, reducing the risk of cracks and peeling over time.
- Professional-grade sealants: A heat-accelerated gun and premium sealant ensure edges and fastener holes stay watertight, giving peace of mind during heavy rain.
- Moisture meters: These sensors monitor hidden spots in your deck structure, alerting you to potential issues before visible damage occurs.
- Design software: 3D visualization tools help plan drainage and water flow patterns, reducing guesswork and costly mistakes.
These tools, combined with trusted resources like industry blogs and expert advice, can elevate your outdoor project from average to extraordinary. I consistently recommend reading about [deck builder insights for perfecting outdoor spaces](https://deckdesignbuild.com/deck-builder-insights-designing-your-dream-outdoor-space) to hone your craft.
Lead with Passion, Act with Precision
Embarking on your outdoor living journey with a mindset rooted in curiosity and meticulousness will set you apart. The future of outdoor decks is bright with innovative materials and smart technology, but at the core remains the need for deliberate actions—like proper flashing tape application—that protect and enhance your space. Every step you take today with care will echo in the years of enjoyment ahead.
What’s one small detail you’re determined to focus on in your next decking project? Share your thoughts below, and let’s learn together!