
I remember the day I nearly lost my favorite pair of stilettos on a sprawling outdoor deck. I was dressed to impress, eager for a sunset dinner with friends, when my high heels got caught in what I thought was a stable, stylish deck pattern. Instead, I found myself teetering dangerously, seconds away from a humiliating spill. That lightbulb moment revealed a glaring flaw in many outdoor decking designs—wide gaps between the boards.
How a Simple Design Flaw Can Ruin Your Night Out
Despite their sleek look, wide-gap decking patterns can spell disaster for high-heel enthusiasts like me. Those gaps may seem minor, but underfoot, they create unpredictability. Your heels can sink in, stumble, or even cause injury, turning a special evening into an awkward dance of balance and panic.
But don’t worry; I’ve learned from my early mistakes. Today, I want to share insights that can help you avoid the same pitfalls. Whether you’re a homeowner dreaming of an inviting outdoor space or a professional deck builder, understanding the impact of gap sizes is crucial. Properly designed decks not only look stunning but also provide safe, comfortable footing—especially when paired with modern composite materials that are gaining popularity in 2025.
And trust me, mastering even the smallest details can elevate your entire outdoor experience. Ready to step confidently onto your deck without fear of catching a heel? I’ll guide you through the most important aspects of decking design, starting with understanding the real problem behind those troublesome gaps.
Is Wide-Gap Decking Really That Dangerous for High-Heels?
Early in my journey, I mistakenly believed that gaps were solely a matter of aesthetic choice. I thought a wider gap meant more breathability and a modern look. Big mistake. Years ago, I ignored the guidelines around gap sizes, and my experience proved that marginally wider gaps can make a significant difference. According to experts, gaps exceeding 1/4 inch can lead to instability under certain footwear, especially high heels (source: [DeckDesignBuild](https://deckdesignbuild.com/the-riser-height-error-that-makes-your-stairs-feel-awkward)).
This was my lesson in not underestimating small details—they matter, big time. As I started to pay attention to these design nuances, I discovered that choosing the right gap size can prevent accidents and even enhance the overall style of your outdoor living space.
Now, I want to help you avoid my rookie mistake. Imagine a deck that’s not just beautiful but also safe for all footwear—casual sneakers, summer sandals, and, of course, those killer high heels. The key lies in understanding the optimal gap sizes and how integrated design choices make a tangible difference.
In the following sections, we’ll explore actionable tips to design and select decking that’s both fashionable and functional. Whether you’re building anew or renovating, these insights will help you transform your outdoor space into a safe, stylish haven—no more embarrassing heels caught in gaps or hazardous trips. Ready to step up your outdoor game? Let’s get into the details that will make all the difference.
Choose the Right Gap Width to Prevent Heel Traps
To avoid heels getting caught, measure your deck board gaps precisely. Aim for no wider than 1/4 inch, especially in high-traffic or stylish areas where foot comfort matters. During installation, use a spacer or a jig to maintain consistent spacing, preventing uneven gaps that cause instability. I once used cardboard pieces as temporary spacers, which worked until I replaced them with proper plastic jigs. This ensured my gaps stayed uniform, leading to a safer walking surface.
Ensure Proper Joist Spacing for Stability and Style
Joist spacing directly influences deck strength and gap uniformity. For composite decking, 16-inch on-center spacing is standard, but in areas prone to heavy loads or high foot traffic, consider 12-inch spacing for added stability. When building my last deck, I used a laser level to mark precise joist positions, which helped me keep everything aligned perfectly. A stable foundation results in less board movement, reducing the risk of loose planks or uneven gaps. For more detailed guidance, check out maximizing outdoor space.
Optimize Anchor Points and Fastening Techniques
Use high-quality fasteners suitable for your deck material—stainless steel screws over nails for longevity. For composite decking, hidden fasteners provide a smooth surface and reduce tripping hazards. During my project, I pre-drilled holes to avoid splitting the boards and used color-matched screws to blend seamlessly. Proper fastening prevents boards from shifting over time, maintaining consistent gaps and a polished look. Learn more about fastening options at composite trends 2025.
Create Seamless Transitions with Smart Stair Design
Design stairs with riser heights between 4 and 7 inches and treads at least 10 inches deep to promote safety and comfort. Use the riser height trick—measuring multiple stair runs to ensure uniformity, preventing tripping hazards. When I built my staircase, I used a story pole to mark consistent riser heights, which made installation much easier and more precise. Installing stairs with even risers not only improves safety but also enhances the aesthetic flow of your outdoor space. Explore more at stairs design.
Integrate Composite Materials for Durability and Style
Select composite decking with a mineral core to resist warping, staining, and fading. When choosing materials, consider color options that stay cool—lighter shades reflect heat, making walking barefoot more pleasant. During my last build, I opted for a light gray composite with mineral core, which stayed cool even during peak summer; I used a heat-bending technique for trimming curves, saving time and reducing waste. For inspiration, visit composite decking trends 2025.
Plan for Future Accessories and Functional Features
Incorporate lighting, planters, and outdoor furniture into your design upfront. Use embedded LED channels along stair risers or beneath decking boards for subtle illumination. When I installed my lighting, I calculated the wiring path carefully, avoiding visible conduits and ensuring safe waterproofing. Pre-planning makes maintenance easier and helps your outdoor space look cohesive. Check out outdoor living ideas for additional tips.
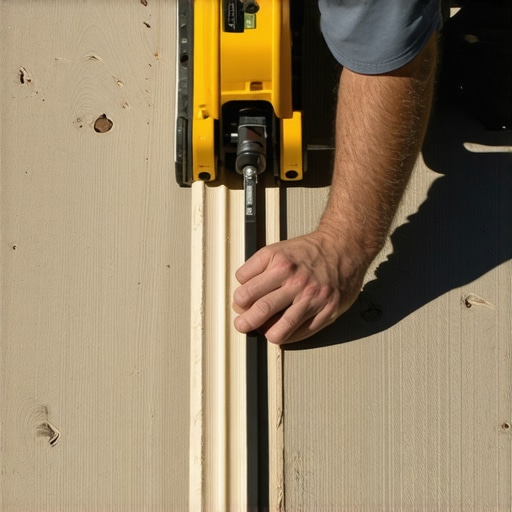 While many believe that choosing the right materials and basic design principles are enough for a durable, safe outdoor space, seasoned deck builders understand there’s much more beneath the surface. A common misconception is that composite decking alone guarantees low maintenance and longevity. However, the nuanced details—like proper fastener placement and precise joist spacing—are crucial and often overlooked.
What Do Experts Know About Hidden Decking Pitfalls That Beginners Miss?
Expert insights reveal that neglecting subtle factors such as thermal expansion gaps or the influence of microclimates can lead to costly mistakes and safety hazards. For example, design flaws like inadequate drainage around stairs or misaligned fasteners can cause deck warping or dangerous loosening over time, despite high-quality materials (source: mineral core benefits). Many just focus on surface aesthetics, unaware that these hidden nuances are what separate a passing project from a professional-grade masterpiece.
To elevate your outdoor space, consider consulting with a skilled deck builder who understands these intricacies. They can help you avoid the typical traps—like improper gap sizes or misaligned framing—that compromise both safety and visual appeal. Remember, the devil is in the details. For insights into professional techniques, visit benefits of hiring experts. Have you ever fallen into this trap? Let me know in the comments. Your experience might help others avoid costly mistakes when designing their dream outdoor living area.Maintaining a beautiful, durable outdoor deck requires the right tools and a strategic approach. Over the years, I’ve refined my toolkit to include equipment that ensures precision, efficiency, and long-term quality. First, a high-quality cordless drill with adjustable torque settings is indispensable for fastening composite boards without over-tightening or causing damage. I personally rely on models from Makita or DeWalt because of their reliability and battery life, which allows me to work uninterrupted on larger projects.
Accuracy in spacing and alignment starts with the right measuring tools. A digital laser distance meter, for example, guarantees precise measurements over longer spans compared to traditional tape measures. It simplifies tasks like measuring joist spans or the length of custom-cut boards, reducing errors that might compromise safety or aesthetics. I recommend the Bosch GLM 50 C, as it offers clear readings and Bluetooth connectivity for saving measurements directly to your phone, making project documentation more manageable.
When it comes to surface preparation, a heavy-duty orbital sander ensures a smooth finish on composite or wood surfaces before sealing or staining. I find that pre-wetting the surface with water and using a 120-grit pad prevents heat buildup, which can melt or damage composite decking. Additionally, a multi-tool with oscillating attachments comes in handy for cleaning tight corners, fasteners, and detailed areas—especially around railings and stair stringers. My go-to is the Fein MultiMaster, appreciated for its power and versatility.
For ongoing maintenance, an electric pressure washer fitted with a specialized decking attachment minimizes grime and mold without damaging the surface. I avoid high-pressure settings that can gouge the material; instead, I set it to around 1500 PSI and keep the nozzle at a consistent distance. Regularly removing debris and checking fasteners with a magnetic screwdriver prevents the formation of loose boards and problematic gaps, especially in areas exposed to seasonal changes.
Looking into the future, innovative tools like drone-assisted inspections may become standard for assessing large decks or hard-to-reach areas, enabling quicker identification of problems before they escalate. As composite decking continues evolving, tools that can test material integrity—such as thermal imaging cameras—might also become essential for long-term assessment and maintenance. For now, investing in quality, purpose-built tools is the key to keeping your outdoor living space in top shape.
How do I maintain my deck over time?
Regular inspections at least twice a year—preferably in spring and fall—are vital. Check for loose fasteners, cracked or splintered boards, and signs of water infiltration. Applying a high-quality, UV-resistant sealant every 2-3 years preserves color and prevents surface degradation, especially in sun-exposed areas. Incorporate a soft brush attachment on your pressure washer to gently remove dirt without damaging the surface, and use a degreasing cleaner for stubborn stains. Integrating these maintenance routines with your hands-on toolkit ensures that your deck remains both beautiful and safe for years to come. Remember, consistent care reduces the need for costly repairs or replacements down the line. For comprehensive guidance, consider consulting a professional deck builder, who can recommend tailored strategies and tools—an investment worth making to protect your outdoor oasis. Want to streamline your maintenance routine? Try upgrading to an orbital sander with variable speed and dust collection features. This combination makes surface prep faster and cleaner, saving you time and effort on your next project.
What I Wish I Knew About the Hidden Landmines in Deck Construction
One of the most powerful lessons I learned was that paying attention to the smallest details—like consistent spacing or fastener quality—can save you from costly repairs and safety hazards down the line. I once overlooked thermal expansion gaps, only to find my deck warped after a hot summer. That lightbulb moment taught me that understanding how materials behave under different conditions is essential for longevity.
Another surprise was realizing how microclimates around my deck could influence material choice. Shade or coastal winds demanded different fasteners or treatments than I initially planned. These insights, gained over years of hands-on experience, have transformed my approach from basic to expert.
Additionally, the misconception that composite decking alone guarantees low maintenance led me astray—until I discovered that proper fastening and framing are just as critical. This revelation helped me build decks that are not only beautiful but also durable and safe, even in challenging environments.
My Go-To Tools and Resources for Building and Maintaining Outdoors
Over time, I’ve curated a toolkit that ensures precision and efficiency. A cordless drill with adjustable torque (like Makita’s models) prevents over-tightening, which is crucial for composite boards. A digital laser distance meter, such as the Bosch GLM 50 C, helps me measure joist spans accurately—saving time and reducing errors. For surface prep, an orbital sander with variable speed keeps the finish smooth and ready for sealing.
When it comes to maintenance, a pressure washer with a decking attachment delicately removes grime without damage, extending the life of my outdoor spaces. For insights into the latest trends and techniques, I often consult articles like outdoor living ideas for 2025 or seek professional guidance from experts through professional deck builder resources.
Embrace the Challenge and Elevate Your Outdoor Space
Your outdoor living area is more than just a backyard addition; it’s an extension of your home and personal style. By focusing on the finer details—like proper gap sizes, stable framing, and smart material choices—you can craft a space that’s both stunning and safe for everyone, from heels to kids. Take the plunge, apply what you’ve learned, and don’t be afraid to push the boundaries of your DIY skills or to collaborate with experienced professionals. Future outdoor experiences start with the steps you take today.
What has been your biggest lesson learned when working on outdoor projects? Share your story below—I’d love to hear how you’ve turned small mistakes into learning wins!