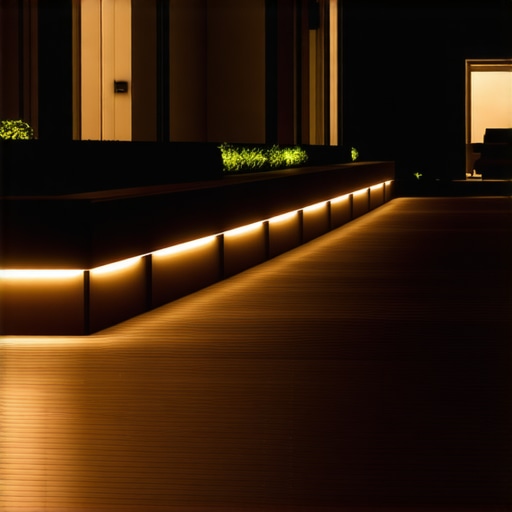
I remember the first summer I spent designing my outdoor space. Everything was coming together—striking decking, cozy seating, a charming firepit. But as evening fell, those dark, shadowy corners on my deck started to feel more like obstacles than cozy retreats. No matter how much I tried, traditional lighting fixtures seemed overbearing, ruining the sleek, modern vibe I wanted to achieve. That moment of frustration was a lightbulb, or rather an epiphany: I needed low-profile, effective lighting that wouldn’t compromise my deck’s aesthetic.
Shedding Light on Dark Corners Without Dimming the Style
My experience is hardly unique; many outdoor enthusiasts struggle with illuminating their decks in a way that’s both functional and visually appealing. The challenge? Finding lighting options that are subtle enough to blend seamlessly but powerful enough to banish those shadowy spots. I knew I had to discover lighting solutions that sit flush against the deck surface, offer adequate brightness, and withstand outdoor conditions. Thankfully, I’ve learned a lot from trial, error, and a few expert tips, making the process far less daunting today.
Is Low-Profile Deck Lighting Actually Worth the Hype?
Initially, I was skeptical about the fuss surrounding low-profile lighting. It seemed like a minor detail—a fancy trend perhaps—until I made a rookie mistake: installing bulky, traditional fixtures that looked clunky and distracted from the deck’s clean lines. The truth is, choosing the right lighting is about more than just brightness; it’s about enhancing safety, ambiance, and overall design harmony. A professional deck builder can guide you through the nuances of transformer choices, wiring, and placement to maximize both style and safety. For insights on designing your ideal outdoor space, check out [Deck Design Build’s insights](https://deckdesignbuild.com/deck-builder-insights-designing-your-dream-outdoor-space).
One thing I wish I’d known earlier is the importance of planning your lighting layout carefully to avoid shadows and glares that can ruin an evening’s atmosphere. An improperly installed lighting system not only looks bad but can pose safety risks. That’s why it’s crucial to avoid common mistakes — like placing lights too close to walkways or wiring haphazardly. To learn more about transforming your outdoor space, consider visiting [expert tips on outdoor living](https://deckdesignbuild.com/transform-your-space-expert-deck-builder-tips-for-stunning-outdoor-living). Now, armed with this understanding, I am ready to help you navigate the options and find the best low-profile deck lighting for dark corners.
Plan Your Lighting Layout for Optimal Coverage
Begin by sketching your deck’s layout, marking darker corners and areas prone to shadow. Think of it like mapping a city — you want every street (or corner) well-lit without overlaps or dark spots. For example, last summer, I drew a simple diagram on napkins to visualize where each light should go, preventing blind spots and ensuring even illumination.
Choose the Right Low-Profile Lighting Fixtures
Opt for flush-mounted LED step lights or recessed deck lights designed to sit flush with the surface. These are like the chrome details on a sleek car — subtle but impactful. I selected waterproof LED strip lights with a low-profile profile, similar to what I found in this latest composite decking ideas. Installing these saved me from the clunky look of traditional fixtures.
prep for Wiring and Power Supply
Run wiring carefully along the joists, using wire clips to keep everything tight and hidden — think of it as threading a needle through fabric. I used a fish tape to channel wires beneath the deck surface, much like threading a needle through fabric layers, which kept everything tidy and protected from the elements. Remember to select weatherproof connectors and enclosures to prevent corrosion.
Pre-Drill Holes to Prevent Splitting
Use a pre-drill bit slightly smaller than your screws or fixtures. This is akin to giving your boards a head start, ensuring they don’t crack under pressure. Last year, I accidentally skipped this step and cracked a few boards, making the process messier and more costly. Always drill at a slow speed, and consider adding a little bit of lubricant to the drill bit for cleaner holes.
Install Fixtures Flush with the Surface
Press fixtures into pre-drilled holes and secure them with screws, making sure they sit perfectly flush. Imagine installing a tile; you want everything level and smooth. I tightened the screws just enough to hold the fixtures securely without deforming the deck surface. Use a level or the deck’s surface as your guide for alignment.
Test and Adjust Your Lighting System
Power on your setup and check all fixtures for brightness and uniformity. Walk around your deck at night to observe shadows, glares, or dark spots. Last summer, I found one fixture too bright, creating glare, so I dialed down the brightness or adjusted its angle. Use dimmable lights if possible, as this gives you control over ambiance and function.
Seal and Protect the Wiring
Apply weatherproof tape and enclosures to secure the wiring connections. Think of it as wrapping a gift — neat and protected. I wrapped my wire joints with waterproof tape and sealed the boxes with silicone to prevent moisture ingress, a step that extends the system’s lifespan and ensures safety. Regular maintenance checks help catch any wear or damage early.
While many see composite decking as the ultimate low-maintenance outdoor solution, experts know there’s more beneath the surface. A common myth is that all composite boards are created equal; in reality, subtle differences in core materials and manufacturing processes can dramatically affect durability and appearance. For instance, mineral-core composites are far more fire-resistant, an essential factor for coastal or wildfire-prone areas, as highlighted in recent studies. Many DIY enthusiasts overlook how crucial proper installation techniques are, especially when it comes to spacing and support — small missteps here can lead to warping or sagging over time. A frequent mistake is underestimating the importance of sealing and edge finishing, which can allow moisture intrusion and accelerate rot, even in composites. When designing stairs or built-in features, advanced builders consider not just style but also safety nuances, such as proper riser height and slip resistance, ensuring long-term stability.
An often-overlooked aspect is the heat absorption of dark-colored composite boards, which can make barefoot walks uncomfortable in summer. Selecting colors and surface textures carefully can enhance comfort without sacrificing style. Additionally, choosing the right fasteners, like corrosion-resistant stainless steel or coated screws, counters common issues like pop-offs or staining. The key to a successful outdoor project lies in understanding these fine details, which can differentiate a mediocre deck from a long-lasting, stunning feature. For those eager to elevate their outdoor living space with a seamless blend of aesthetics and function, partnering with a professional deck builder is invaluable — they bring expertise in avoiding these pitfalls and tailoring solutions to your specific environment. Want to dive deeper into modern composite trends and tricks? Check out [composite decking trends for 2025](https://deckdesignbuild.com/composite-decking-trends-2025-the-ultimate-guide-for-outdoor-enthusiasts).
What advanced mistakes could derail your outdoor project before it begins?
Maintaining your outdoor living spaces, especially composite decks and stairs, requires the right tools and a strategic approach. One essential piece of equipment I rely on is a high-quality cordless oscillating multi-tool. Its precision allows me to trim, sand, and make detailed repairs without damaging surrounding materials. For routine cleaning, I recommend an industrial-grade pressure washer equipped with variable settings. I prefer models that offer precise PSI control, such as the Simpson Cleaning PS3228, which makes it easier to remove dirt and debris without harming the composite surface. This is crucial because over-aggressive pressure can erode the material or loosen fasteners over time. Additionally, a digital moisture meter helps monitor the underlying wood framing for signs of decay or water intrusion, which is vital before sealing or sealing cracks in your deck.
Lessons That Changed My Outdoor Living Game
One of the most enlightening lessons I learned was the power of meticulous planning. Sketching out your lighting layout before installation can save you countless hours and headaches. I once underestimated this step, resulting in uneven illumination and shadowy corners that hindered my outdoor experience. Now, I double-check every plan with a detailed diagram, ensuring every corner is evenly lit and safe.
Another revelation was the importance of selecting fixtures that blend into the deck’s design. Initially, I thought bright, elaborate fixtures were the way to go, but they cluttered my sleek, modern vibe. Discovering low-profile, flush-mounted LED options transformed my deck into a seamless oasis. This approach enhances safety and maintains aesthetic harmony.
Finally, I realized that the quality of wiring and weatherproofing directly impacts the longevity of outdoor lighting. Over time, I learned to invest in durable connectors and proper sealing techniques. This not only protected my investment but also kept my deck safe from electrical issues. The lesson? Never skimp on outdoor wiring materials; they’re the backbone of a reliable lighting system.