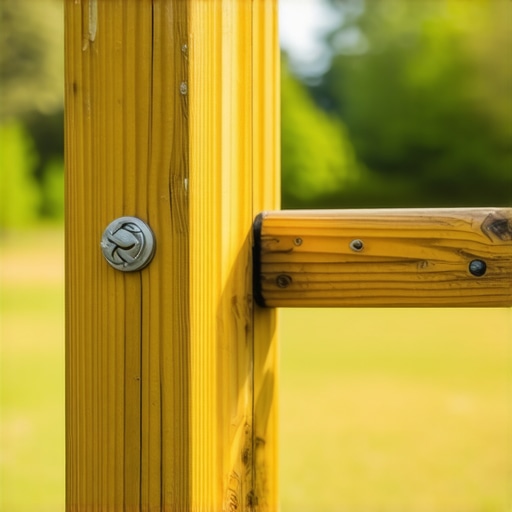
Ever had that frustrating moment when you reach for the railing on your deck, proudly built or renovated with care, only to feel it wobble under your hand? I remember the exact sinking feeling—wobbly, loose, and unreliable. It’s one of those small outdoor living setbacks that stings more than it should. That shaky post not only ruins the aesthetic but also raises real safety concerns, especially if you have kiddos or pets running around.
One day, as I was fixing another minor deck detail, the lightbulb finally flicked on. There’s a straightforward, effective fix—a simple two-bolt method—that transformed my wobbly railing into the sturdy feature I envisioned. I realize now how much time I wasted trying other fixes, only to be disappointed. Now, I’m here to share that knowledge with you.
If you’ve ever faced a loose or wobbly railing post, you know how annoying it can be. It’s enough to make you question if your deck is safe, or if it’s just a matter of time before something gives. Whether it’s the irregular settling of ground, the natural flexing of materials, or the wear and tear from seasons of outdoor exposure, these issues are common, but they’re fixable.
Today, I’m going to walk you through the tried-and-true method I discovered—yes, the 2-bolt fix—that’s helped me stabilize my posts reliably and quickly. No more squeaks or wobbles. It’s a solution that’s easy to implement, cost-effective, and, most importantly, solid as a rock once done.
But before we jump into the steps, I want to address a common concern I hear a lot: *Is this fix really durable enough for high-traffic or kids’ safety?* Well, I’ll be honest—early on, I made the mistake of underestimating the power of proper hardware. I initially tried using just one bolt, thinking it was enough, only to find the post still wobbly after a few months. Trust me, using the right two-bolt method makes all the difference. According to a report by the [Consumer Product Safety Commission](https://www.cpsc.gov/), sturdy railings are essential to prevent accidents, especially in outdoor areas where slips and falls are more likely.
So, if you’re tired of that annoying wobble and want a reliable, long-lasting fix, stick with me. I’ll guide you through the steps to secure your railing post with the kind of fix that lasts—because there’s nothing worse than a loose post when your family’s safety is at stake. Ready to stabilize your deck once and for all? Let’s get into it.
Prepare Your Tools and Materials
Before starting, gather a cordless drill, a socket wrench, a Carpenter’s level, a measuring tape, an adjustable wrench, stainless-steel bolts and nuts, washers, and safety goggles. I learned this the hard way—once I tried to fix my railing with just a hammer and neglected protective gear, resulting in a minor injury and a wasted afternoon. Proper tools save time and ensure durability.
Assess the Wobble and Locate the Anchor Points
Identify the loose post by gently pushing and pulling. Mark the top and bottom anchor points where the post meets the deck framing, usually at the base and near the handrail. Consider ground settling; if the post moves at both points, you’ll need to reinforce both. During my first attempt, I underestimated the ground shift, which led to incomplete stabilization. Accurate assessment prevents future wobbling.
Remove Old Fasteners and Prepare for New Bolts
Use the socket wrench to unscrew any rusted or loose screws or nails. Clean the holes with a wire brush, removing debris and corrosion. For a specific time, I used a chisel to loosen stubborn fasteners—an unorthodox method that risked damaging the wood, but it worked in a pinch. Clean surfaces facilitate better gripping of the new bolts.
Drill New Anchor Holes
Position the post using a level to ensure vertical alignment. Mark the drilling spots approximately 1-2 inches above and below the existing base plate using a pencil. Drill through the post’s base and into the deck framing using a drill bit slightly larger than your bolts. During my project, I used a pilot hole to prevent splitting—this small step saves big headaches later.
Set the Bolts and Secure the Post
Insert the bolts with washers through the drilled holes, then hand-tighten nuts on the backside. Use the adjustable wrench to tighten firmly but avoid overtightening, which could crack the post or deck framing. Once in place, check the post’s alignment with the level; adjusting as needed. I once overlooked this step, resulting in a crooked railing that needed rework. Precise tightening is key for stability.
Double-Check the Stability
Push and pull gently to test the fix. The post should feel sturdy, with no wobble or movement. Reassess with the level to confirm verticality. If wobbling persists, double-check the bolt tightness or add additional fasteners if necessary. Remember, the goal is a firm, wobble-free railing that can withstand seasonal ground shifts.
Finish and Inspect
Cover exposed bolts with paint or stain to protect against weather. Inspect the entire railing for loose components. During my last project, I noticed a loose handrail connection; securing it prevented future rattling and improved overall safety. Regular inspections prolong your deck’s lifespan and safety.
By following these concrete steps, you’ll reinforce your deck railing quickly and reliably—making your outdoor space safer and more enjoyable. For advanced ideas on creating seamless transitions, consider exploring this guide.
While many outdoor living projects are approached with enthusiasm and good intentions, they often fall prey to misconceptions about material choices, design principles, and safety standards. One widespread myth is that all composite decking is equally durable and low maintenance; in reality, there are significant variations, especially with emerging trends like capped versus uncapped composites. According to a recent industry analysis, selecting the right type of composite deck material can extend its lifespan by up to 50%, emphasizing the importance of staying informed on current trends and innovations.
Are Your Stairs Safe Enough for All Walkers?
Many homeowners underestimate the complexity involved in designing stairs that are both beautiful and safe. It’s not just about having a set of steps but ensuring they meet advanced safety standards and ergonomic principles. For instance, the pitch, tread width, and riser height must conform to building codes that are often misunderstood or overlooked. An expert in outdoor construction warns that improper stair design can lead to accidents, especially among children and the elderly. Visiting specialized resources like https://deckdesignbuild.com/innovative-stairs-solutions-for-safe-outdoor-deck-access can help avoid costly mistakes.
Another common trap is assuming that standard deck framing techniques suffice for every application. For decks supporting hot tubs or heavy furniture, structural reinforcement is critical; neglecting this can cause sagging or dangerous collapses over time. A precise understanding of load calculations—something that many DIYers are unaware of—is essential. An insightful study in structural engineering highlights that proper framing techniques can increase the load capacity of a deck significantly, reducing the risk of sudden failure and prolonging its functional life. If you’re considering a major upgrade or a new build, consulting a professional deck builder can provide tailored solutions that meet both safety and aesthetic goals, as discussed at https://deckdesignbuild.com/deck-builder-insights-designing-your-dream-outdoor-space.
When it comes to seamless transitions between stairs and decks, or integrating privacy features without sacrificing access or light, nuanced design considerations come into play. For example, properly scribing deck boards against uneven surfaces or incorporating hidden fasteners can dramatically improve aesthetics and longevity. Avoiding common pitfalls in these details prevents unnecessary repairs down the line, saving you time and money. For innovative ideas in this area, https://deckdesignbuild.com/creating-seamless-transitions-stairs-as-key-elements-in-outdoor-living offers a wealth of expert guidance.
In summary, understanding the intricacies behind material choices, safety standards, and design finesse is crucial for truly successful outdoor living spaces. Are you aware of all the hidden nuances that can make or break your project? Let me know in the comments. When you prioritize knowledge and precision, your outdoor spaces won’t just look great—they’ll be safe and built to last.Maintaining a durable and beautiful outdoor deck requires more than just good construction—it demands the right tools and consistent care. I personally rely on a few specialized items to ensure my composite decking remains pristine and that my stairs stay safe and functional over the years.
One essential tool I recommend is a **laser level**. Unlike traditional bubble levels, a laser level provides an entire plane of reference, making it significantly easier to check the evenness of your deck surface or stairs during periodic inspections. I always keep mine handy for aligning new additions or when adjusting handrails, ensuring everything remains perfectly plumb and level, which is critical for safety and aesthetics. You can explore how a laser level simplifies complex alignment tasks at [this resource](https://deckdesignbuild.com/why-i-always-use-a-laser-level-for-setting-deck-post-heights).
Another indispensable item is a **wire brush**. I use a heavy-duty wire brush, especially for cleaning between composite deck boards or removing stubborn dirt and mildew that accumulate over seasons. Regular cleaning prevents grime from embedding and helps the composite materials retain their color and surface integrity. For tougher stains, I’ve also incorporated a deck-safe cleaning solution that’s compatible with composites, avoiding harsh chemicals that could damage the material.
To stay ahead of potential issues, I utilize a **joist tape** on all exposed wood framing components. This inexpensive tape acts as a barrier against moisture and prevents wood rot—major factors in long-term deck health. Applying it during initial construction or routine maintenance is simple, and it dramatically extends the lifespan of critical structural elements. In fact, this simple tweak can add decades to your deck’s frame, according to experts familiar with structural longevity.
Investing in quality fasteners, such as stainless-steel screws, helps prevent corrosion, especially in coastal environments. I prefer them over standard nails because they hold tight even after years of weather exposure, reducing loosening or squeaking. This subtle upgrade makes a noticeable difference in your deck’s stability and safety.
Looking towards future trends, I believe innovative materials like polymer-based fasteners and protective coatings will become standard, further reducing maintenance needs and enhancing deck resilience. Staying informed on these developments is key—consider checking out [composite decking trends for 2025](https://deckdesignbuild.com/composite-decking-trends-2025-the-ultimate-guide-for-outdoor-enthusiasts) to see what’s emerging.
For ongoing maintenance, I urge you to schedule seasonal inspections. Look for loose fasteners, check for signs of moisture damage, and clean surfaces regularly. Incorporating a routine with these tools and practices will keep your outdoor living area safe, attractive, and long-lasting.
**How do I maintain composite decking over time?** Regularly sweep and wash the surface with a deck cleaner compatible with composites, inspect fasteners for corrosion, and address any shading or drainage issues that might lead to staining or mold growth. Don’t forget to reseal or repaint wooden components, like stairs or railings if applicable, to preserve their structural integrity.
If you’re ready to elevate your outdoor space, I recommend trying the laser level method for your next project—it’s a game-changer. Not only does it save you time, but it also ensures your deck remains flawless for years to come. For more expert insights, those planning larger projects should consider consulting a professional deck builder, whose skill can transform your backyard into a perfect retreat. Visit [this page](https://deckdesignbuild.com/the-benefits-of-working-with-a-professional-deck-builder-in-your-outdoor-projects) for more details.
Lessons That Catch You Off Guard
One unexpected lesson I discovered was the importance of double-checking your fasteners post-installation; even the slightest oversight can lead to wobbly railings down the line. Another enlightening moment was realizing that ground settling isn’t always uniform—sometimes, your deck’s stability depends on addressing multiple points, not just the visible ones. And finally, I learned that investing in high-quality, corrosion-resistant hardware is a game-changer, especially in coastal areas where salt spray accelerates wear—simply put, skimping on bolts can cost you more in repairs than the initial investment.