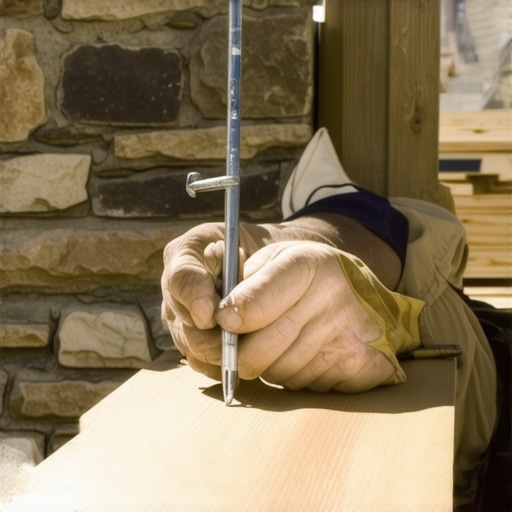
It was a chilly morning when I finally decided to tackle the final touches on my outdoor deck. As I laid the last few boards, I realized something was off—the deck looked great, but those last few planks near my stone house wall just didn’t sit right. No matter how carefully I measured, they appeared uneven, and the gaps looked terrible. That lightbulb moment hit me hard: getting deck boards to sit perfectly against an uneven, textured stone wall is a game of patience, precision, and know-how.
Why Properly Scribing Deck Boards Matters More Than You Think
When I first started my outdoor project, I underestimated how complex it could be to install decks that align beautifully with irregular surfaces. But trust me, overlooking this step can lead to gaps that trap debris, allow water ingress, or just ruin the sleek look you’re after. And honestly, those gaps? They can also be a real trip hazard, especially for kids or the elderly. An uneven scribe isn’t just about aesthetics; it’s about safety, durability, and overall satisfaction. If you’re like I was, wondering how to get those boards to hug your stone wall flawlessly, then you’re in the right place. Today, I’ll share the secrets that transformed my flawed attempt into a pro finish.
But before we dive into the nitty-gritty, I must confess — I initially thought that just fitting the boards tightly would do the trick. I neglected to account for the irregularities of my stone wall, which introduced gaps and uneven cuts. This mistake, common among DIYers, can be costly and frustrating. According to recent decking trends, meticulous scribing is crucial for a seamless transition along textured surfaces [source: https://deckdesignbuild.com/composite-decking-trends-2025-the-ultimate-guide-for-outdoor-enthusiasts]. So, why does this matter, and how can you get it right? Let’s explore.
Is Scribing Deck Boards Against a Stone Wall Really Worth the Effort?
Absolutely. Properly scribing your deck boards ensures a tight fit along uneven walls, prevents water pooling, and maintains a clean look that elevates your entire outdoor space. Plus, it increases the longevity of your deck by reducing gap-related issues such as debris buildup and moisture retention. Trust me, I learned this the hard way—early on, I rushed the process, and the gaps showed in just a few years. Proper scribing might seem daunting at first, but with the right tools and techniques, you’ll be surprised how straightforward it becomes.
Are you facing this exact problem with your project? If so, you’re not alone. Many DIYers and even seasoned deck builders overlook the importance of detailed scribing, leading to headaches down the line. Thankfully, fixing this isn’t as hard as you might think. Up next, I’ll walk you through the step-by-step process that helped me achieve a flawless fit against my uneven stone wall. Ready to make your deck look professionally finished? Let’s get started.
Start by laying your deck board on the surface, then align it carefully along the wall or uneven surface you want to follow. Use a pencil or marker to trace the edge where the board contacts the surface, including all deviations and grooves. I vividly recall the day I marked the boards for my stone wall; I used a flexible contour gauge to capture every bump and crack, ensuring my cut line would match the wall’s unique shape. Avoid rushing this step, as a precise mark is the foundation for a perfect fit.
Once marked, use a jamb saw, rotary tool, or a multi-tool with the right blade to cut along your traced line. For irregular surfaces, a jigsaw offers flexibility, allowing you to follow complex contours accurately. I prefer starting with a rough cut using a circular saw to remove excess material, then refining the shape with the jigsaw. Take your time during this process—rushing can cause uneven cuts, leading to gaps or the need for repetitive trimming. Remember, a well-shaped board will sit flush and avoid water pooling at gaps.
Place the cut board against the wall or surface, then scrutinize the contact points. It’s common to encounter minor gaps or high spots. In such cases, gently sand the high spots or trim carefully with a fine-tooth saw. During my project, I often made small iterative adjustments, marking and trimming incrementally until the board hugged the surface perfectly. Using a spirit level or laser line can assist in maintaining a consistent height and alignment throughout the process.
After a perfect fit, temporarily clamp the board in place and check the alignment one last time. Fasten it securely with corrosion-resistant screws or hidden fasteners, ensuring they do not force the board away from the wall. To prevent cracking or splitting during fastening, pre-drill holes slightly smaller than your screws. For stubborn gaps or irregularities, consider adding a flexible sealant or flashing behind the board to improve water resistance and accommodate slight movements. I also recommend sealing the cut edges and corners to prolong the lifespan of your deck.
Once all boards are in place, go back and smooth out any rough edges with a fine-grit sander or file. Adding a color-matched deck caulk can fill small gaps, giving a polished appearance. Remember, patience during scribing and trimming is key; rushing these steps will cost more time later rectifying gaps or uneven surfaces. Mastering these core techniques transforms an imperfect surface into a flawless finish, elevating your outdoor space to professional standards.
 When it comes to outdoor living spaces, many homeowners and even experienced deck builders fall prey to misconceptions that can compromise safety, aesthetics, and longevity. One widespread myth is that using standard framing techniques suffices for all staircases, but in reality, overlooking load calculations and local code requirements can lead to structural failures. According to industry experts, such as those referenced in the [deck design trends](https://deckdesignbuild.com/deck-builder-insights-designing-your-dream-outdoor-space), precise structural planning is essential for high-traffic, outdoor stairs.
A common mistake is neglecting the nuanced differences between composite decking types. Many assume all composites behave similarly, but composites vary significantly in expansion rates, moisture absorption, and UV resistance. Choosing improperly can cause warping or staining over time. For detailed guidance, see our article on [choosing the right composite decking](https://deckdesignbuild.com/choosing-the-right-composite-decking-for-durable-low-maintenance-outdoor-areas).
Advanced builders recognize that the biggest hidden nuance lies in the attachment methods, especially for stairs and rails. Using incompatible fasteners may seem minor but can cause loosening or corrosion, undermining safety and aesthetics. A well-kept secret among professionals is employing stainless-steel fasteners, which resist corrosion in coastal or high-moisture environments, as highlighted in our [stainless-steel fasteners article](https://deckdesignbuild.com/why-stainless-steel-fasteners-are-non-negotiable-for-cedar).
Another critical aspect is the subtle mistakes made during design phase. For instance, many overlook how stair riser height and tread depth influence safety and comfort. Slight miscalculations can result in uneven steps or tripping hazards. Even experienced deck builders sometimes misjudge the ideal dimensions, which could be avoided by referencing the [outdoor stairs design standards](https://deckdesignbuild.com/designing-safe-and-stylish-stairs-for-outdoor-decks-in-2025).
A sophisticated question often overlooked by DIYers is: How does climate impact material selection and design? For example, in humid coastal climates, materials must accommodate frequent moisture changes without warping. Failing to adapt your design can lead to costly repairs or replacements. Studies on climate-specific material behavior, like those found in [decking trend reports](https://deckdesignbuild.com/composite-decking-trends-2025-the-ultimate-guide-for-outdoor-enthusiasts), underscore the importance of tailoring choices to your environment.
Being aware of these advanced nuances and myths helps elevate your project from amateur to professional quality. Remember, partnering with a [professional deck builder](https://deckdesignbuild.com/the-benefits-of-working-with-a-professional-deck-builder-in-your-outdoor-projects) can help you navigate these pitfalls more effectively.
Have you ever fallen into this trap? Let me know in the comments! Taking the time to understand these deeper details ensures your outdoor space isn’t just beautiful but also safe and durable for years to come.Maintaining a beautiful and durable outdoor living area requires the right tools and a disciplined approach. Over the years, I’ve honed a toolkit tailored specifically for deck builders and outdoor enthusiasts, ensuring every project stands the test of time. One must-have is a high-quality laser level; I use the Bosch GLL 3-80, which provides precise alignment for posts, railings, and stairs. Its accuracy minimizes errors that could compromise safety and aesthetics. For cutting composite decking, I prefer a fine-tooth saw with variable speed settings, such as the Makita 5007MGA, because it offers clean cuts without melting the plastic components, which is a common issue with cheaper blades. When shaping boards to fit uneven surfaces, a variable-speed rotary tool with carbide bits gives me the finesse needed to follow complex contours — especially critical when scribing against textured stone or brick walls. Regularly, I rely on a moisture meter like the Wagner MC580, which helps me determine the real-time moisture content of woods and composites — an essential check before sealing or staining. To secure fasteners effectively and prevent corrosion, I opt for stainless-steel screws, specifically the Grip-Rite 2-1/2 in. Stainless Steel Coarse Thread Deck Screws, because they resist rust, maintaining structural integrity over years. For cleaning, I swear by a combination of a power brush and eco-friendly deck washes, such as the Eco Advance Deck Cleaner, which preserves the finish while removing stubborn dirt and stains. Additionally, digital planning software like SketchUp Pro helps me visualize projects and troubleshoot potential issues before physical work begins, saving time and reducing waste. I predict that the future of outdoor maintenance tools will move toward smarter, app-connected devices that offer real-time data and remote diagnostics, simplifying upkeep even further. If you’re serious about keeping your decks in top shape, I recommend investing in a quality laser level; its precision will transform your workflow and set the foundation for long-term success.
How do I maintain my outdoor spaces over time?
Regular inspections, timely cleaning, and protective sealing are critical, but leveraging the right tools makes all the difference. For example, consistent use of a moisture meter can preempt structural issues caused by hidden rot or moisture intrusion, which often goes unnoticed until it becomes serious. Pair this with routine cleaning and applying high-quality sealants suited for your climate, such as those recommended in our [outdoor living ideas](https://deckdesignbuild.com/innovative-outdoor-living-ideas-with-composite-decking-in-2025), to prolong material life and maintain visual appeal. Remember, staying proactive and well-equipped will save you money and stress in the long run. Want to elevate your maintenance game? Try incorporating a moisture meter into your periodic inspection routine today and observe how the early detection of issues can save your project from costly repairs later. With consistent upkeep and the right tools, your outdoor space will remain inviting and resilient for years to come.
Lessons I Didn’t See Coming in Deck Construction
One unexpected insight was how minor mistakes in scribing can cascade into major gaps, compromising safety and aesthetics. It taught me that patience during marking and cutting is essential—rushing shortcuts that often lead to rework and frustration. I also learned that understanding your wall’s irregularities deeply before cutting is far more efficient than attempting to force-fit after the fact. Lastly, I realized that investing in quality tools, like contour gauges or flexible saw blades, saves time and improves precision, transforming a daunting task into a manageable one.
Tools and Resources That Elevate Your Decking Skills
My essential toolkit begins with a high-accuracy laser level, like the Bosch GLL 3-80, which I trust for maintaining perfect alignments across uneven surfaces. For shaping boards, a precision rotary tool with carbide bits offers unmatched finesse—making complex contours easy to follow. The contour gauge is indispensable for capturing the exact profile of textured surfaces, ensuring your cuts are spot-on. I also recommend reading www.deckdesignbuild.com/choosing-the-right-composite-decking for the latest insights on matching materials to environmental demands, and www.deckdesignbuild.com/transform-your-outdoor-living for innovative design ideas. These resources deepen your understanding and help avoid common pitfalls.
Embrace the Process: Your Outdoor Space Awaits Your Skill
Remember, every perfectly scribed and fitted board adds a layer of pride and durability to your outdoor living space. With patience, the right tools, and a willingness to learn from each step, you can achieve professional-quality results that will last for years. Don’t get discouraged by initial challenges—think of each cut and adjustment as a step toward mastery. Your effort today transforms your outdoor environment into a safe, beautiful haven that truly reflects your vision. So grab those tools, trust your process, and let your outdoor project be a testament to your dedication—your future self will thank you for it.