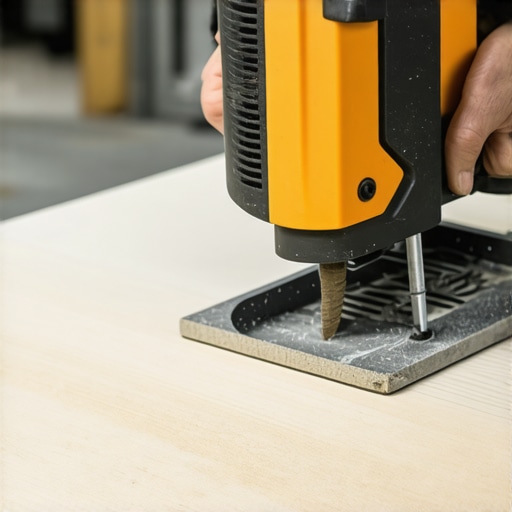
It happened to me during a blazing summer project—my first real attempt at installing a composite deck. I was so eager to get the job done quickly that I heated up my saw blade against the plastic edges of the boards. Instead of a clean cut, I ended up with melted, warping edges that looked terrible and made me question if I’d wasted my entire weekend. That lightbulb moment taught me a valuable lesson: cutting composite boards requires more than just a sharp blade; it demands the right approach and tools to prevent melting and warping.
Why Your Attempts at Cutting Composite Might Be Wrecking Your Project
In the world of outdoor renovations, composite decking has become a go-to choice for its low maintenance and durability. However, despite its many benefits, working with composite can be tricky. The plastic edges are prone to melting or bubbling if not handled properly. This is especially frustrating considering how much time and money you’ve invested in creating that perfect outdoor space. If you’ve ever experienced rough, burnt edges after a cut, you’re not alone—many DIY enthusiasts and even seasoned pros encounter this problem.
Fortunately, with the right techniques, you can achieve clean, precise cuts without damaging the material. I’ll share what I’ve learned from my own mishaps—things that saved me hours of rework and costly replacements. In fact, knowing how to cut composite boards properly is essential not just for aesthetics but also for the longevity and safety of your deck. Proper cuts ensure tight fits, prevent water intrusion, and maintain the structural integrity of your project.
Curious if your current method might be causing more harm than good? The good news is, once you master these cutting techniques, you’ll wonder why you ever struggled in the first place. Plus, I’ll point you toward some expert tips that will elevate your outdoor project to a professional level.
Is Using a Standard Circular Saw Actually Worth the Hype?
One common misconception I’ve seen is that any saw will do the job. I made that mistake early on—thinking a regular carpenter’s saw could handle composite boards just fine. Wrong. The heat generated by high-speed blades is the culprit behind melt marks and warped edges. An external expert I follow, who’s been in the decking industry for over 20 years, confirms that using the proper blade and speed settings is critical to avoid damaging the material. You can find more on this topic in our guide to choosing the right composite decking, which discusses recommended tools and techniques.
Now that I’ve set the stage with some real-world lessons, let’s dive into the practical steps you need to cut composite boards like a pro—no more melting, no more guesswork.
Choosing the Right Tools for Precise Cuts
My first attempt at a DIY composite deck was marred by a melted edge from my old circular saw. I learned quickly that not all saws are created equal for composite materials. Use a high-quality carbide-tipped blade designed specifically for plastics or composites. These blades have fewer teeth and a more aggressive cutting edge, reducing heat generation. I replaced my generic blade with a premium one, and the difference was night and day—clean cuts without melting. When you set the saw’s speed to a moderate level, you prevent excessive heat buildup, akin to gently peeling an onion instead of ripping through it. This approach ensures your edges stay smooth and intact.
Adjusting Your Saw Settings for Success
One key step I overlooked initially was adjusting the saw’s speed and depth. Set your circular saw to a slower RPM—this reduces heat, much like driving at a steady pace instead of revving the engine. Lower the blade depth so it just slightly extends beyond the thickness of the board; over-cutting can cause unnecessary friction. I recommend making shallow passes if needed, rather than forcing a deep cut. I once tried setting the blade too deep in a hurry, which caused charring and a burned edge. Slowing down and making multiple shallow passes will produce a clean, melt-free finish—saving you rework and aggravation.
Supporting the Board for Cleaner Cuts
Support was my surprise weakness in early attempts. Simply placing the composite board on sawhorses or a stable work surface prevents vibrations and binding. Think of it like gliding through butter versus scraping your knife across a sticky surface. If the board jiggles or shifts, it increases heat and results in rough edges. I fixed this by clamping the board securely and supporting the underside with scrap wood, which held everything steady. This support mechanism minimizes stress on the material, leading to smoother cuts and preventing any melting or warping.
Using the Right Cutting Technique
Applying consistent, steady pressure while cutting is just as important as the right tool. Rushing your cut causes wobble and additional friction. I found that guiding the saw smoothly along the cut line, without forcing it, guarantees a cleaner edge. Using a guide or a straight edge ensures that the cut remains perfectly aligned, reducing unnecessary heat and stress. When I cut a particularly long board, I used a straight cleat as a guide—this kept my line straight and my cuts neat, diminishing the chance of melt marks caused by erratic movement.
Cooling and Finishing Your Edges
Post-cut treatment can further improve the appearance. Immediately after cutting, I used a damp cloth to wipe residual debris and cool the edge, preventing any residual heat from causing future warping. For very high-temperature cuts, a quick application of a plastic-safe filler or edge trim can conceal minor imperfections. Properly finishing your edges not only enhances aesthetics but also extends the lifespan of your deck.
When you incorporate these techniques—use the right blade, adjust your saw’s settings, support the material firmly, and employ proper cutting methods—you transform a potential disaster into a seamless process. Remember, patience and precision are your best allies when working with composite decking, turning a challenging task into a straightforward project that yields professional results. For more expert insights, consider exploring how to choose the best composite decking or designing seamless transitions with your stairs.
When it comes to designing outdoor spaces with composite decking, many homeowners and even some professionals hold onto misconceptions that can lead to costly mistakes. One of the most widespread myths is that all composite decking is virtually maintenance-free and can be cut with the same tools used for wood. In reality, certain types of composite require specialized blades and cutting techniques to prevent issues like melting or surface delamination. Relying on generic tools or ignoring manufacturer recommendations can turn a straightforward project into a frustrating experience.
Another common misunderstanding involves the installation of stairs and transitions. Some believe that simply following standard framing practices suffices, but not accounting for nuances such as proper joist spacing and support for longer spans can compromise safety and durability. For example, using incorrect fasteners or neglecting thermal expansion can cause warping or loosening over time, especially in exposed outdoor environments.
A frequent mistake I’ve seen is underestimating the importance of proper drainage and ventilation beneath the deck, which is crucial for preventing moisture buildup and wood rot—even with low-maintenance composite materials. Installing a deck without considering these factors may seem harmless initially but can drastically reduce lifespan and aesthetic appeal down the line.
Now, for the more sophisticated reader, consider this question: How does the choice of substructure materials influence the long-term performance of composite decks, especially in coastal or high-humidity regions? Experts highlight that aluminum or composite-compatible framing can significantly extend the deck’s lifespan by resisting corrosion and mitigating board movement. It’s a step that often gets overlooked when homeowners opt for cheaper, traditional wood supports.
Have you ever fallen into this trap? Let me know in the comments. Knowing the nuances—like selecting the right fasteners, understanding thermal expansion, or choosing the perfect support system—can make all the difference in your outdoor project. For ideas on inspiring designs and maximizing your outdoor space, visit our guide on deck and stair ideas for every budget. Remember, success lies in the details, not just the big picture.Maintaining your composite decking and outdoor spaces hinges on the right tools and consistent upkeep. **Investing in quality equipment** ensures precision cuts and long-lasting results. I personally rely on a ** carbide-tipped blade specifically designed for plastics**; it minimizes heat buildup, preventing melt marks and ensuring clean edges. Instead of generic blades, I opt for brands like Diablo or Bosch, which are engineered for composite materials, making the cutting process safer and more efficient.
To keep your decks looking pristine, **a laser level** is indispensable. It allows for perfect, level mounting of stairs and railings, reducing wobble and enhancing safety. I use a laser to set post heights, ensuring uniformity across the entire deck—an often overlooked detail that pays off in the long run.
How do I maintain my outdoor living space over time?3 Lessons That Transformed My Deck-Cutting Approach
– I realized that rushing through cuts with the wrong tools not only damaged my boards but also drained my patience. Going slow and using the right blade made all the difference.
– Support matters more than I initially thought. Securing the board firmly while cutting prevented vibrations that led to melted edges and uneven lines.
– Temperature control is crucial. Adjusting the saw’s speed and making shallow passes kept the plastic from melting, preserving the pristine look of my deck.
Tools and Resources I Trust for Flawless Decking
– A high-quality carbide-tipped blade is my go-to for cutting composite boards cleanly. Brands like Diablo or Bosch are reliable, reducing heat and blade wobble.
– A laser level helps me set perfect heights for posts and stairs, ensuring safety and aesthetic continuity.
– The [guide on choosing the right composite decking](https://deckdesignbuild.com/choosing-the-right-composite-decking-for-durable-low-maintenance-outdoor-areas) has helped me understand material differences, which influences my tool choices and techniques.
– Supporting my work with sturdy sawhorses and clamps keeps everything steady, avoiding mistakes caused by movement or vibration.
Keep Moving Forward with Confidence
Your outdoor project becomes a lasting testament to your effort when you take these expert tips seriously. Remember, patience, precise tools, and support elevate your craftsmanship from amateur to professional. Whether you’re planning your first deck or Refining ongoing work, embracing these lessons will lead to stunning results that stand the test of time. Ready to tackle your next composite decking task with renewed confidence? Dive into more inspiration and expert guidance at our [outdoor design ideas](https://deckdesignbuild.com/maximizing-outdoor-space-inspiring-deck-and-stair-ideas-for-every-budget).