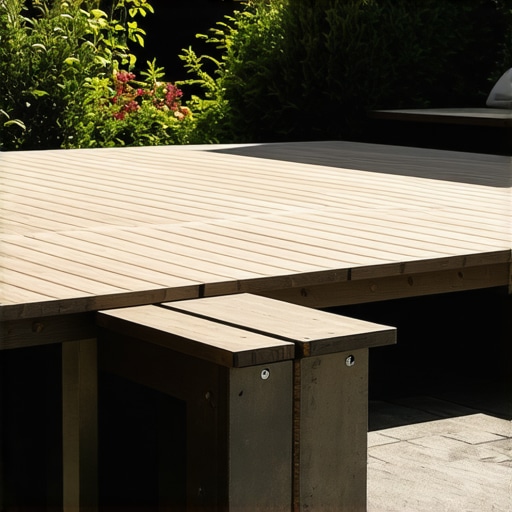
I remember the exact moment I realized my patio project was about to turn into a frustrating mess. It was one hot summer afternoon, and I was mid-assembly, trying to align the floating bench seats. The worst part? Those *unsightly wobbles* that kept ruining the clean look I envisioned. Despite following all the instructions I could find, something just wasn’t adding up. That’s when I stumbled upon a little-known trick that changed everything—**the hidden bracket secret**.
The Game-Changer I Didn’t See Coming
Building floating deck benches seemed straightforward at first. Measure, cut, attach—simple, right? But as any DIY enthusiast quickly learns, aesthetics and stability rarely go hand in hand without a bit of finesse. After a few failed attempts with basic brackets, I started digging deeper and discovered a trick that not only made my benches rock-solid but also gave them a sleek, seamless appearance. And believe me, this secret isn’t just a handy tip—it’s a *must-know* for anyone serious about outdoor living.
Are you tired of wobbly, poorly secured benches ruining your backyard vibe? If yes, then stay tuned. Today, I’ll walk you through this often-overlooked technique that can elevate your outdoor space from okay to wow, regardless of your skill level.
Is This Hidden Bracket Method Really Worth the Hype?
When I first heard about this secret, I was skeptical. I’d invested in high-quality decking and stylish furniture, only to find my sacrifices in design ruined by unstable seating. Early in my journey, I also made the mistake of thinking that standard brackets were enough—big mistake. They seemed simple but lacked the finesse to hold everything securely over time, especially with the natural expansion and contraction of materials.
In fact, I learned that many DIYers miss a crucial step by neglecting a hidden reinforcement that spreads load evenly and prevents those annoying wobbles. For more insights on professional deck building—something I wish I had considered earlier—check out [the benefits of working with a professional deck builder](https://deckdesignbuild.com/the-benefits-of-working-with-a-professional-deck-builder-in-your-outdoor-projects). From my experience, skipping this step can lead to costly repairs later and an overall loss in the visual appeal.
As we dive into the specifics of this secret, bear in mind: every mistake I made taught me valuable lessons. Now, I want to help you avoid the same pitfalls. So, shall we uncover this hidden bracket trick together? By the end of this post, you’ll know exactly how to secure your floating benches with confidence, transforming your outdoor space into a true oasis.
Choosing the Right Brackets and Planning Your Layout
Start by selecting L-shaped metal brackets designed for outdoor use, ensuring they can handle the weight of your seating. Measure your bench length and determine where to place brackets for even support, typically every 24 inches. Use a laser level to mark precise attachment points on your deck joists.
Secure the Brackets to the Deck Joists
Attach brackets directly to the horizontal deck joists with corrosion-resistant screws. Imagine the joists as the backbone of your structure—every bracket acts like a sturdy rib supporting the seating. Tighten screws firmly but avoid overtightening, which could deform the bracket.
Pre-assemble the Bench Seats
Build your floating seats off-site, attaching the top and base panels with screws. For stability, reinforce with corner blocks at each joint—this prevents wobbling when in place. I once tried assembling everything on-site, but the mess and misalignments made me wish I had pre-built for accuracy.
Attaching the Seats to Hidden Brackets
Lift each bench onto the brackets, aligning the pre-drilled holes with the bracket arms. Use stainless steel screws to secure the seat frame to the brackets, creating a solid, unified piece. Think of this connection as a hinge that allows for slight expansion and contraction without wobbling.
Adding Reinforcement for Extra Stability
For larger benches, install a hidden central support beam underneath, attaching it to the brackets with additional fasteners. This distributes weight evenly, much like a suspension bridge, preventing any sagging or wobbling over time. I added this extra support after my first wobble session, and it made a dramatic difference.
Ensuring a Seamless, Aesthetically Pleasing Finish
Cover the bracket attachment points with custom trim or fascia for a sleek look. Sand down any rough edges and apply a weatherproof stain or sealant. This not only protects your materials but also enhances the visual appeal—making your DIY project look professional.
Regular Maintenance and Minor Adjustments
Over time, natural movement or shifting may cause slight wobbles. Check the screws and tighten as needed. When you notice any unevenness, slightly loosen the screws, reposition the seat, and retighten. This proactive approach preserves the stability and longevity of your outdoor seating.
Many homeowners and even aspiring DIYers fall prey to misconceptions about deck building, outdoor living, and composite decking. A prevalent myth is that choosing the cheapest materials guarantees savings, but in reality, cutting corners often leads to costly repairs down the line, especially with critical components like stairs and railings. For instance, some believe that standard brackets suffice for securing stair stringers, yet experts emphasize the importance of heavy-duty, corrosion-resistant fasteners to ensure safety and longevity; see [the best practices for secure outdoor stairs](https://deckdesignbuild.com/innovative-outdoor-living-ideas-with-composite-decking-in-2025). Additionally, many underestimate the impact of proper ventilation beneath deck surfaces, which is crucial for preventing moisture buildup and rot—something not obvious to the untrained eye. When it comes to composite decking, the misconception that all brands are equally durable can backfire; choosing a quality brand like those recommended in [composite decking trends for 2025](https://deckdesignbuild.com/composite-decking-trends-2025-the-ultimate-guide-for-outdoor-enthusiasts) ensures you get low-maintenance, long-lasting surfaces. Furthermore, some overlook the nuanced details in stair design, such as the importance of consistent riser heights and tread depths, which directly impact safety and aesthetic appeal. Advanced builders understand that even the slightest variance can cause trips, and paying attention to these small details elevates your project from amateur to professional.
A common trap in deck construction involves neglecting proper load calculations for stairs, especially when integrating heavy features like hot tubs or outdoor kitchens. Failing to reinforce the underlying structure can lead to sagging or failure over time, which is why consulting with a [professional deck builder](https://deckdesignbuild.com/the-benefits-of-working-with-a-professional-deck-builder-in-your-outdoor-projects) is often worth the investment. Similarly, many assume that seamless integration of stairs with the deck surface is purely cosmetic, but from an advanced perspective, precise framing and flashing are how you prevent water intrusion and wood rot, making your stairs both beautiful and durable.
Have you ever fallen into this trap? Let me know in the comments. Understanding these nuanced aspects safeguards your investment and results in a truly stunning outdoor retreat.Maintaining your outdoor deck and ensuring it functions flawlessly over time requires more than just initial craftsmanship. Investing in the right tools can make ongoing maintenance efficient and even enjoyable. As a DIY enthusiast, I rely heavily on high-quality equipment that balances precision with durability. For example, I swear by a cordless impact driver like the Makita XDT16, which offers enough torque for securing heavy composite decking fasteners and can handle other tasks around the yard, saving me from frequent battery swaps. Additionally, a digital moisture meter, such as the Protimeter Surveymaster, helps me detect hidden dampness beneath the surface, preventing rot before it becomes a costly repair. When dealing with stairs, I often use a laser level like the Bosch GLL 55 to ensure consistent riser heights and pitch, which is crucial for safety and visual appeal.
Regular inspection tools are equally important. A quality flashlight, like the Fenix PD35 Turbo, illuminates tight corners and joints during inspections so I can identify loose fasteners or signs of wear. For cleaning composite surfaces without damaging the material, I prefer a soft-bristle scrub brush and a specialized cleaner like Full Clean Multi-Surface Cleaner, which effectively removes grime without abrasives.
Looking ahead, I predict that smart maintenance tools will become more accessible. Devices integrating wireless sensors that monitor moisture and structural integrity in real-time could revolutionize long-term deck care. These innovations will allow homeowners and professionals alike to anticipate issues before they escalate, saving both time and money.
How do I keep my deck in top shape over the years? Routine checks are key. I schedule quarterly inspections to scrutinize fasteners and clean surfaces, preventing small problems from growing. For persistent issues like loose stairs or uneven boards, I use a drill guide with a built-in leveling function—such as the DEWALT DW088K cross-line laser—to realign components precisely.
If you haven’t already, try incorporating a moisture meter into your maintenance kit. It’s a game-changer for early detection of hidden damage, especially with composite decks that can trap moisture beneath the surface. Regular upkeep combined with the right tools ensures your outdoor living space remains stunning and safe for years to come. To optimize your deck’s longevity further, consider working with a seasoned professional—discover the benefits of collaborating with experts in [the advantages of professional deck builders](https://deckdesignbuild.com/the-benefits-of-working-with-a-professional-deck-builder-in-your-outdoor-projects). This partnership can help you identify issues before they become major, ensuring your investment pays off long-term.
Lessons That Changed My Deck Building Perspective
One eye-opening realization was that even the smallest reinforcement can make a huge difference in stability, especially when supporting heavier features like hot tubs or outdoor kitchens. I once ignored this and faced costly repairs, but now I always double-check my load calculations—an insight I wish I had grasped earlier. Another lesson was about the importance of perfectly aligned stairs; a minor miscalculation in riser height can lead to trips and falls, risking safety and design integrity. Plus, I learned that regular maintenance isn’t just routine—it’s a crucial step to catch emerging issues before they become major problems, saving both time and money in the long run. Embracing these lessons transformed my outdoor spaces from average to extraordinary, and I want you to experience that same confidence in your deck projects.