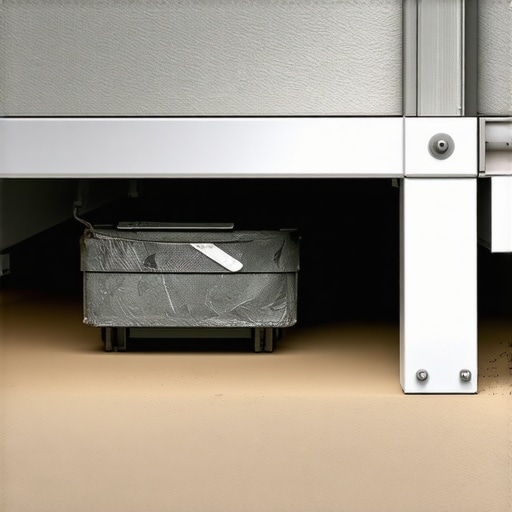
I still remember the moment when I opened my under-deck storage for the first time and was greeted not by a neat, organized space but by a damp, moldy mess. It was a lightbulb moment—clearly, I had missed something crucial about venting, and my stuff had paid the price. If you’re like me, battling musty odors and soggy boxes, you’re probably wondering if there’s a smarter way to keep that space dry and usable. Well, you’re in luck. Today, I’ll share a simple yet often overlooked trick that made a world of difference in my outdoor storage area—the hidden venting method that really works and doesn’t require major renovations. Do you find your under-deck storage prone to water build-up or mustiness? You’ve probably dealt with the frustration of mold, rot, or in some cases, even pest problems creeping in where they shouldn’t. It’s not just annoying; it can be downright damaging to your outdoor gear and decking investment. That’s why understanding how to properly vent this space is essential. Believe me, I learned this the hard way early in my deck-building journey. Mistakenly, I thought sealing everything tight was the best approach, assuming it would keep out moisture. But in reality, airtight spaces trap humidity, creating the perfect environment for mold and rot. According to the Wood Moisture Association, ventilation is vital for controlling indoor humidity and extending the lifespan of wooden structures. So, what’s the secret? How do you encourage airflow without sacrificing security or aesthetic appeal? That’s exactly what we’ll explore next. From my personal experience, incorporating a simple venting trick solved my problem efficiently and cost-effectively. Whether you’re a seasoned DIYer or just starting to upgrade your outdoor spaces, mastering this technique can make your under- deck storage a clean, dry, and functional area for years to come. Just imagine the peace of mind knowing your stored items are protected from moisture damage—sounds good, right? If this has been a headache for you, stay tuned. I’ll guide you through the step-by-step process that turned my damp nightmare into an organized oasis, transforming the way I use my outdoor space and, honestly, saving me money on repairs and replacements. Ready to tackle this issue head-on? Let’s dive into the details.
Install Vents in Critical Locations
Start by placing vents at strategic points, such as the sides of the deck near the lowest joists. During my last project, I used adjustable louvers to control airflow, which proved invaluable in managing moisture levels during heavy rain. Think of it like installing nostrils on a fish tank—allowing fresh air in and let damp air escape, maintaining a balanced environment inside.
Choose the Right Vent Type
Opt for weather-resistant, louvered vents designed for outdoor use. These prevent excess water entry while facilitating airflow. When I did this, I found plastic or aluminum vents to be more durable against corrosion—almost like choosing a good pair of waterproof shoes—protecting your investment while serving their purpose.
Create Pathways for Airflow
Use chinking or adjustable vent covers to direct air into spaces that tend to trap humidity, such as corners or beneath beams. I personally cut small, unobtrusive openings in the skirting boards and sealed around them with weatherproof caulking, transforming my cluttered under- deck into a dry haven. It’s akin to opening windows in a stuffy room for fresh air—simple, yet effective.
Maximize Natural Drafts
Position vents to leverage prevailing breezes—ideally on opposite sides of the deck—to induce natural cross-ventilation. During a particularly windy day, I noticed that my stored items stayed drier simply because I created a vent path that encouraged air movement, much like how a chimney draws smoke out of a fireplace.
Seal and Protect Vents for Longevity
Apply waterproof sealant around vent edges and covers to prevent water intrusion. I used a high-quality silicone caulk, which lasted through seasonal weather changes. Think of it like applying a raincoat—necessary to keep moisture out even when the wind blows rain sideways. This step is critical to ensure your ventilation system doesn’t become an entry point for water damage.
Combine Venting with Dehumidification
For truly damp spaces, supplement venting with a dehumidifier designed for outdoor or semi-outdoor environments. During my experience, running a small, energy-efficient dehumidifier during wet seasons drastically reduced mold risk and kept my gear dry—similar to how a humidifier helps a room stay comfortable indoors.
Monitor and Adjust Regularly
Finally, check your vents periodically for debris, corrosion, or blockages. Adjust their positions based on changing weather patterns. I made a habit of inspecting mine after storms, always surprised how a quick adjustment could improve airflow, much like tuning a musical instrument for perfect pitch. Proper maintenance ensures your drying system works efficiently year-round, preserving both your space and your belongings.
When it comes to designing and building outdoor spaces, many homeowners and even some professionals make assumptions that can lead to costly mistakes. A common myth is that all composite decking is created equal—people often believe manufacturer labels guarantee top-tier durability and appearance. However, the reality is a bit more nuanced. Not all composite materials withstand environmental stresses equally, and selecting the wrong type can result in warping, fading, or mold over time. For example, capped composites tend to resist staining better, but even among them, variations in core quality can influence longevity. \
Maintaining your outdoor deck over the years requires more than just occasional cleaning; it demands a strategic approach utilizing the right tools and methods. One indispensable tool I personally rely on for durability is a high-quality power washer with adjustable pressure settings. Unlike generic pressure washers, my model allows me to switch between gentle rinsing for delicate composite boards and more aggressive cleaning for stubborn grime, preventing surface damage while ensuring longevity. Additionally, I recommend a deck-specific cleaning solution like Basic Coatings DeckClean, which is formulated to break down mold and dirt without harming the materials. Using a soft-bristle brush attachment, connected to your power washer, ensures you scrub away dirt without scratching the surface, a step I find crucial for preserving the aesthetic and structural integrity of your deck. For routine inspections, a moisture meter like the Wagner MMC220 helps me identify areas prone to water retention or rot before visible damage occurs, enabling proactive repairs. In terms of preservation, sealing your deck with a high-quality, UV-resistant stain or sealant extends the lifespan of your investment. My preferred product is Behr Premium Transparent Waterproofing Wood Stain, which I apply with a microfiber roller for an even coat. Looking ahead, the trend in deck maintenance seems to lean toward smart solutions—think IoT-enabled moisture sensors and automated cleaning systems that monitor environmental conditions and activate maintenance routines accordingly. This innovation promises to make long-term upkeep less labor-intensive and more precise.
How do I keep my deck in top shape over time?
Regularly inspect and clean your deck using tools like a power washer and specialized cleaning solutions. Don’t forget to check moisture levels periodically with a moisture meter and re-apply sealants when the finish begins to wear. Implementing these practices can prevent costly repairs down the line and maintain that beautiful outdoor space you’ve worked so hard to create. I highly recommend trying my method of combining a gentle power washing with targeted sealing—it’s been a game-changer for me and could be for you as well. For more on advanced deck care techniques, explore our comprehensive guide to seamless transitions and stairs to enhance your space. Plus, consider investing in a moisture meter designed specifically for outdoor wooden structures; it’s a small device that offers peace of mind by helping you catch issues early. Remember, a well-maintained deck not only looks inviting but will also perform better and last decades longer, making your outdoor living experience truly enjoyable.
What I Wish I Knew About Deck Venting Before I Started
One of the most valuable lessons I learned was that sealing your deck airtight might seem like a good idea, but it can actually trap moisture and lead to worse problems like mold and rot. It’s tempting to think that dense materials or tight seals will keep the elements out, but in reality, proper airflow is essential for longevity. I wasted time and money trying to waterproof every nook without considering ventilation—a mistake I won’t repeat.
Another insight came from understanding that not all vents are created equal. I initially thought installing a few generic vents would suffice, but choosing weather-resistant, adjustable louvers made a significant difference in controlling humidity levels. The key is strategic placement—near the lowest points and in areas prone to moisture buildup—to truly improve drying and air circulation.
Finally, regular maintenance of your vents can’t be overlooked. Debris, leaves, or corrosion can block airflow, rendering your efforts useless. Periodic inspections and quick fixes like sealing around edges with weatherproof caulk have kept my under-deck storage dry and mold-free. These small daily attentions ensure that the ventilation system continues to serve its vital role effectively.