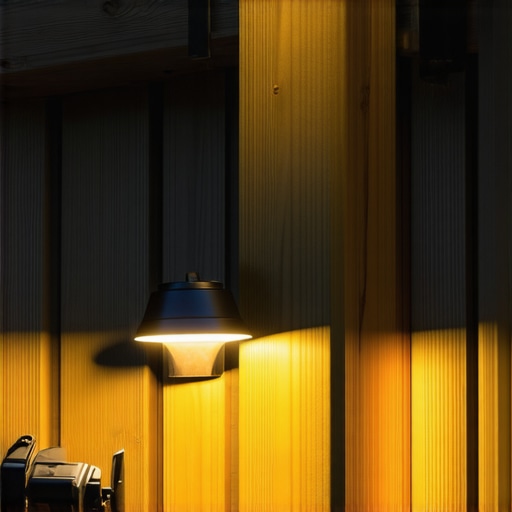
It was a clear summer evening when I finally realized that my beloved outdoor deck was missing one crucial element—lighting. After spending hours choosing the perfect composite decking and designing the ideal layout, I was thrilled to entertain friends under the stars. But as the sun set, I faced a glaring problem: my deck lacked soft, ambient lighting, making it feel less inviting and more like a dark stage set. The thought of tearing out posts or ripping apart sections of my new build was daunting—and expensive.
That night, I had a lightbulb moment. Why not retrofit my existing deck posts with lighting? My challenge was clear: I wanted a seamless, cost-effective way to add lights without sacrificing the integrity of my old posts or disrupting my outdoor oasis. Over the years, I’ve learned that many outdoor enthusiasts hesitate because they assume that adding lights requires major renovations or professional help. But with a bit of DIY ingenuity, it’s entirely possible—and incredibly rewarding.
Today, I promise to guide you through the process I perfected: how to retrofit lights into existing deck posts safely and beautifully. This approach will help you transform your outdoor space, making it more enchanting and functional, without the headache of rebuilding everything. If you’re like me, you’ve faced that frustrating realization that your deck, despite its beauty during the day, falls flat after sunset. And if you’ve ever wondered whether you can spice up your outdoor lighting without high costs or complex wiring, you’re in the right place.
Let’s dive into how you can turn your deck into a warmly lit retreat—step by step.
Why Retrofit Deck Post Lights? The Benefits You Can’t Ignore
Start with a Clear Plan
Before diving into installation, sketch your deck layout focusing on current post locations and desired lighting effects. Decide whether you want soft ambiance or brighter task lighting. Use a measuring tape to record post dimensions and distances, which will guide your choice of retrofit kits. I learned this firsthand when I realized that precise measurements prevented unnecessary purchases and post modifications later on.
Select Appropriate Lighting Fixtures
Choose weather-resistant, low-voltage LED fixtures designed for outdoor use. Consider integrating fixtures that fit seamlessly into your posts, such as LED puck lights or strip lighting. Remember, the right fixture can turn your deck from dark to inviting, much like how I upgraded my old posts by selecting fixtures that matched my deck’s style—saving me from a mismatched look. For more ideas, visit innovative outdoor living ideas.
Prepare Your Existing Posts
Turn off power and remove any existing hardware or embellishments on the posts carefully. Use a drill with a masonry bit to create access points at the top or sides of the posts, depending on your fixture type. I used painter’s tape around drill spots to prevent cracking, which proved invaluable when I drilled into brittle wood. This prep work ensures a clean, safe space for your wiring and fixtures.
Plan Your Wiring Path
Route wiring through the posts by drilling holes at the base or the top. Use flexible conduit or waterproof conduit fittings to protect wires from moisture and UV damage. As I threaded wires through my posts, I ensured the conduit was sealed tightly to prevent water ingress, similar to how I sealed my deck’s perimeter. This step prevents future electrical issues and preserves your outdoor space’s aesthetics. For detailed wiring techniques, see how to install deck lighting without drastic drilling.
Connect the Fixtures Securely
Attach your chosen fixtures to the prepared spots, ensuring they sit flush and are firmly secured with weatherproof screws or clips. Connect wires to a low-voltage power supply, respecting polarity and safety instructions. I tested connections with a voltage meter before powering up, which saved me from potential shorts. Proper securing and testing guarantee longevity and safety of your retrofit lighting.
Power Up and Test
Once wired, turn on the power and verify each fixture’s performance. Adjust angles or positions as needed to achieve even illumination. Take note of any flickering, which might indicate loose connections—tighten accordingly. After successful testing, conceal wiring and gear neatly inside the posts or along the framing. Achieving this clean finish was the culmination of following precise steps, transforming my dark, unwelcoming deck into a nightly retreat. For professional insights, consider visiting benefits of working with a professional deck builder.
Many homeowners assume that hiring a deck builder means simply choosing the right materials and trusting the contractor to execute. However, this oversimplification can lead to overlooking critical details that affect the durability and safety of your outdoor space. For instance, a widespread misconception is that all composite decking is maintenance-free; in reality, the market is evolving, and choosing the right type—like mineral core boards—can significantly impact longevity, especially in harsh climates. For a comprehensive understanding of current trends, check out composite decking trends 2025.
What Do Experts Know About Advanced Deck Construction That Novices Miss?
One common mistake is neglecting the importance of proper framing, which can cause stairs and deck surfaces to sag or crack over time. A subtle nuance often overlooked is the influence of moisture management—improper flashing or inadequate drainage can lead to rot, even when using high-quality materials. According to industry expert TimberTec, correct flashing and venting are essential to ensure your deck’s lifespan, a topic thoroughly covered in transform your space with expert tips. Moreover, many think that stairs are straightforward to build; in truth, miscalculations in staircase stringer dimensions or neglecting proper handrail height not only violate codes but also pose safety risks. For advanced stair design tips, see designing safe stairs.
Another hidden nuance involves the fasteners used. While nails and screws are common, opting for corrosion-resistant stainless steel fasteners can prevent rust and staining, especially in coastal environments. This is a detail often missed by DIYers but emphasized by professionals. Check out fastener choices for coastal decks. Remember, details matter in construction—each choice impacts safety, aesthetics, and longevity. Don’t underestimate the importance of professional guidance; collaborating with experienced deck builders can reveal these subtle pitfalls and help you create a truly durable outdoor living area. Have you ever fallen into this trap? Let me know in the comments.Maintaining your outdoor deck is crucial to ensure its longevity, safety, and visual appeal. Over the years, I’ve discovered that using the right tools and software makes all the difference in keeping your deck looking pristine and functioning smoothly. One indispensable tool I recommend is the **Laser Level**—specifically, the Bosch GLL3-330CG. It’s highly accurate, easy to set up, and helps ensure your deck boards and stair risers are perfectly aligned, preventing uneven surfaces that can lead to safety hazards. Additionally, a **cordless electric drill** with variable speed control is essential for fastening composite boards securely without damaging the material. I personally favor the DEWALT DCD791D2 because of its power and ergonomic design, which reduces fatigue during long projects.
For routine maintenance, a **high-pressure washer**—like the Sun Joe SPX3000—allows for efficient cleaning of composite surfaces without the risk of warping or damaging the material. I’ve found that regular washing prevents mold and moss buildup, especially in shaded areas. When it comes to software, **Deck Designer** tools such as those from Trex offer excellent visualization options, helping plan expansions or renovations down the line. As composite decking continues to evolve—embracing trends like fiber-reinforced boards—the right tools will help adapt your approach seamlessly.
Prediction: Advances in drone technology and 3D scanning are poised to transform deck inspections. Using drones equipped with high-resolution cameras, homeowners and professionals can monitor large or hard-to-reach areas for damage or rot, reducing the need for invasive inspections and ensuring proactive maintenance.
How do I maintain my deck over time?
Regular inspections are key—look for loose fasteners, chips, or signs of rot. Applying a **coating of protective sealant** every couple of years can preserve the vibrancy of composite surfaces and prevent water ingress, which is essential even for low-maintenance materials. Before sealing, make sure the surface is thoroughly cleaned with a mild cleaner and a soft brush to remove dirt and debris. Also, pay attention to drainage; ensuring water doesn’t pool around the posts or in stair drains prolongs the life of your entire structure. For more detailed insights, visit choosing the right composite decking to select materials that require minimal upkeep.
Don’t overlook the importance of **moisture management** in long-term upkeep—an area where industry expert TimberTec emphasizes proper flashing and venting techniques. These small but vital details prevent rot from developing beneath your deck and keep it safe for years to come. Consider upgrading existing fasteners with corrosion-resistant options such as **stainless steel screws**, especially if you live near coasts where salt accelerates rusting. This detailed attention to hardware is often overlooked but significantly extends your deck’s lifespan.
Finally, keep an eye on technological advancements like **smart moisture sensors** that can alert you to potential issues early. In the coming years, integrating IoT devices might become standard, enabling real-time monitoring of everything from wood moisture levels to structural integrity.
Try implementing a **laser-guided leveling method** during your next deck renovation—it saves hours of guesswork and ensures perfect alignment, making your DIY projects look professionally finished. Remember, the right tools don’t just make work easier; they can double the lifespan of your deck and keep it safe for family and friends. Ready to elevate your maintenance game? Visit contact us to explore professional guidance or get expert recommendations tailored to your outdoor space.
Lessons That Changed My Deck Game Forever
- One of the hardest lessons I learned was that patience exceeds perfection; rushing the wiring process resulted in flickering problems I had to troubleshoot later. Taking my time, double-checking connections, and reading the fixture manuals thoroughly made all the difference.
- Another insight was realizing the importance of sealing all cut areas inside the posts. Moisture was a silent threat I underestimated, which could lead to rot and electrical hazards. Sealing with a waterproof caulk gave me peace of mind and prolonged the lifespan of my retrofit lighting.
- The simplicity of using low-voltage LED fixtures initially seemed too good to be true. But once I saw how energy-efficient and long-lasting they are, I knew they were the right choice—saving me money and reducing my environmental footprint.
- Finally, I discovered that planning your wiring route beforehand—considering future upgrades or troubleshooting—can save headaches later. Running conduit inside or along the posts, instead of just wiring through, provides easier access for maintenance and adds a professional touch to your project.
Tools and Resources That Made a Difference
- The **Bosch GLL3-330CG Laser Level** became my best friend, ensuring perfectly aligned fixtures and smooth lines, which made my deck look professionally finished. Its accuracy and ease of setup are unmatched, and I highly recommend it for any outdoor lighting retrofit.
- My reliable **DEWALT DCD791D2 Cordless Drill** allowed me to drill precise access points and secure fixtures firmly, even in the toughest posts. Its ergonomic design reduced fatigue during lengthy install sessions, making the project enjoyable rather than exhausting.
- For wiring protection, I trust **Watertight Conduit and Fittings** from local hardware stores—keeping wires safe from weather, pests, and UV damage. Properly protected wiring is crucial for long-term safety and performance.
- Lastly, I explored online tutorials and FAQs on sites like deck design insights and professional project guides, which provided valuable tips on waterproof sealing and fixture placement. Investing in quality tools and trusted resources really pays off in achieving a seamless, durable retrofit.