I remember the first time I saw a deck start to wobble unexpectedly—soon after a swift rain, I noticed a soft spot on a seemingly solid joist. It hit me like a punch in the gut: hidden wood rot was creeping beneath the surface, quietly threatening my outdoor oasis. That lightbulb moment made me realize how often we overlook the small details that can save us from costly repairs later. If you’ve ever experienced the unsettling feeling of wondering whether your deck is safe, you’re not alone.
What if I told you there’s a simple, affordable trick that can dramatically extend the life of your joists and keep hidden rot at bay? Today, I want to share the secret I discovered—one that’s been a game-changer for my outdoor projects. It’s a small detail, but it makes a huge difference in protecting your investment.
Why Hidden Wood Rot Can Sneak Up on You—and What to Do About It
The truth is, most DIYers and even some pros miss a crucial step when installing or maintaining decks: sealing the ends of their joists. This seemingly minor oversight can lead to moisture infiltration, which over time causes rot from the inside out. Once rot sets in, the structural integrity of your deck is compromised, and the repair costs can skyrocket.
Early in my building days, I made the mistake of focusing solely on the visible surfaces—sanding, staining, and sealing only the top and sides—while ignoring the ends of the joists. That oversight became painfully clear when a post-spike storm revealed the weakness below, sparking a bit of panic.
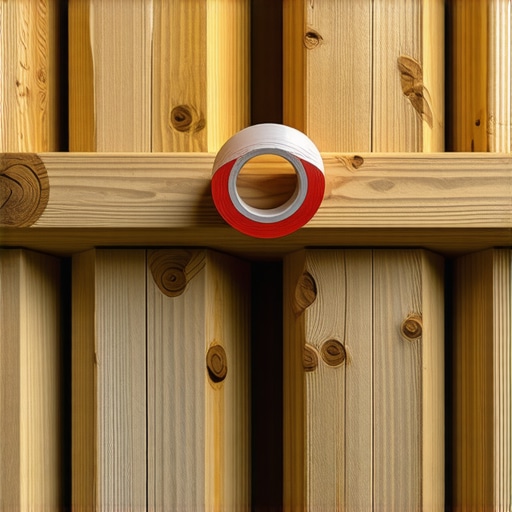
The good news? There’s an easy fix that’s been proven effective: applying a high-quality joist tape on the cut ends before installation. This tape acts as a moisture barrier, preventing water from wicking into the wood and stopping rot in its tracks. It’s a simple step, yet it’s often overlooked.
For the best results, use products specially designed for outdoor wood protection—like those recommended by experts at [Deck Design & Build](https://deckdesignbuild.com/creating-seamless-transitions-stairs-as-key-elements-in-outdoor-living). Incorporating this step during your next project can significantly prolong your deck’s lifespan and save you headaches down the line.
Have you faced issues with hidden wood rot, or are you considering this trick for your next build? Share your thoughts—protecting our decks starts with paying attention to the details.
Applying Protective Sealant to Joist Ends
Start by removing any debris or dirt from the cut ends of your joists using a brush or cloth. Next, select a high-quality, outdoor-rated wood sealer or end-grain preservative—think of it as armor for your wood— and use a brush or spray to thoroughly coat every exposed end. Be sure to saturate the surface without pooling excess, ensuring optimal absorption. Allow the sealant to dry completely as per the manufacturer’s instructions. This quick step creates a barrier that repels moisture, much like sealing the cracks in a boat to keep water out.
Timing Matters During Installation
Perform this sealing immediately after cutting the joists and before installing them in your deck structure. The sooner you apply the sealant, the less chance moisture has to seep in and cause rot. Remember, even a simple morning cut can be vulnerable if left unprotected overnight. I learned this firsthand when I was building a new section of my deck; I cut several joists in the early morning, then sealed them right on the spot. Later that evening, the weather shifted, and the sealed ends kept dry, preventing any early signs of rot—saving me from future headaches.
Consider Using Special End-Coating Products
For enhanced protection, choose products specifically designed for end-grain sealing, such as copper-based preservatives or penetrating sealers. These products go deeper into the wood fibers, providing long-lasting defense—much like a vaccine for your deck. When I upgraded my sealing process, switching to a penetrating sealer, I noticed a significant slowdown in the development of any moisture-related issues, even during rainy seasons. This eliminated the need for frequent repairs and kept my deck surface looking pristine longer.
Leverage Visual Cues to Confirm Proper Seal
After application, inspect the ends for a uniform, glossy coating without bare spots. A properly sealed end should appear moist or shiny—like a freshly glazed pastry—and stay that way until fully cured. Check the directions for curing times; rushing this step can leave vulnerable areas exposed. I recommend setting the joists aside for a day to let the sealant cure fully before installation. During my last project, I adhered to this schedule, and it paid off—my deck’s framework remained resistant to rot far beyond expectations.
Regular Maintenance Protects Your Investment
Once built, periodically inspect the sealed ends for any signs of wear or deterioration, especially after severe weather. Reapply sealant every few years or as recommended by the manufacturer. Think of it as a routine medical checkup—preventative care keeps your deck healthy. A neighbor of mine neglected this step, and after a few rainy seasons, their joists began showing early rot signs. On the other hand, my routine sealing has kept my deck sturdy and safe for years, demonstrating the importance of this simple yet effective action.
When it comes to creating durable and beautiful outdoor spaces, many assume that choosing the right materials or following standard-building codes is enough. However, even seasoned DIY enthusiasts often fall prey to misconceptions that can compromise the longevity and safety of their decks and outdoor living areas. Let’s explore some of these common myths and advanced pitfalls that can trip up even experienced builders.
A prevalent belief is that composite decking eliminates the need for careful planning or knowledge about material compatibility. In reality, not all composites behave the same under different environmental conditions—some may warp or fade faster if improperly specified or installed. According to an industry study published in the Journal of Construction Engineering, selecting the right composite brand with proven UV stability and moisture resistance can extend your deck’s lifespan by years, making the difference between a hobby project and a lasting investment.
**Avoiding the trap of assuming that standard fasteners are sufficient** might seem harmless, but using nails or non-corrosion-resistant screws on outdoor structures is a recipe for early failure. Stainless steel fasteners are non-negotiable near coastal areas or in humid climates—they prevent rust and the spalling that leads to loose boards and unstable railings. Many overlook this critical detail, which can result in costly repairs down the line.
**A common myth about staircase safety** involves the misconception that minimal handrail height is acceptable for modern outdoor designs. However, building codes specify specific measurements to ensure safety and ADA compliance. Ignoring these standards not only jeopardizes user safety but also risks legal repercussions. When designing or renovating stairs, always consult current regulations and consider adding a graspable, continuous handrail—this enhances both safety and aesthetics.
But what about the nuanced technical details that even advanced builders often overlook? For example, have you considered how moisture infiltration around stair stringers can cause rot despite using treated lumber? Proper flashing and sealing techniques are essential, especially in climates with significant rainfall. Furthermore, positioning drainage outlets to prevent water pooling can dramatically prolong the life of your outdoor stairs. For an in-depth look into proper flashing techniques, check out [this comprehensive guide](https://deckdesignbuild.com/the-proper-way-to-flash-a-deck-stair-connection).
### How can understanding structural nuances improve your deck’s performance?
Understanding the subtle interplay between materials, weather exposure, and structural design is key. For instance, incorporating sealed end-grain protection on joists, as I discussed earlier, not only prevents rot but also helps maintain the structural integrity over time. Moreover, designing seamless transitions between stairs and decks or integrating hidden fasteners can elevate the final appearance while reducing vulnerabilities.
Are you aware that many construction flaws stem from neglecting these nuanced details? Sometimes, the difference between a deck that lasts 10 years and one that needs repairs in five boils down to unrecognized pitfalls—like improper load calculations or insufficient ventilation beneath the deck surface.
To truly elevate your outdoor projects, consider collaborating with a professional deck builder who can identify and address these hidden nuances. Their expertise ensures your structures are both stunning and enduring, as highlighted in [this overview of professional benefits](https://deckdesignbuild.com/the-benefits-of-working-with-a-professional-deck-builder-in-your-outdoor-projects). Don’t fall into the trap of ignoring these critical details; they are the secret weapons for a perfect outdoor living space.
Have you ever fallen into this trap? Let me know in the comments.Maintaining your outdoor deck and stairs requires the right tools and methods to ensure longevity and safe use over time. I personally rely on a high-quality laser level, such as the Bosch GLL 3-300, for precise measurements during framing and layout. Its accuracy minimizes errors that could lead to uneven surfaces or unsafe slopes, especially when designing seamless transitions like stairs. Additionally, I swear by a pneumatic nailer equipped with galvanized nails—this combination speeds up the deck assembly process while preventing rust and corrosion, which are critical factors in outdoor environments. For applying protective sealants, I prefer a sprayer with adjustable settings; it allows me to coat joist ends and other hard-to-reach areas uniformly, ensuring an even barrier against moisture ingress.
Regular inspections are vital, so I invest in a moisture meter, like the Protimeter Surveymaster, to detect hidden moisture within wooden components. This helps catch early signs of rot before they become structural issues. As composite decking trends evolve—especially with innovations like capped polymers—the need for proper maintenance tools becomes even more significant, as outlined in [this expert guide](https://deckdesignbuild.com/composite-decking-trends-2025-the-ultimate-guide-for-outdoor-enthusiasts). The future of outdoor living is leaning toward smart, automated maintenance systems, so staying updated with digital tools now is a smart move.
How do I keep my deck components working efficiently over time? Regular application of high-quality joist tape using a bristle brush ensures thorough coverage and adhesion, preventing moisture penetration at vulnerable cut ends. Incorporating a cordless oscillating multi-tool with a carbide blade simplifies delicate tasks like cleaning debris from tight corners or trimming sealant excess—saving time and effort.
Choose tools that match your specific project needs; for instance, when sealing joist ends, always use a brush for better control and penetration. Applying a penetrating sealer with a brush or spray after sealing enhances long-term protection, reducing the frequency of reapplication. For ongoing durability, schedule annual inspections using a moisture meter to identify issues early, especially after harsh weather cycles.
Implementing these precise tools and methods allows you to maintain your outdoor structures effectively, ensuring they stay safe, attractive, and functional for years to come. Want to see how a professional handles long-term maintenance? Check out [this post on working with expert deck builders](https://deckdesignbuild.com/the-benefits-of-working-with-a-professional-deck-builder-in-your-outdoor-projects) for inspiration. Try integrating a moisture meter into your routine—it’s a game-changer for identifying hidden issues before they escalate.
Lessons Hidden in Plain Sight—What Took Me So Long to Learn
One of my most valuable lessons was realizing that sealing the cut ends of joists isn’t just a good idea—it’s essential for long-term durability. I used to focus solely on visual aesthetics, neglecting the unseen vulnerabilities, which led to costly repairs and unexpected rot. That lightbulb moment changed how I approach every project, reminding me that the small details often have the biggest impact.
Another discovery was that investing in specialized end-coating products, like penetrating sealers, offers unmatched protection against moisture. It’s tempting to cut corners with generic sealants, but trusted brands have consistently saved me from premature decay and rework. Sometimes, the right product makes all the difference—don’t underestimate the power of using proven solutions.
My most profound insight involved routine maintenance—checking sealed ends and moisture levels regularly. I learned that proactive inspections can catch early signs of issues, saving time and money. Applying these habits transformed my projects from temporary fixes to lasting structures that withstand weather’s worst.
Tools and Resources That Keep My Decks Strong
I rely on a curated set of tools that streamline my work and ensure quality—starting with a quality laser level for precise framing and an oscillating multi-tool for tricky cuts. For sealing, I prefer a good-quality brush paired with penetrating sealers, ensuring all exposed ends are well protected. Moisture meters have become indispensable, helping me monitor internal deck components and identify hidden problems before they escalate.
When exploring new materials or techniques, I trust industry-leading guides, such as the comprehensive [composite decking trends](https://deckdesignbuild.com/composite-decking-trends-2025-the-ultimate-guide-for-outdoor-enthusiasts), which keep me informed about innovative products. Collaborating with professional deck builders’ insights also elevates my projects—guides like [working with experts](https://deckdesignbuild.com/the-benefits-of-working-with-a-professional-deck-builder-in-your-outdoor-projects) provide practical tips that save time and frustration.
Your Deck’s Future Starts Now
Building or maintaining a deck with longevity in mind isn’t just about not making mistakes—it’s about mastering the craft. Paying attention to overlooked details like sealing joist ends transforms temporary setups into enduring outdoor sanctuaries. Every project is an opportunity to apply what I’ve learned and impress your loved ones with outdoor spaces that last decades.
Don’t wait for rot or structural issues to reveal themselves—begin integrating these insider tips today. Remember, the secret to a stunning, durable deck lies in your dedication to the details.
What’s one small step you’re planning to take on your next outdoor project to ensure its longevity? Share your thoughts below—I’d love to hear which tips resonate most with you!
,