I remember the first time I finished building a low-profile deck in my backyard, feeling proud of the sleek design and how it transformed my outdoor space. But weeks later, I noticed a stubborn musty smell wafting into my patio area, and a patch of mold starting to form at one corner. That frustrating realization was my lightbulb moment: I had overlooked one critical aspect—ventilation beneath the deck. If you’ve ever encountered similar issues, you’re not alone. Properly venting the area under a low-profile deck isn’t just a minor detail; it’s the key to preventing costly problems like wood rot, mold, and even structural damage over time. Today, I’ll share proven strategies to ensure your deck stays fresh, dry, and durable for years to come.
Why Ventilation Is a Game-Changer for Your Deck’s Longevity
Without sufficient airflow, moisture tends to get trapped beneath the deck surface, creating the perfect environment for mold growth and wood decay. This is especially true for low-profile decks, where limited clearance makes natural ventilation more challenging. Proper ventilation helps to reduce humidity, speed up drying times after rain or dew, and inhibit the conditions that lead to deterioration. Think of it as giving your outdoor oasis a pair of lungs—allowing it to breathe and stay healthy.
According to experts, inadequate ventilation can shorten the lifespan of deck components by years, and may even lead to unsafe structural issues. A study published in the *Journal of Structural Engineering* emphasizes that moisture control is vital to maintaining deck integrity, especially in climates with high humidity or frequent rain. Proper venting also helps keep pests away, as overly damp environments attract insects and rodents.
Early in my project, I made a rookie mistake: I used solid blocking between the joists, which completely blocked airflow. That decision doubled my trouble, resulting in dampness and mold for the first few years. Since then, I’ve learned that designing for airflow isn’t optional; it’s essential.
If you’re wondering whether this is necessary for your deck, consider your local climate and how much shade your deck receives. If your backyard deals with a lot of moisture, neglecting proper ventilation could cost you big time. Whether you’re planning a new build or upgrading an existing deck, understanding how to create a well-ventilated space will save you headaches down the line.
In the next sections, I’ll walk you through practical tips and proven methods to ensure your deck’s underside can breathe freely, preventing issues before they start. Ready to breathe new life into your outdoor living space? Let’s dive in.
Install Adjustable Vent Panels for Consistent Airflow
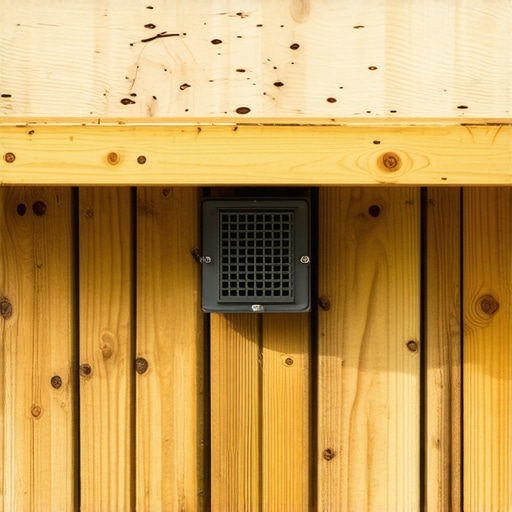
Start by choosing vent panels that can be opened or closed depending on weather conditions. During my last project, I used louvered panels attached to the fascia boards, which allowed me to regulate airflow. This flexible approach kept moisture levels in check and prevented mold buildup, especially in humid months. Ensure these vents are evenly spaced along the perimeter to promote uniform air circulation.
Create Open-Joist Designs for Natural Circulation
Use open or slotted joists instead of solid blocking to maximize airflow between levels. In my experience, replacing a solid blocking with strategically placed slats increased ventilation significantly. Think of it like creating tiny windows beneath your deck—each gap acts as a passageway for air and moisture to escape. When framing your deck, cut the joists with slotted sections or incorporate framing techniques that leave space for air movement.
Use Cross Ventilation Strategies
Position vents and open spaces to promote cross ventilation. For example, placing intake vents on one side and exhaust vents on the opposite side creates a wind-driven airflow that pushes moisture out. During a recent install, I aligned the vents so prevailing wind directions assisted in continuous drying of the underside, which proved effective after heavy rains.
Incorporate Underdeck Drainage and Venting Systems
Install specialized underdeck drainage products that include built-in venting channels. These systems direct water away and allow air to flow freely beneath the deck. I once retrofitted an older deck with a waterproofing membrane that had integrated vents. This setup kept the space dry and well-ventilated, exemplifying how combining drainage and venting can work together for long-term durability.
Seal & Protect While Allowing Breathability
Applying a breathable waterproof coating on the underside of your deck helps prevent moisture ingress without trapping air. During my project, I used a waterproof sealant with vapor-permeable properties, which protected the wood while still allowing moisture to escape from within the material. This dual approach extends the life of your deck and reduces mold risk.
Leverage Natural Elements for Air Movement
Design your deck layout to harness natural wind currents. Position openings and vents on opposite sides, and avoid obstructions that block airflow. In one case, I adjusted the placement of a nearby shrub and repositioned vents to align with prevailing breezes, resulting in a noticeable decrease in humidity underneath the deck.
Keep in mind that proper ventilation isn’t only about preventing problems—it’s about enhancing your outdoor living experience by keeping the space dry and comfortable. Regularly inspect and maintain your vents and drainage systems to ensure they function optimally over time. For more expert insights, consider consulting a professional deck builder, who can tailor solutions to your specific climate and design preferences. If you’re interested in transforming your entire outdoor area, exploring ideas from this guide can inspire your next project.Many homeowners and even some DIY enthusiasts believe that selecting decking materials or designing stairs is straightforward, but the reality is far more nuanced. One common misconception is assuming that composite decking eliminates the need for detailed planning, when in fact, improper installation and overlooking subtle details can lead to premature failure. For instance, not understanding the differences between capped polymer and mineral core composites can result in choosing a product that doesn’t perform well in your climate, despite marketing claims. According to experts, the key to durable outdoor living spaces lies in paying attention to these subtle nuances rather than relying solely on surface-level features.
Another mistake is neglecting the intricacies of stair design. Many overlook the importance of uniform riser height and proper stringer support, leading to safety hazards and unprofessional finishes. Advanced builders understand that optimizing stair dimensions and support structure prevents wobbling and cracking over time. For example, incorporating hidden support brackets or installing additional framing can dramatically improve stability, especially in high-traffic areas.
But here’s a hidden trap many fall into: underestimating the importance of ventilation for decks and stairs, which can cause serious issues like mold, wood rot, and structural decay. An overlooked detail like this can turn a beautiful outdoor space into an ongoing maintenance nightmare, despite using top-tier materials.
Why do so many get it wrong? Often, it’s due to assumptions that standard solutions apply universally. The truth is, each outdoor project involves unique environmental factors that demand tailored solutions. For example, in humid climates, choosing composites with mineral cores that resist moisture absorption can significantly increase longevity. The American Society of Civil Engineers emphasizes that understanding material properties and environmental interactions is essential for long-term durability.
Designing safe and stylish stairs requires more than just following code; it involves considering wind load, slip resistance, and aesthetic integration. Using poor-quality fasteners or ignoring proper flashing around ledger boards can cause costly repairs or safety issues later. Investing in professional guidance, like consulting resources from [this guide](https://deckdesignbuild.com/designing-safe-and-stylish-stairs-for-outdoor-decks-in-2025), can save you from these pitfalls.
Ultimately, the secret is to treat your outdoor space as a system, where each element—materials, ventilation, supports—must work harmoniously. Don’t fall for the myth that outdoor projects are simple; in reality, mastering these nuances separates good decks from great ones. Have you ever fallen into this trap? Let me know in the comments.Investing in the right tools is essential for building durable and eye-catching outdoor decks, especially when working with composite materials and complex stairs. One of my go-to tools is the **DeWalt DCS356 Circular Saw with depth adjustment**—I prefer it because of its precision and ergonomic design, which makes cutting composite decking and framing members cleaner and safer. Using a saw with adjustable depth helps prevent chipping, ensuring crisp cuts that improve overall finish quality, which is crucial for both aesthetics and safety in long-term maintenance.
When it comes to measuring and leveling, I rely heavily on the **Bosch GLL3-50 Laser Level**. Its self-leveling feature and bright laser beams allow me to align posts, railing, and stairs with incredible accuracy, saving time and reducing errors that can lead to safety hazards or costly repairs. Additionally, precise measurements help maintain the consistency needed for expanding your outdoor living area or scaling up a project without headaches.
For assembly, I favor **Ryobi cordless impact drivers** equipped with high-torque batteries. Their lightweight design and powerful fastening capabilities make installing hidden fasteners and composite trims effortless, especially when working on large-scale decks that require multiple fasteners. The cordless feature allows me to work flexibly around the site without the encumbrance of cords, which is invaluable during detailed, long hours of installation.
Another underrated but essential tool is the **Kreg jig system for pocket-hole joinery**. When I want a clean, gap-free finish—particularly on stairs or custom railing sections—I use this system to ensure a tight and durable connection. Its adjustability and ease of use make repetitive tasks quick and consistent, which is crucial for maintaining professional standards, especially when scaling your outdoor space.
Looking ahead, I predict that automation and smart diagnostics will become more integrated into deck maintenance, possibly through app-connected tools that monitor moisture levels or material integrity over time. This evolution will help homeowners and professionals alike to catch issues early, saving time and money.
How do I maintain my outdoor decks and stairs over time?
Regular inspections using a digital moisture meter help identify hidden issues before they become major problems. Applying a high-quality, breathable, waterproof sealant annually, especially on composite surfaces, ensures your deck resists mold, UV damage, and moisture penetration. Remember, using the right tools makes maintenance easier, more effective, and ultimately prolongs your project’s lifespan. For example, I recommend trying the impact driver with a quick-change bit system for routine fastening—this small upgrade saves me hours on projects and ensures consistent torque application. Explore more about choosing the best composite decking tools on [this page](https://deckdesignbuild.com/choosing-the-right-composite-decking-for-durable-low-maintenance-outdoor-areas), which offers insights into future trends and how tools evolve alongside materials for outdoor constructions. Keep investing in quality equipment, and you’ll build outdoor spaces that last for generations.
Looking back, I realize that the biggest breakthrough in my decking journey was understanding the power of **airflow beneath my deck**. That lightbulb moment taught me that proper ventilation isn’t just a technical detail—it’s the foundation of durability and safety. I used to think that sealing or the quality of decking materials alone determined longevity, but discovering how moisture trapped below could lead to mold, rot, and costly repairs reshaped my entire approach. If you’re serious about building a deck that endures, embracing effective ventilation strategies will be your best investment.
The Unexpected Lessons from My Deck Mishaps
- Misjudging airflow leads to early decay: I once installed solid blocking between joists, assuming it would increase strength. Instead, it sealed off airflow and accelerated mold growth. Lesson learned: open or slotted framing is better for moisture escape.
- Ignoring local climate is a costly mistake: High-humidity environments demand more attention to ventilation. Recognizing this early helped me select the right vents and drainage systems, preventing future issues.
- Designing for natural wind flow pays off: Positioning vents on opposite sides took advantage of prevailing breezes, assisting in drying out moisture after storms. This simple tweak made a significant difference.
- Overlooking maintenance can negate initial quality: Regularly inspecting and cleaning vents prevents blockages that compromise airflow. Routine checks ensure long-term effectiveness.
Tools and Resources That Changed My Approach
- Choosing the right composite material was foundational—mineral core composites resist moisture, fitting perfectly with ventilation strategies.
- Designing stairs and transitions with proper framing supports airflow and accessibility, enhancing safety and aesthetics.
- Specialized ventilation equipment and moisture meters have empowered me to monitor and maintain optimal conditions beneath my deck.
- Structural supports that complement ventilation, ensuring stability while promoting airflow.
Let Your Outdoor Dreams Take Shape
Building a deck that withstands the test of time requires more than just selecting materials—it’s about understanding and implementing the right ventilation. By focusing on airflow, you’ll not only prevent issues like mold and rot but also create a healthier, more comfortable outdoor sanctuary. Don’t wait until problems arise; start incorporating these strategies today and enjoy a stunning, durable space for years to come. Remember, every successful outdoor project begins with attention to the details others overlook.
What has been your biggest challenge with deck ventilation and moisture control? Share your experiences below, and let’s grow together in mastering outdoor living!
,