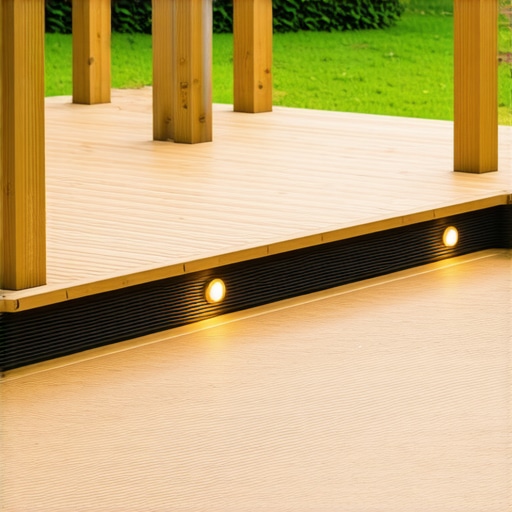
I remember the first time I installed some beautiful low-voltage lights on my deck. It looked stunning—until I realized the unsightly wiring running across the surface, glaring in the evening light. That moment was a lightbulb for me: wiring is necessary, but it doesn’t have to ruin the aesthetic. Have you ever faced the frustration of visible wires that spoil your outdoor oasis? You’re not alone. As someone passionate about outdoor living, I’ve learned that hiding these wires not only enhances the look but also extends the lifespan of your lighting system. Today, I want to share the practical steps I’ve taken to hide wiring effectively, turning a messy mess into a sleek finish that elevates my entire backyard experience.
Why Hiding Wiring Matters More Than You Think
Hiding wiring isn’t just about looks. It’s about safety, durability, and maintaining that seamless vibe you’re after in your outdoor space. Exposed cables can be tripped over, damaged by weather, or even become an eyesore over time. Plus, properly concealed wiring keeps your outdoor area looking professional, as if built by a seasoned deck builder. This is especially true if you’re investing in composite decking—its sleek surface calls for equally neat wiring solutions. I discovered early on that my DIY approach to hiding wires often led to more issues than I bargained for, like pinched cables or decay from exposure. So, I dove into research, talked to experts, and tested my own methods. What I found is that a little planning goes a long way, and there are smart tricks that make wiring virtually invisible. If you want your lighting to be functional and fabulous, read on. I’ll break down some of the secrets that transformed my deck after I applied these tips.
Is Concealed Wiring Really Worth the Effort?
Absolutely—though I’ll admit, I made my fair share of mistakes early on, like trying to hide wires without proper protection. Trust me, if you rush this step, you risk future damage or hazards. A common pitfall I encountered was using cheap conduits that cracked in the cold weather—something I now avoid by investing in quality materials. For more insights on how professionals approach this, check out the benefits of working with a professional. They have the experience to hide wiring safely and seamlessly, saving you time and money in the long run. Today, I’ll share the tried-and-true techniques I’ve perfected to keep your wiring out of sight and out of the elements, ensuring your deck lighting shines beautifully for years to come. Ready to transform your outdoor space into a sleek, illuminated retreat? Let’s get started.
Plan Your Wiring Route Carefully
Start by mapping out where your lights, outlets, and switches will be installed. During my first project, I laid out the entire wiring path on paper, marking hidden pathways along the joists and beneath the decking. This prevents surprises later and ensures a tidy install. Think of this step as drawing the blueprint of a building—clarity saves time and mess down the line. Measure carefully; one misstep can lead to exposed wires or the need to redo sections.
Create Protective Conduits and Channels
Use flexible conduit or raceways to shield cables from weather and mechanical damage. I opted for high-quality UV-resistant conduit, which I routed along the underside of the deck joists. Running wires through conduits is like placing them inside armor—protecting against rain, sun, and pest damage. When installing, secure the conduit with clip fasteners every few feet to prevent movement. This step is crucial; loose wiring can rub against wood or other surfaces, leading to wear or shorts.
Hide Wires Within The Joists
Cut shallow grooves into the sides of your deck joists to conceal the wiring, similar to how a carpenter channels wood for running electricals in walls. Use a router or chisel to make these channels, ensuring you avoid weakening the structural integrity of the joists. During my project, I learned that over-grooving risked joist strength—so I limited the depth to about one-third of the joist’s thickness. After routing, pass the wires through the channels, making sure to leave some slack for future adjustments. Seal the grooves with non-hardening wood filler or caulk for added weatherproofing.
Secure and Seal the Wiring Joints
Connections should be tight and weatherproof. Use waterproof connectors and electrical tape designed for outdoor use. I tested different sealing methods, ultimately choosing silicone-filled connectors that withstand rain and temperature swings. After making connections, cover them with weatherproof electrical boxes, sealing entry points with gasketed covers. This prevents moisture ingress, which is vital for long-term reliability. Remember, exposed or poorly sealed connections are a common failure point—skimping here compromises safety and aesthetics alike.
Use Beneath-Deck Sleeves for Long Runs
For wiring that runs across larger spans or to distant fixtures, install protective sleeves beneath the deck surface. These sleeves act as tunnels, guiding wires undisturbed and protected. In my case, I threaded the cables through PVC pipes anchored to the underside of the joists. This method made future upgrades or repairs straightforward, as I could pull new wires through without disturbing the entire setup. Think of it as installing a dedicated highway for your wires, minimizing exposure and damage.
Check Local Electrical Codes
Before powering up, verify all steps comply with local safety standards and codes. I consulted with a licensed electrician and reviewed the privacy policy and electrical guidelines to ensure my wiring was legal and safe. Using proper materials and techniques isn’t just about code; it’s about protecting your family and property from potential hazards. Never take shortcuts—diligence now prevents disasters later.
When designing outdoor stairs and decks, it’s common to follow popular guidelines or rely on standard practices. However, many people miss the subtle yet crucial details that can make or break the safety, longevity, and aesthetic appeal of these features. Let’s dig deeper into some common misconceptions and advanced pitfalls that even seasoned DIY enthusiasts often overlook.
Why the Right Tread Depth Can Save You From Future Repairs
While code-minimum tread depths are widely accepted, real-world application demands a nuanced understanding. For instance, the trend of increasing riser height to fit aesthetic preferences can inadvertently cause safety hazards, especially for elderly or mobility-challenged users. An overly steep staircase may look sleek but pose a risk of trips or falls. Experts suggest keeping riser heights within the 7- to 7.75-inch range, as outlined in professional standards. Oversights here can lead to uncomfortable foot traffic and even structural stress on support systems, leading to costly repairs down the line. Be vigilant about balancing visual style and safety.
The Mistake of Ignoring Drainage in Stairwell Design
A common error is neglecting proper drainage provisions where stairs meet the ground. Water pooling in stair treads or at the foot of the stairs can accelerate rot, promote moss growth, and increase slip hazards. Proper drainage involves sloping around landings and using hidden weep holes to guide water away. Implementing these details requires an advanced understanding of site grading and material behavior—something novice builders often overlook. According to research from the outdoor living institute, failure to consider drainage can shorten the lifespan of your stairs and compromise safety. Always test your design with water runoff simulations before finalizing installation.
Why Expert Guidance Outperforms DIY Fixes
Many underestimate the complexity involved in achieving seamless transitions between stairs and decks, especially when integrating composite materials. Professional deck builders bring an eye for detail—like ensuring smooth transitions that don’t trap debris. Skimping on professional advice often results in gaps or uneven step heights, which aren’t just unsightly but also safety hazards. A common mistake is miscalculating joint spacing, leading to creaking or wobbling over time. Investing in expert consultation can save you from these pitfalls and deliver a durable, low-maintenance outcome.
Advanced deck and stair projects involve complex calculations, precise material selection, and consideration of site-specific factors, such as freeze-thaw cycles or pest exposure. If you’re serious about elevating your outdoor living, I recommend reviewing resources like professional insights, and working with a trusted builder when possible. Remember, these nuanced details often distinguish a good project from a great one. Have you ever fallen into this trap? Let me know in the comments.
Keep It Working: Tools and Techniques for Durability
Maintaining a beautiful, safe outdoor space requires investment not just in good materials but also in the right tools and consistent upkeep. Over the years, I’ve found that certain specialized equipment makes all the difference in preserving the integrity of your deck and stairs. One of my go-to tools is a high-quality cordless electric drill like the DeWalt DCD991. Its brushless motor provides consistent power, which is crucial when drilling into composite or pressure-treated wood for repairs or installing new components. Additionally, a digital moisture meter helps me monitor wood and material dryness, preventing issues like mold or warping caused by unseen moisture buildup.
Invest in Precision Cutting and Fastening
For cutting composite boards, I rely on a Davinci Circular Saw with a fine-tooth blade. This ensures clean cuts without melting or chipping the material—something that standard blades struggle with. Proper cuts reduce the risk of water ingress and improve overall lifespan. When it comes to fastening, I prefer hidden fasteners like Timbertech’s PRO Plug System, which not only provides a sleek appearance but also minimizes exposed hardware where water can cause corrosion or decay. Using the right fasteners prolongs the life of your decking and avoids common issues like loosening or squeaking over time.
Routine Inspection and Care Tools
For ongoing maintenance, a telescoping pole with a soft brush attachment helps me routinely sweep off debris, preventing moisture retention. I also use a flexible inspection mirror to peek beneath the deck or stairs for signs of joist rot or pest activity—areas difficult to view otherwise. Regularly checking your structure allows you to catch small problems before they escalate, saving costs and ensuring safety. Remember, especially with composite decking, routine assessments help maintain its appearance and performance, as outlined in expert advice.
Planning for Long-Term Success
Looking ahead, I predict that incorporating digital management tools—like project tracking apps—will become standard for outdoor projects. These allow for scheduling inspections, ordering replacement parts, and even ordering custom-cut components in advance, reducing downtime. Combining traditional tools with innovative tech ensures your outdoor living space remains both stunning and functional for years to come.
How do I maintain my deck and stairs over time?
Consistent inspections paired with the right tools—such as moisture meters, precision saws, and fasteners—are fundamental. Regularly cleaning surfaces, checking connections, and replacing worn hardware extend the lifespan dramatically. For example, periodically re-tightening fasteners and sealing exposed wood or composite surfaces prevents moisture infiltration and structural weakness. Staying proactive with maintenance means fewer surprises and more enjoyment of your outdoor haven.
If you’re ready to elevate your outdoor project, try integrating a digital inspection schedule with your routine using a simple app like Trello or Evernote. It’s a game-changer for long-term durability, ensuring your deck and stairs stay as beautiful as the day they were built.
Lessons the Pros Don’t Tell You About Creating a Backyard Sanctuary
Over the years, I’ve learned that even small details, like concealing wiring or precise stair measurements, can make or break your outdoor project. One lightbulb moment was realizing that the most overlooked aspect isn’t the materials you choose but how you hide and protect wiring—transforming a cluttered mess into sleek, durable beauty. Additionally, I discovered that understanding the nuances of stair riser height isn’t just about code; it’s about safety and comfort. These insights have saved me time, money, and headaches, and they can do the same for you.
My Realizations That Changed the Game
- Using high-quality conduits and routing wires along joists keeps rain and pests at bay, but also requires careful planning to avoid weakening structural components.
- Proper stair riser height and landings ensure safety and usability—ignoring these can result in uneven steps and future repairs. I once underestimated this and paid the price.
- Regular inspections with the right tools, like moisture meters and inspection mirrors, catch small issues before they escalate—saving money and extending the life of your deck and stairs.
Navigation Through Expert-Recommended Tools and Resources
My toolbox is filled with trusted gear that makes outdoor projects manageable. The hidden fastener systems ensure sleekness and longevity for decking, while a DeWalt DCD991 cordless drill provides reliable power for installing lights and fixtures. I also rely on detailed guides and industry blogs to stay updated on best practices. These resources and tools aren’t just about building—they’re about building smarter, more durable outdoor spaces.
Your Next Step: Making Outdoor Living Better
Building a beautiful, functional outdoor space isn’t just a project—it’s an investment in your lifestyle. Embrace the process, use trusted resources, and don’t be afraid to ask for professional guidance when needed. As you tackle your deck and stairs, remember that thoughtful details like concealed wiring and precise measurements turn good projects into exceptional retreats. Your outdoor oasis is waiting, and with careful planning, it can become your favorite spot year-round.