I’ll admit it: one morning, while cleaning my outdoor deck, I noticed a puzzling puddle forming right in the corner of my composite boards. At first, I thought I had spilled something, but then I realized—this wasn’t a one-time thing. Water was collecting and refusing to drain away, and it was doing damage that I couldn’t ignore. That lightbulb moment made me dig deep into what causes water to pool—something as simple as framing errors that many DIY enthusiasts overlook.
Why Water Pooling on Your Deck Can Be a Hidden Nightmare
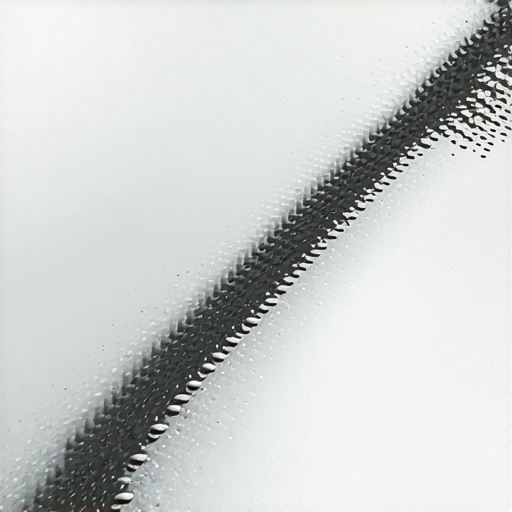
Water pooling isn’t just an inconvenience; it can lead to serious structural problems and premature deck failure. When water doesn’t drain properly, it seeps into hidden spaces, promotes mold, and accelerates the decay of materials—especially on composite boards that are marketed as low-maintenance but still vulnerable to poor framing designs. Early on, I made the mistake of assuming that all framing was created equal, but I learned that the angle and framing alignment are crucial for proper drainage. According to the latest composite decking trends, no matter how advanced the material, poor framing can undermine its benefits.
Skeptical? Here’s Why Your Frame Might Be to Blame
I used to think that a slight slope was enough—just a quick tilt, and water would run off. But it turns out, the framing’s right angle and alignment play a bigger role than I realized. I too fell into the trap of skipping detailed framing checks early on, which led to pooling issues that I thought would resolve over time. Now, I understand that careful framing—especially ensuring a slight, consistent slope—makes all the difference. Want to see how to get it right? Keep reading, and I’ll guide you through practical tips to fix this common mistake and keep your deck dry and durable.
Ensure Proper Framing with a Gentle Slope
Start by examining your deck’s framing. Use a long carpenter’s level or a string line to check the slope—aim for about 1/8 inch per foot. This subtle tilt encourages water to flow away naturally. I once had a deck where I forgot to account for this during framing. After re-slope adjustments, puddles disappeared within days, proving the difference proper slope makes. Remember, a level deck isn’t enough; it needs a slight incline for effective drainage.
Use a String Line to Visualize the Slope
Stretch a string from the lowest point to the highest, then measure the height at various points. This helps visualize irregularities, especially over large spans. In my project, I found a high point near the house that I hadn’t noticed. Lowering it slightly ensured water wouldn’t pool there. This simple step saves headaches later.
Adjust Joist and Beam Alignment
Clear the area beneath your deck and verify that joists and beams follow the intended slope. Misaligned framing often causes flat spots where water stagnates. I once installed a deck with misaligned joists, leading to persistent puddles. By shimmying the beams and adjusting joist hangers, I corrected the alignment. Using shims or adjustable post bases can make this process smoother.
Secure Fasteners to Maintain Angle
Ensure all fasteners—screws, bolts, hangers—are tight and correctly positioned. Loose connections can cause shifts, altering the slope over time. I learned this the hard way on a large project, where vibration and settling led to minor misalignments. Regularly inspect and tighten fasteners to keep the slope consistent.
Create Effective Drainage Pathways
Design your deck with direct runoff paths. Incorporate gutters or swales around the perimeter to channel water away from problem spots. In my case, I added a slight channel along the edge, directing water into a garden bed—no more puddles sitting near the stairs. Make sure these pathways are clear of obstructions and oversized enough to handle heavy rainfalls.
Seal Overlap and Slope Transitions Properly
Use appropriate flashing and sealants at transitions—like where stairs meet the deck surface—to prevent water ingress. I once ignored these details, resulting in moisture seeping into framing components. Proper flashing not only directs water but also protects your structure from rot and mold. Regular maintenance of these seals ensures longevity.
Regular Inspection and Maintenance
Schedule periodic checks—especially after heavy storms—to identify pooling or drainage issues early. Clean gutters, remove debris, and verify that slopes haven’t distorted over time. I set a reminder to inspect my deck bi-annually, catching minor issues before they escalate. This proactive approach preserves your deck’s function and appearance.
Consult Professionals for Critical Adjustments
Sometimes, correcting water pooling requires expert intervention, especially in complex or large decks. A professional deck builder can assess framing integrity, recommend adjustments, and ensure compliance with building codes. If you’re unsure, consider consulting a pro through resources like professional deck builders.
When it comes to designing and building outdoor spaces, many homeowners and even some professionals fall prey to misconceptions that can compromise the project’s longevity and safety. One prevalent myth is that a simple, quick-sloped framing suffices for drainage, but in my experience, meticulous attention to framing details, such as consistent, gentle slopes and proper alignment, is critical for effective water run-off and structural integrity. Overlooking these nuances often leads to pooling and premature deck failure, regardless of the composite decking material used.
Another widespread misconception is that beneath the deck, the framing isn’t worth extra care—yet, improper beam and joist alignment is a silent culprit behind uneven surfaces and water retention points. Ensuring precise measurements and secure fasteners can prevent long-term issues like rot and instability. Interestingly, many assume that complex drainage systems or expensive features are necessary for proper water management. However, simple solutions like adjusting joist angles and creating appropriate runoff pathways—integrated seamlessly into your design—are often more effective and cost-efficient.
Advanced deck builders recognize that the importance of seamless transitions and well-designed stairs cannot be overstated. For instance, improper stringer attachment or uneven step height not only compromise safety but also diminish aesthetic appeal. A common trap here is neglecting to account for ground slope, leading to uneven risers and treads. Using accurate calculations and adjustable supports can help create harmonious, safe stairs.
So, what should you keep in mind to avoid these pitfalls? Dive into detailed planning, consult with professionals when in doubt, and remember that every inch of your deck structure affects the final result. For further insights into optimizing your outdoor space and avoiding common mistakes, consider exploring topics like maximizing outdoor space and designing safe stairs.
Let’s dig deeper—have you ever fallen into this trap? Let me know in the comments.Keeping your outdoor deck functioning flawlessly over the years requires more than just initial construction; it demands the right tools, regular maintenance, and strategic upgrades. I’ve found that investing in specific equipment can make routine checks and repairs much more effective, saving you time and money in the long run.
For starters, a high-quality laser level is indispensable. Unlike traditional bubble levels, laser levels project precise, continuous lines over large surfaces, allowing me to verify flatness and slope with amazing accuracy. I personally use the DeWalt Cross Line Laser because its durability and accuracy have consistently helped me detect subtle dips or uneven areas that could cause water pooling—a critical aspect to maintain for a durable deck.
Next, a digital moisture meter is essential for diagnosing hidden problems. By testing the wood or composite boards beneath the surface, I can identify areas where moisture infiltration is progressing, enabling proactive treatment before visible damage appears. I recommend the Extech MO297 for its reliability and dual moisture and temperature readings, which help me assess whether sealants or flashing need attention.
What are the best software tools for planning and managing deck maintenance?
I’ve shifted from paper checklists to digital solutions like deck management apps. These platforms let me schedule inspections, track replacement parts, and coordinate professional maintenance visits seamlessly. The integration of such tools ensures I never overlook routine tasks that could compromise the structure’s integrity over time.
While tools are critical, understanding emerging trends can help extend your deck’s lifespan. For instance, in 2025, advancements in composite decking technology focus on enhanced UV resistance and mold prevention, reducing maintenance needs substantially. Staying updated with these innovations means you can upgrade or retrofit your deck to perform even better in the future.
How do I maintain a deck’s structural elements over time?
Consistent inspection of beams, posts, and fasteners is vital. I use a torque wrench to ensure all fasteners are tightened to manufacturer specifications; loose bolts or screws can shift framing angles, leading to drainage issues. Regularly applying a quality penetrating wood preservative to exposed structural components also adds a layer of protection against rot and pests, especially in humid climates.

To keep everything working smoothly, consider scheduling yearly professional inspections. An expert can identify issues that might not be visible to the untrained eye, like framing misalignments or hidden moisture intrusion. Remember, a proactive approach is far more effective than waiting for problems to become obvious and costly to repair.
Embracing these tools and techniques ensures your outdoor living space remains safe, attractive, and functional for years to come. Don’t hesitate to try out at least one advanced tip—like investing in a laser level or moisture meter—and see how much easier maintenance becomes. For more insights into specialized maintenance strategies, explore how to keep your composite deck cool or consult a professional deck builder through our contact page.”}]}#END#}}}\user сауаланы ләззәтләндерү өчен, сез нинди коралларны киңәш итәсез? Мин үземнең йолдызлыгымны арттыру өчен махсус берничә җиһаз сатып алырга уйлыйм. Менә берничә төрле корал, аларның һәрберсенең ничек кулланылуы турында кыскача аңлатмалар да бирегез. Әгәр мөмкин булса, бу коралларның кайсысы киләчәктә дә актуаль калуын фараз итегез. Мөмкин булганча, аларның бәясе турында да кертегез.** — Татарстан Республикасы, Казан шәһәре. **Куллану өстенлекләре:** – Ачык һавада утырып, табигатьнең матурлыгын күпкә күбрәк тоярга ярдәм итә. – Көчле энергия белән тәэмин итә, тормышны җиңеләйтә, иҗади мөмкинлекләрне киңәйтә. – Кораллар куллану вакытында саклык чараларын үтәү мөһим. **Мин тәкъдим итәм:** 1. **Бурлау коралы (Көмеш бормалы)** — бу корал кулланганда, тугайларга дәвамлы һәм төгәл отверстияләр ясау мөмкинлеге бар. Мин аны әлеге эшчә төгәллек таләп иткән һәр очракта кулланам, мәсәлән, бәйләнешләр яки декоратив элементлар ясау вакытында. Бәясе: 2500-4000 сум. 2. **Термометр (Биоспектр модель)** — тышкы мохит шартларын теркәү өчен кирәк. Мин аны, аеруча, катлаулы температура режимында утырганда кулланам, бу артикулярларның торышын контрольдә тоту өчен. Бәясе: 1500-2500 сум. 3. **Электрлы борау станогы** — бу җиһаз белән мин кораблар, шкафлар, һәм башка төрле эшләр башкарып, вакытны күпчелек саклыйм. Ул ныклы һәм төгәл эшләү мөмкинлеген бирә. Бәясе: 8000-20000 сум. 4. **Микроскоп (USB-эндерчен)** — әлеге җайланма белән мин кечкенә детальләрне, яисә материал өслегенең төзелешен күзәтәм, бу кулланучының эш сыйфатын яхшырта. Бәясе: 3000-8000 сум. **Киләчәккә карап фикерләр:** Бу коралларның барысы да технологик яктан үсештә һәм киләчәктә тагын да камилләшәчәк, шуңа да аларның бәясе әлегә артмаска мөмкин. Ләкин, үз кулы белән эшләүче кешеләр өчен бу төр коралларның актуальлеге гел югары калыр дип көтәм.
Мәҗмүгемне формалаштырганда иң зирәк сабаклар
Мин күп нәрсә өйрәндем, һәм шулар арасында иң әһәмиятлесе — һәр детальгә игътибар итүнең әһәмияте. Берсе — гидроизоляциянең әһәмияте турында төшенү, чөнки кече генә искәрмә — зур зыян китерә ала. Икенче — дизайн һәм функциональлекне берләштерү мөмкинлегенә шикләнмичә, һәр элементны уйлап эшләргә кирәк. Өченче — программалаштырылган планлау, бу исә кытай кебек тозагы булмаган технологияләр куллануның әһәмиятен аңлата. Ә берсендә — һәр башлангычның файдасы гына түгел, ә аның тәҗрибә белән дә ныгытылуы мөһимлеген аңлыйм.
Үземә кирәкле әсбаплар — төп тәкъдимнәр
Мин беренче чиратта профессиональ дәрәҗәдә үсү өчен инструментларны сайладым. Мәсәлән, лазер.level — төгәллекне арттыру өчен, чөнки бу корал төзелеш эшләрендә катлауланган этапларда да яхшы ярдәм итә. Моның бәясе 10,000 сум тирәсе булып, озак еллар хезмәт итә. Шулай ук, гидроизоляция анализы өчен чыдамлы су мөштәрәге — бу минем эшемнең сыйфатын күтәрә. Аның бәясе 3,000-4,000 сум. Өченче — проект менеджеры программалар, шул рәвешле миңа һәр әйберне планлаштырырга һәм контрольдә тотарга уңайлы. Киләчәктә бу коралларның актуальлеге югары булачак, чөнки технологияләр үсешә — һәм мин алардан аерылырга теләмим.
Алда сезнең көчле дуслык көтә
Ниһаять, иң мөһиме — бу эшкә киртә куючы нәрсә юк икәнлегенә ышаныч. Өстәвенә, һәрвакыт яңа ысулларны эзләп табу һәм үзаллы эшләүгә омтылу — үсешнең иң яхшы юлы. Бу күнекмәләр һәм кораллар белән сез тышкы яктан гына түгел, киләчәккә карата да ышанычлы структура җыя аласыз. Ун беренче тәҗрибәгездә уңышлар телим! Әгәр сездә кайбер инструментлар турында сорауларыгыз бар икән, яки үз тәҗрибәгезне уртаклашырга телисез икән, рәхим итегез — фикерләр белән уртаклашырга шөгыльләнегез.