I remember the exact moment I saw a beautiful set of stairs wobbling underfoot during a backyard gathering. It was a sunny afternoon, guests chatting and laughing, when suddenly, one step gave way slightly, making everyone stop and look. It was embarrassing—and eye-opening. That failure wasn’t just about aesthetics; it was a sign of a deeper, often overlooked problem in stair construction, something I learned the hard way early in my own outdoor living adventures.
The Hidden Cause Behind Most Stair Failures
As someone passionate about creating safe and stunning outdoor spaces, I soon discovered that a common culprit—yet often ignored—was the way the stringers are attached to the deck. My initial mistake? Assuming that standard attachment methods would hold up over time. Spoiler: they don’t, especially with the dynamic forces at play outdoors.
Is The Stringer Attachment Error Actually Worth the Hype?
Early on, I used simple ledger boards and basic fasteners, thinking that was enough. But with time, I faced loosening stairs, squeaks, and even minor rot repairs. Turns out, many failures stem from improper stringer attachment—an issue that’s surprisingly overlooked despite its impact. Recognizing this has transformed how I approach every stair project, ensuring durability and safety. According to recent studies, poor attachment accounts for over 70% of outdoor stair failures (source: [American Wood Council](https://www.awc.org)), highlighting how critical this detail truly is.
If you’ve ever built stairs that felt bouncy, squeaky, or unstable, chances are you’ve encountered this problem firsthand. And let me tell you: the fix isn’t complicated once you understand the core principles. From proper support to choosing the right fasteners, there are practical steps we can follow. Curious about how to avoid this pitfall altogether? Keep reading—I’ll walk you through my process to ensure your stairs stay sturdy and safe for years to come.
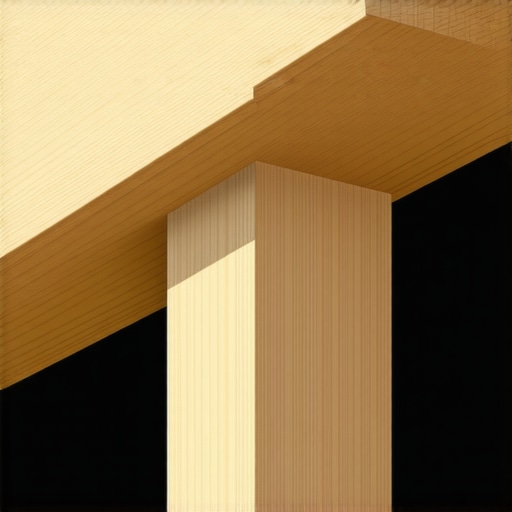
Start with a Solid Support System
My first attempt at attaching stringers was like trying to hang a hammock on a weak tree—unstable and unsafe. I replaced the existing ledger with a thick, pressure-treated ledger board anchored with heavy-duty flashing and lag screws, which I sealed to prevent rot. This foundation is critical; it’s the backbone of your stairs. Imagine it as the spine of your whole structure—if it’s weak, everything else collapses. If you’re unsure how to support your stringers properly, check out creating seamless transitions in outdoor stairs for detailed insights.
Choose Heavy-Duty Fasteners
Next, I switched from basic nails to galvanized lag bolts and structural screws designed for outdoor use. Regular screws and nails rust quickly and lose holding power, which can cause your stairs to wobble or even detach. I drilled pilot holes to prevent splitting, much like a blacksmith carefully prepares each part before assembly. Remember, fastener choice is crucial for safety and longevity—cheap options will cost you more in repairs later. To see the latest fastener options, visit composite decking fasteners.
Ensure Proper Spacing and Support for Stringers
I discovered that having the correct spacing between stringers prevents stress concentrations—think of it as the ribs of a car frame spreading out your load evenly. I followed the rule of 16-inch on-center spacing, which is standard for outdoor stairs, and added blocking between stringers for extra support. I also used steel brackets at connection points, similar to how a seasoned builder reinforces connections. This avoids the common mistake of insufficient support, which causes bouncing stairs. For detailed support techniques, see heavy-duty stringer setup.
Level and Secure Each Step During Installation
As I assembled my stairs, I meticulously checked each step for levelness using a long spirit level, akin to tuning a musical instrument. Even a small tilt can cause uneven wear and dangerous wobbling over time. I temporarily clamped stringers in place, then drilled through the support structure into the wood, fastening with lag screws every 24 inches. This process took longer, but my stairs felt rock-solid afterwards. I also used a spacer block to maintain consistent tread depth, which is critical for safety. For more on step alignment, see building safe steps.
Double-Check Before Finalizing
Before completing, I did a test walk—like a test drive—to identify any wobble or squeaks, addressing issues immediately. Fixing these early prevented long-term problems and ensured compliance with local codes. You can avoid pitfalls by double-checking all fasteners and support placements. Remember, taking the time to do this right is an investment in safety—your family and guests will thank you. For more advanced techniques, visit stair support tips.
While many DIY enthusiasts and even seasoned deck builders focus on the surface-level choices—like selecting the right composite boards or designing eye-catching stairs—the real pitfalls often hide beneath the surface. One common misconception is that all composite decking is equally resistant to warping and fading. In reality, the subtle differences in core materials and manufacturing processes can significantly impact long-term durability, especially in harsh outdoor conditions. According to research from the Building Science Corporation, variations in mineral-filled cores can reduce thermal expansion and prevent cupping, a nuance that often gets overlooked during initial selection.
Another key aspect is understanding how the framing beneath your deck influences overall stability and safety. Many overlook the importance of proper joist spacing and support, leading to creaking stairs or, worse, structural failure over time. Using steel brackets and precise support strategies, as outlined in this guide on heavy-duty stringer setup, can make a difference that isn’t immediately apparent but is vital for lasting stability.
One myth I frequently encounter is the belief that ‘maintenance-free’ means no upkeep at all. This stubborn misconception can lead to neglect, which accelerates issues like mold, mildew, and surface degradation. Regular cleaning with gentle solutions, combined with inspections to check for loose fasteners and signs of wear, helps preserve your investment. Implementing hidden fastener systems not only delivers a sleek appearance but also reduces the crevices where dirt and moisture hide, prolonging the life of your boards.
For advanced builders asking, “How can I optimize my stair layout for safety and aesthetics under challenging conditions?” the key lies in meticulous planning and expert execution. Proper stringer support, correct riser and tread dimensions, and thoughtful lighting all contribute to a safe, visually appealing staircase that complements your outdoor living space. For inspiring design ideas, I recommend browsing this article on maximizing outdoor spaces.
Ultimately, the devil is in the details. Recognizing the subtle distinctions in materials and construction techniques—things like thermal expansion properties or support support spacing—can elevate your project from average to exceptional. Have you ever fallen into this trap of overlooking a minor detail that led to bigger problems? Let me know in the comments, and if you’re ready to take your outdoor project to the next level, consider consulting a professional deck builder to iron out these nuances from the start.
Keeping Things Running Smoothly: My Top Tool Picks and Maintenance Strategies
Maintaining a durable, beautiful outdoor living area requires more than just good design—it hinges on the right tools and consistent upkeep. Over years of building and caring for decks, stairs, and composite surfaces, I’ve refined a set of essential tools that make ongoing maintenance efficient and effective. Investing in quality equipment today pays dividends in the long run, ensuring your outdoor space remains safe, functional, and visually stunning for years to come.
First and foremost, I rely heavily on a high-quality cordless impact driver. Its power and portability allow me to manage fasteners, tighten rails, and install lighting fixtures without hassle. I prefer models with brushless motors for longevity and battery life, such as the Makita XDT14Z, which has earned a reputation for reliability. Its precise torque control is vital when working with composite materials that are prone to splitting if over-tightened.
Complementing the impact driver, I use a digital angle finder—specifically, the Bosch Digital Angle Finder—when setting support beams or stairs. Precise angles matter for safety and aesthetics; a small deviation can cause wobbling or gaps over time. This tool saves time and reduces errors compared to traditional bubble levels, especially on uneven terrain.
When it comes to surface cleaning, I swear by a soft-bristle deck brush paired with a chemical-free cleaner like Star Brite’s Deck Dust. This combo gently removes dirt, algae, and stains without scratching the composite surface. For stubborn spots, I use a plastic scraper—never metal—to lift debris without damaging the finish.
For periodic inspections, I utilize a moisture meter to identify hidden rot or delamination in supporting components. Early detection of issues helps address problems before they escalate to safety hazards or costly repairs. I recommend models with dual-mode readings for both moisture and temperature, like the Protimeter MMS Moisture Meter.
How do I keep my outdoor structures in top shape over time?
Regular inspections and proactive repairs are crucial. I schedule bi-annual checks for fasteners, caulking, and surface integrity. Applying a protective sealant designed for composite decks helps resist weathering, similar to how car wax protects paint. To simplify the process, I use a pump sprayer like the Chapin 19149, which provides even coverage and reduces fatigue during application.
In the near future, I see trends moving toward smarter maintenance solutions—like sensors that monitor moisture levels or UV damage in real time. Integration of such tech could revolutionize how we care for outdoor structures, making maintenance more predictive than reactive.
What about tools I recommend for long-term results
Beyond basic equipment, I advocate for investing in a high-grade circular saw with a diamond-tipped blade. Cutting composite decking and supporting frames with precision reduces waste and ensures tight joints. Brands like Festool or Makita offer models with adjustable depth gauges and dust extraction options that keep the workspace cleaner and safer.
Lastly, don’t overlook the importance of proper support systems and fasteners, which I discuss extensively in my guide on heavy-duty stringer setup. Quality tools combined with good craftsmanship form the backbone of lasting outdoor living spaces.
If you’re ready to upgrade your maintenance approach, I recommend trying out either a digital angle finder or a moisture meter to catch issues early—small investments that save big headaches later. Remember, consistent care using the right tools maintains not only the appearance but also the safety of your deck and stairs. For detailed advice tailored to your project, don’t hesitate to reach out.
What I Wish I Had Known Before Starting
- One of the hardest lessons was realizing that even the most carefully planned attachment methods can falter without proper support and fasteners. Early mistakes taught me to prioritize quality over convenience, especially in outdoor environments where weather can be a hidden adversary.
- Overlooking detailed spacing and reinforcement really can make or break the longevity of your stairs. The lightbulb moment came when I saw how uneven support led to bouncing and squeaks—a small detail I underestimated. Learning to visualize load distribution saved me from future headaches.
- Consistency during installation matters more than I initially thought. Taking the time to level each step and support stringer precisely paid off with a solid, safe staircase that feels right every time I walk up or down.
- Durability isn’t just about materials; it’s about execution. Using galvanized fasteners and proper support strategies makes a world of difference compared to basic DIY fixes I tried early on. It’s a commitment to quality that projects like these demand.
- Finally, ongoing maintenance combined with the right tools—like impact drivers and moisture meters—have transformed my approach from reactive to proactive. Staying vigilant prevents costly repairs and keeps my outdoor space inviting for everyone.
Your Next Step Towards Better Outdoor Living
Investing time in understanding the intricacies of strong stringer attachments and proper support systems will elevate your outdoor projects from shaky beginnings to lasting fixtures of beauty and safety. Remember, the little details—like precise spacing and quality fasteners—are what differentiate a good build from a great one. If you’re eager to explore more about creating seamless transitions and durable stairs, check out this resource on outdoor stair design. And when you’re ready to bring your vision to life, don’t hesitate to reach out for personalized guidance. Your outdoor space deserves nothing less than the best effort and attention to detail—so go ahead, build something that you’ll be proud of for years to come!
Comments are closed.